
Photographing jewellery
Photographing jewellery can be tricky because you are often working with small and reflective objects. I’ve put together my top tips for photographing jewellery with a smartphone below.
SETTING UP YOUR PHONE TO SHOOT
I like to shoot in the Lightroom camera app as it gives lots more control over the settings of your camera. Once you open up the app there are a few things you can do to increase the quality of your images.
Set your camera to save the largest possible files. In the lightroom app this will be DNG files. They will create a higher quality image and allow you more capacity to edit your images later.
Ensure you turn off your flash. When you use the flash on the camera it flattens out the image. If you are photographing reflective jewellery it can also lead to undesired reflections and glares.
Add on a lens: Mobile photography has come a long way and so have the accessories for smartphones. If photographing small pieces of jewellery is something you are doing regularly, it might be a good idea to invest in a clip-on macro lens for your phone. This can help show intricate detail or texture of your pieces.
LIGHTING:
Blurry images are often caused by insufficient light. So to get the best shots of your product make sure that your scene has lots of light. You can do this by shooting directly underneath a window and using a white or silver bounce card to reflect light back onto your product (see picture below)

FOCUSING YOUR CAMERA
If you place your phone too close to the product, it's possible that your camera will be unable to focus on the product. If you are having focus issues, try moving your phone back slightly and see if that helps your camera to focus (you can alway crop the image closer later when editing).
Holding the phone in your hands can cause slight vibrations which are enough to make your image blurry. The best solution is to use a tripod and a shutter release cable. These are accessories that can be purchased for your smartphone device. If you are shooting products regularly it may be worth the investment. If you are not at a point where you can invest in these accessories you can use a stack of books and blocks to prop up your phone and iPhone users can use the headphones that came with your phone as a remote shutter release - just tap the volume controls to take the shot.
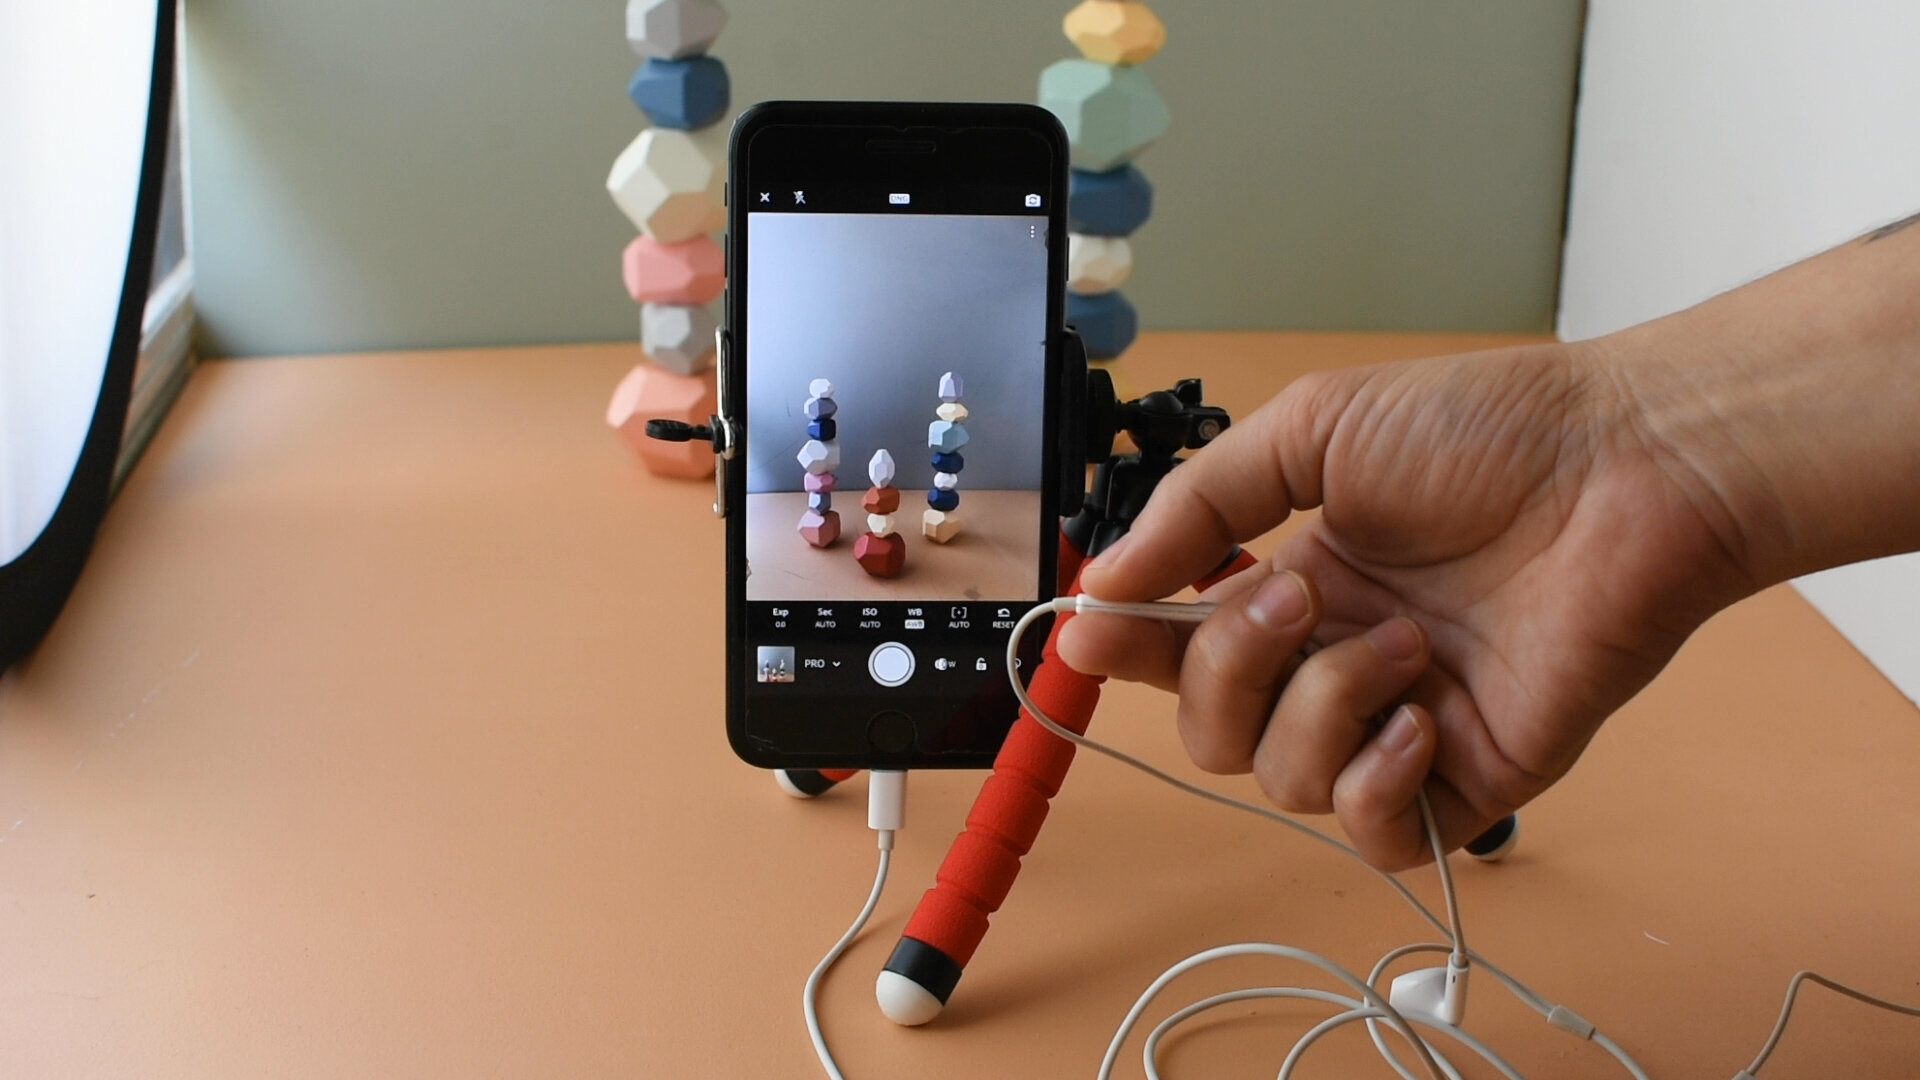
To manually focus using lightroom, tap on your product through the screen. If you hold down on the screen your phone will lock the focus to that object. You will see a green outline around the area where the phone is focused and at the top of the screen you will see the worlds ‘focus locked’

HOW TO EDIT JEWELLERY IMAGES
There are loads of editing controls within the lightroom app. I encourage you to have a play around and see what you can create. Below are the key edits that I make to a jewellery image:
Crop: if you need to take your shot from further back (in order to get clear focus) this is where you can crop your image to create a more tightly framed image.
Adjust the light: playing with the exposure, contrast, whites and blacks can help to sharpen your image.
Sharpen: In the effects tool you are able to adjust the sharpening, clarity and texture of your image. This can help to accentuate the delicate details of your piece.


I hope you’ve found this blog inspiring. If you have questions or would like to connect you can always connect with me over in the photography for makers facebook group.
Happy Snapping!
Rachel