
How to photograph product textures
When it comes to product photography, showing off the texture of a product can be just as important as showcasing its color, shape, and size. Showcasing a products texture can help a customer better understand the product they are considering purchasing. Texture shots are especially crucial for products like skincare, makeup, and food. By incorporating texture shots into your product photography, you can provide a more complete picture of your product and help customers make informed buying decisions.
When it comes to photographing products with textures such as creams and liquids, there are a few things to keep in mind to get the best possible results. In this blog I’ll explore some tips to help you capture the texture of your products in your photos:
Lighting
The right lighting can make all the difference in highlighting the texture of your products. Soft, diffused lighting is best for these types of products as it helps to minimize harsh shadows and highlights and focus on the subtle details of the texture. Try using natural light or softbox lighting to achieve this effect.
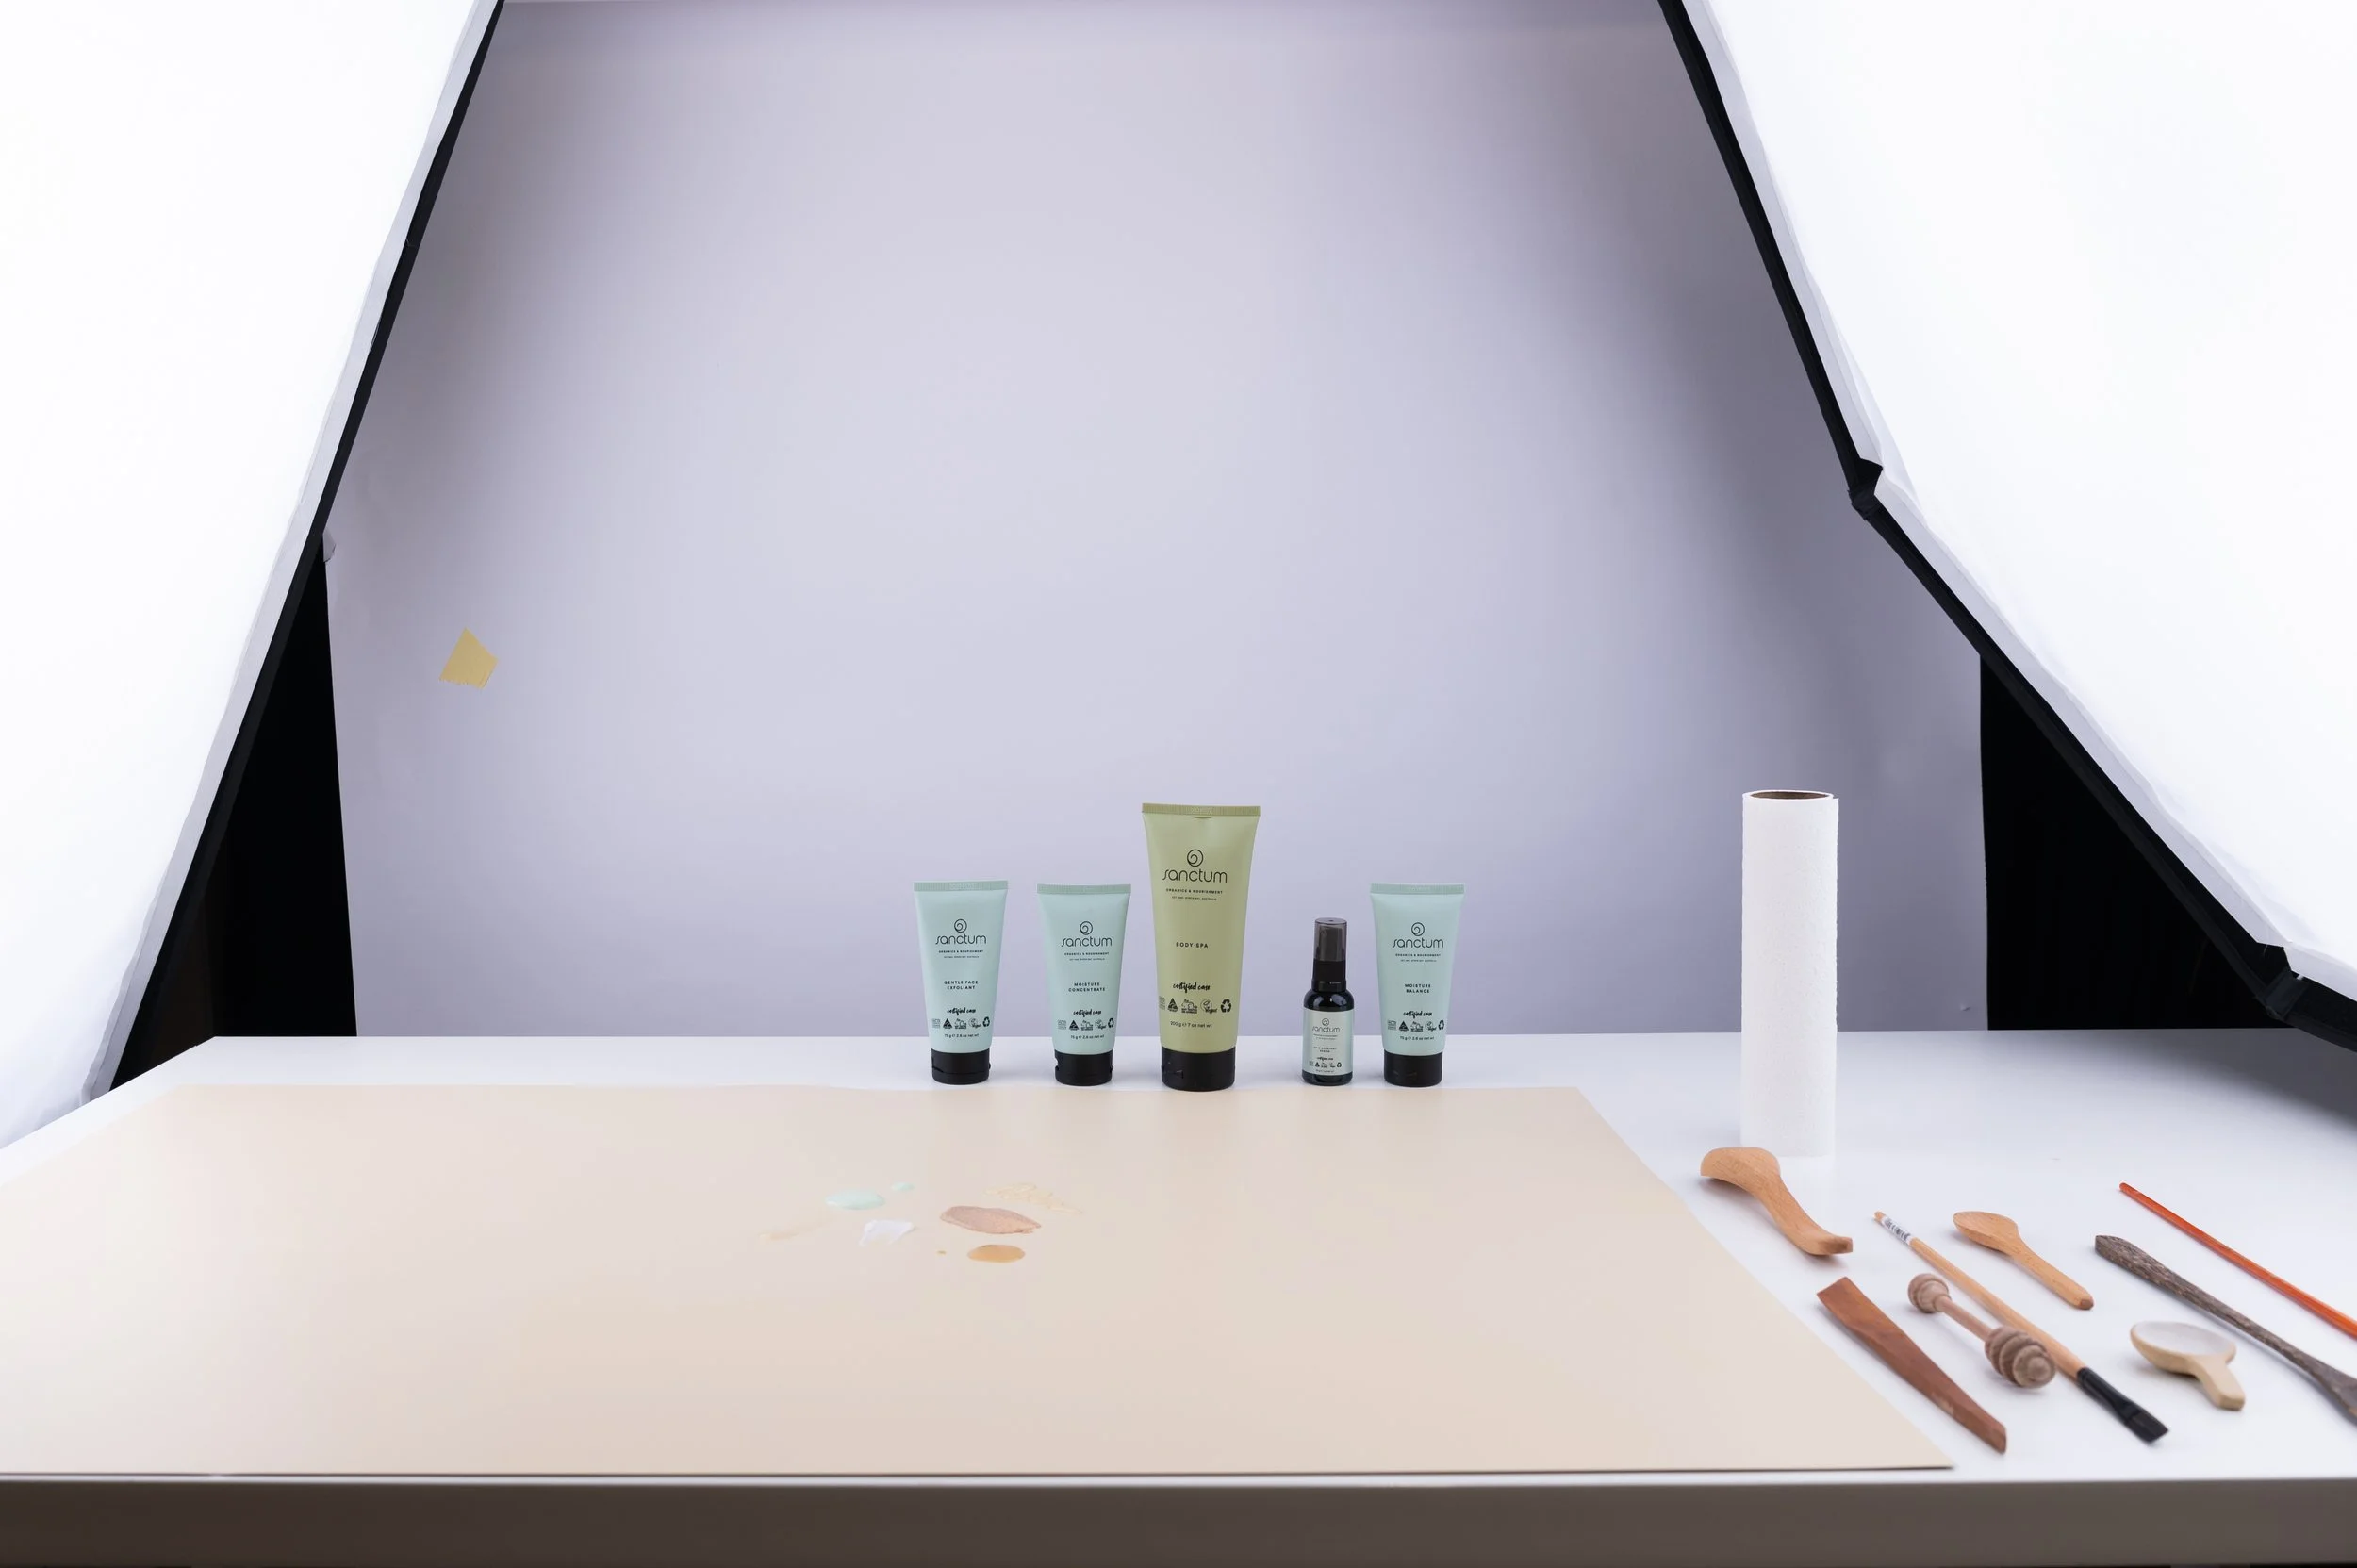
Backgrounds
Choose a background that will complement the texture of your product. A simple, neutral background can help to make the texture of the product stand out and prevent it from being overwhelmed by the background. Avoid using a background that will compete for the viewers attention such as a backdrop with a texutre or pattern.
You can use a white or gray backdrop for a minimalist look. If you’d ike to incorporate colour you can definitely do so, I would reccomend a pastel-colored background for a product texture shot. Pastel colors are often associated with softness, elegance and they can create a beautiful soft contrast with the texture and color of your product.
When choosing a pastel-colored background, it's important to consider the color and texture of your product, as well as the overall mood or atmosphere you want to create for your brand. For example, if you're shooting a light-colored product with a smooth surface, a pale pink or lavender background can create a dreamy, romantic feel. On the other hand, if you're photographing a textured product with warm, earthy tones, a light blue or mint green background can provide a calming, organic vibe.
I reccommend using a vinyl back ground for this type of work. The advantage of a vinyl backdrop is that its eay to clean so they are great if you are working with food or beauty products which can make a mess and need to be wiped off with a wet cloth. Plus they come in a huge variety of colours and textures.
If you decide to purchase a vinyl backdrop I reccommend Everyday Co. You can use my coupon code: RACHELKIMBERLEY for 20% off your purchase.
If you decide that you want to work with a paper of other type of backdrop that could be damaged by the liquid or product that you are photographing you can use tranparent film / sheets. cut them out into small sections so you can move them around. You can then remove the edges in the edit to make them blend into the backdound seamlessly.
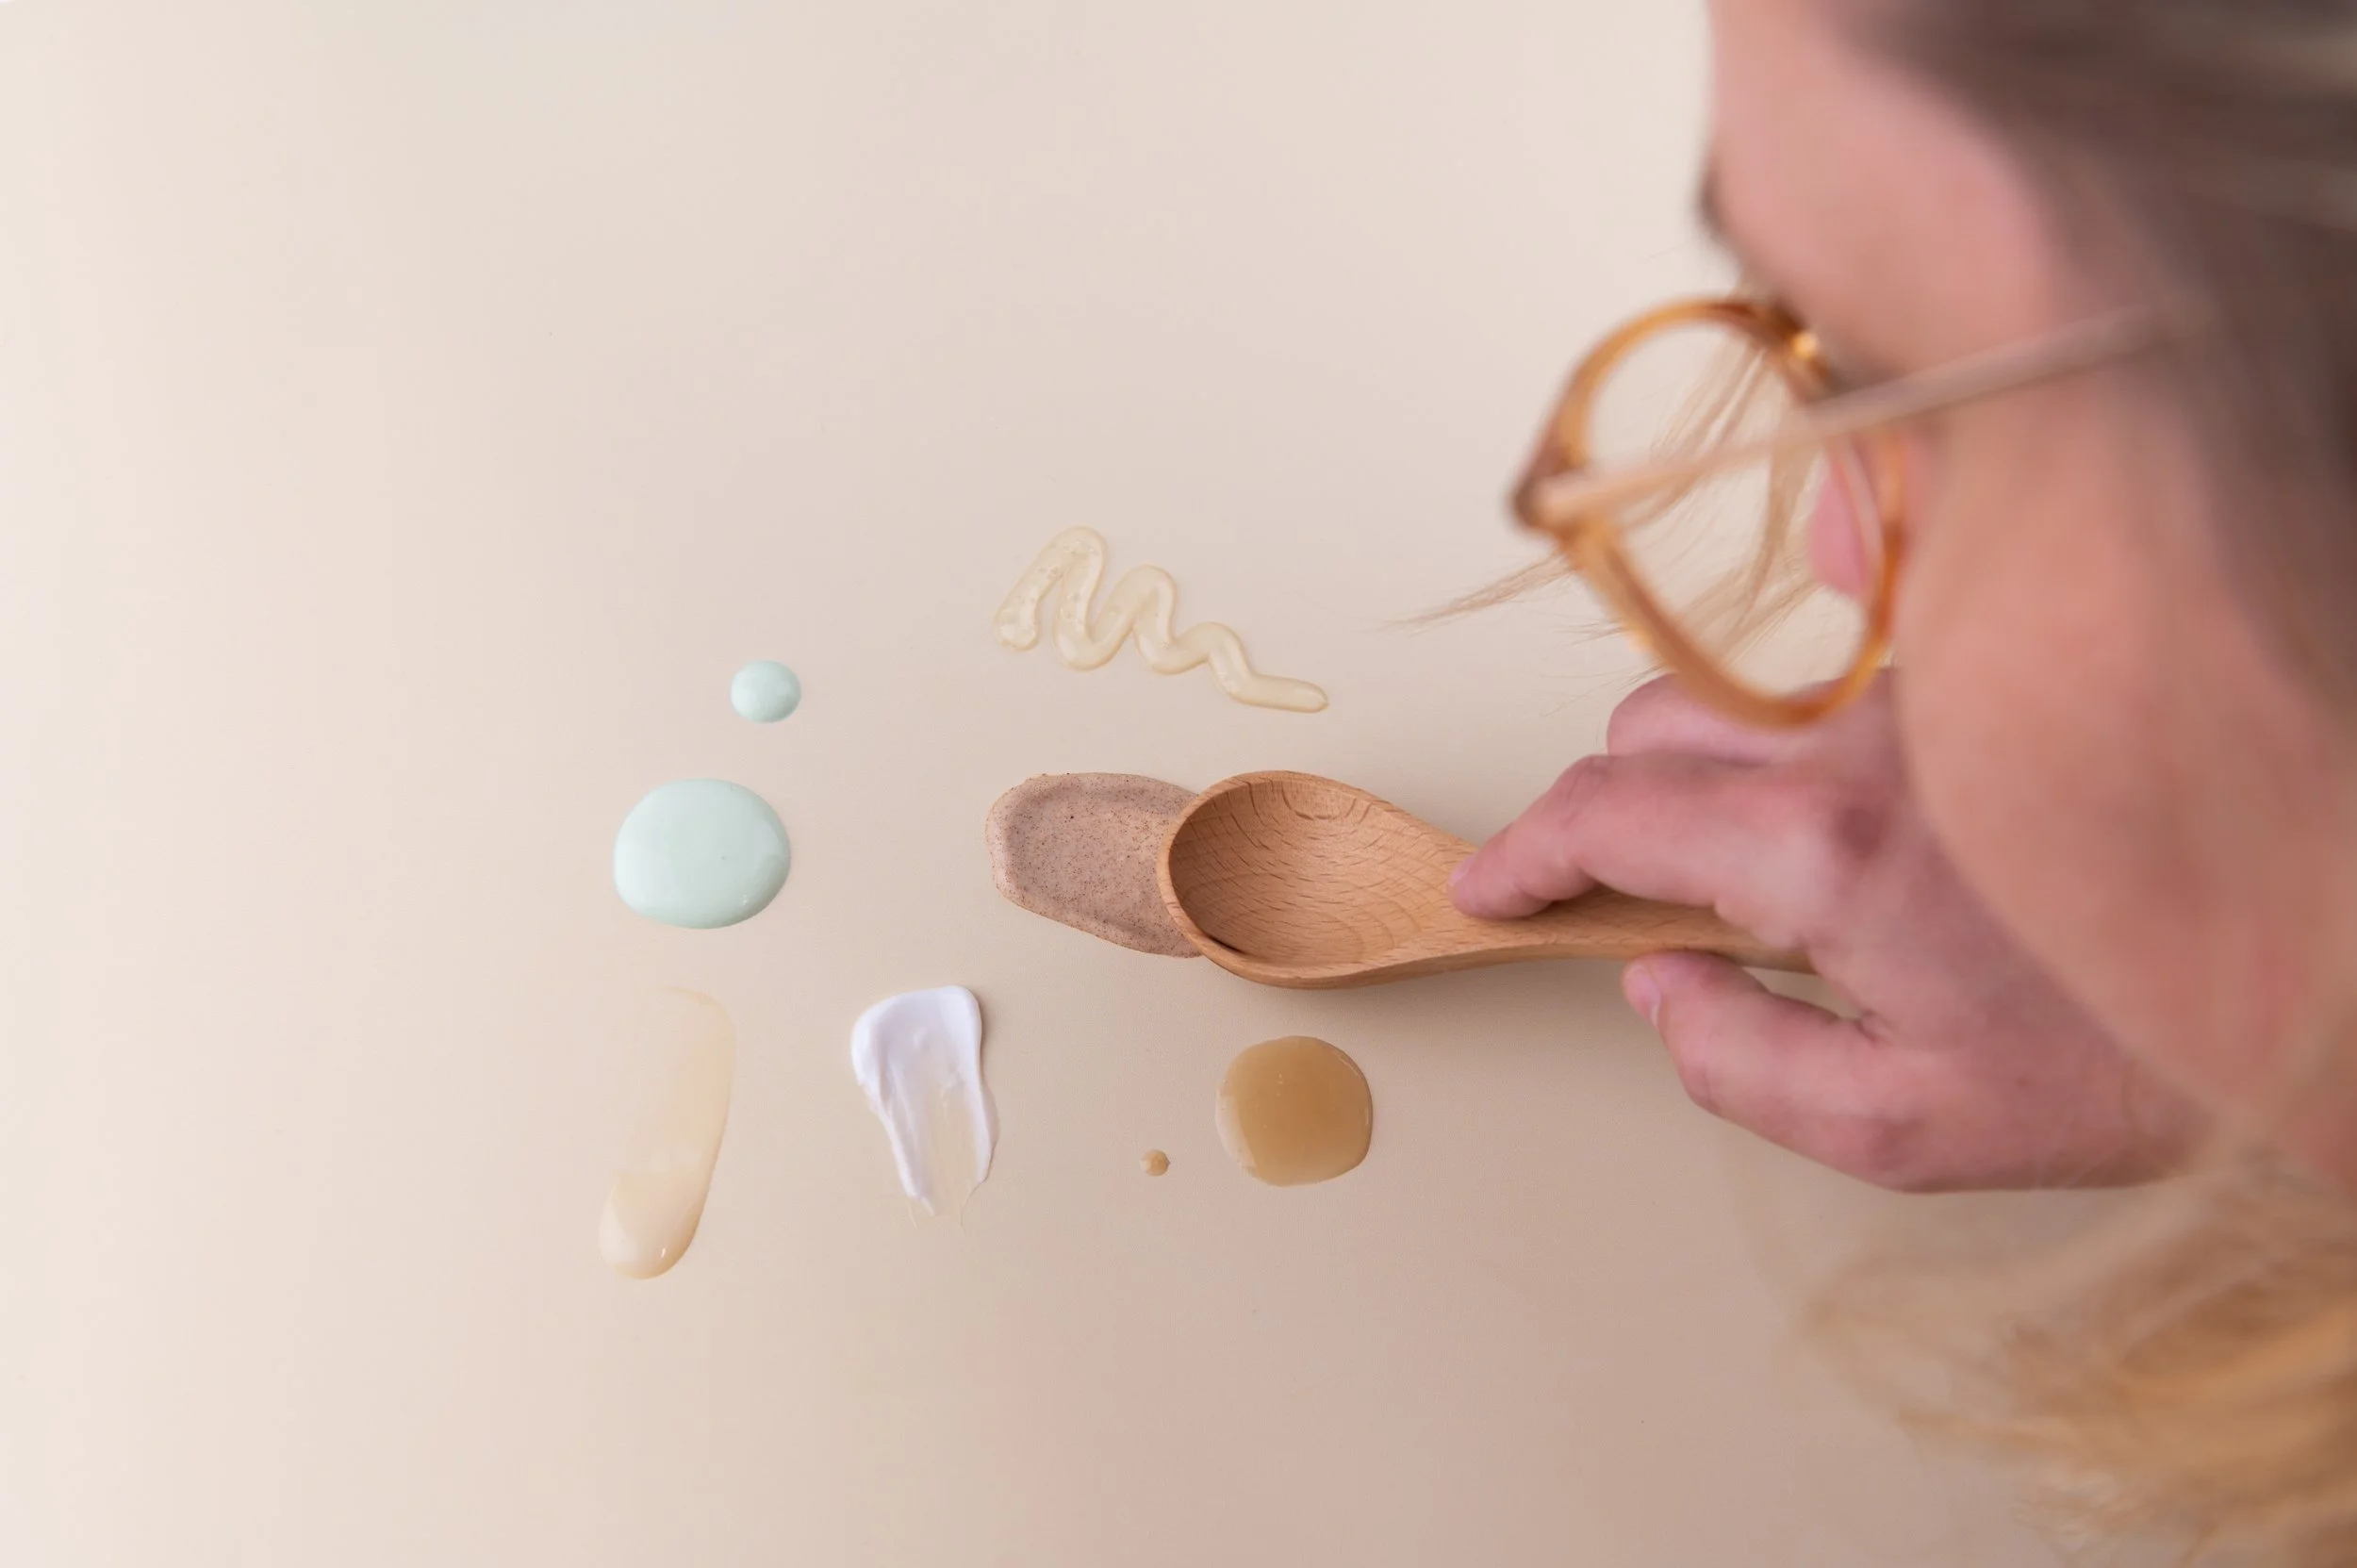
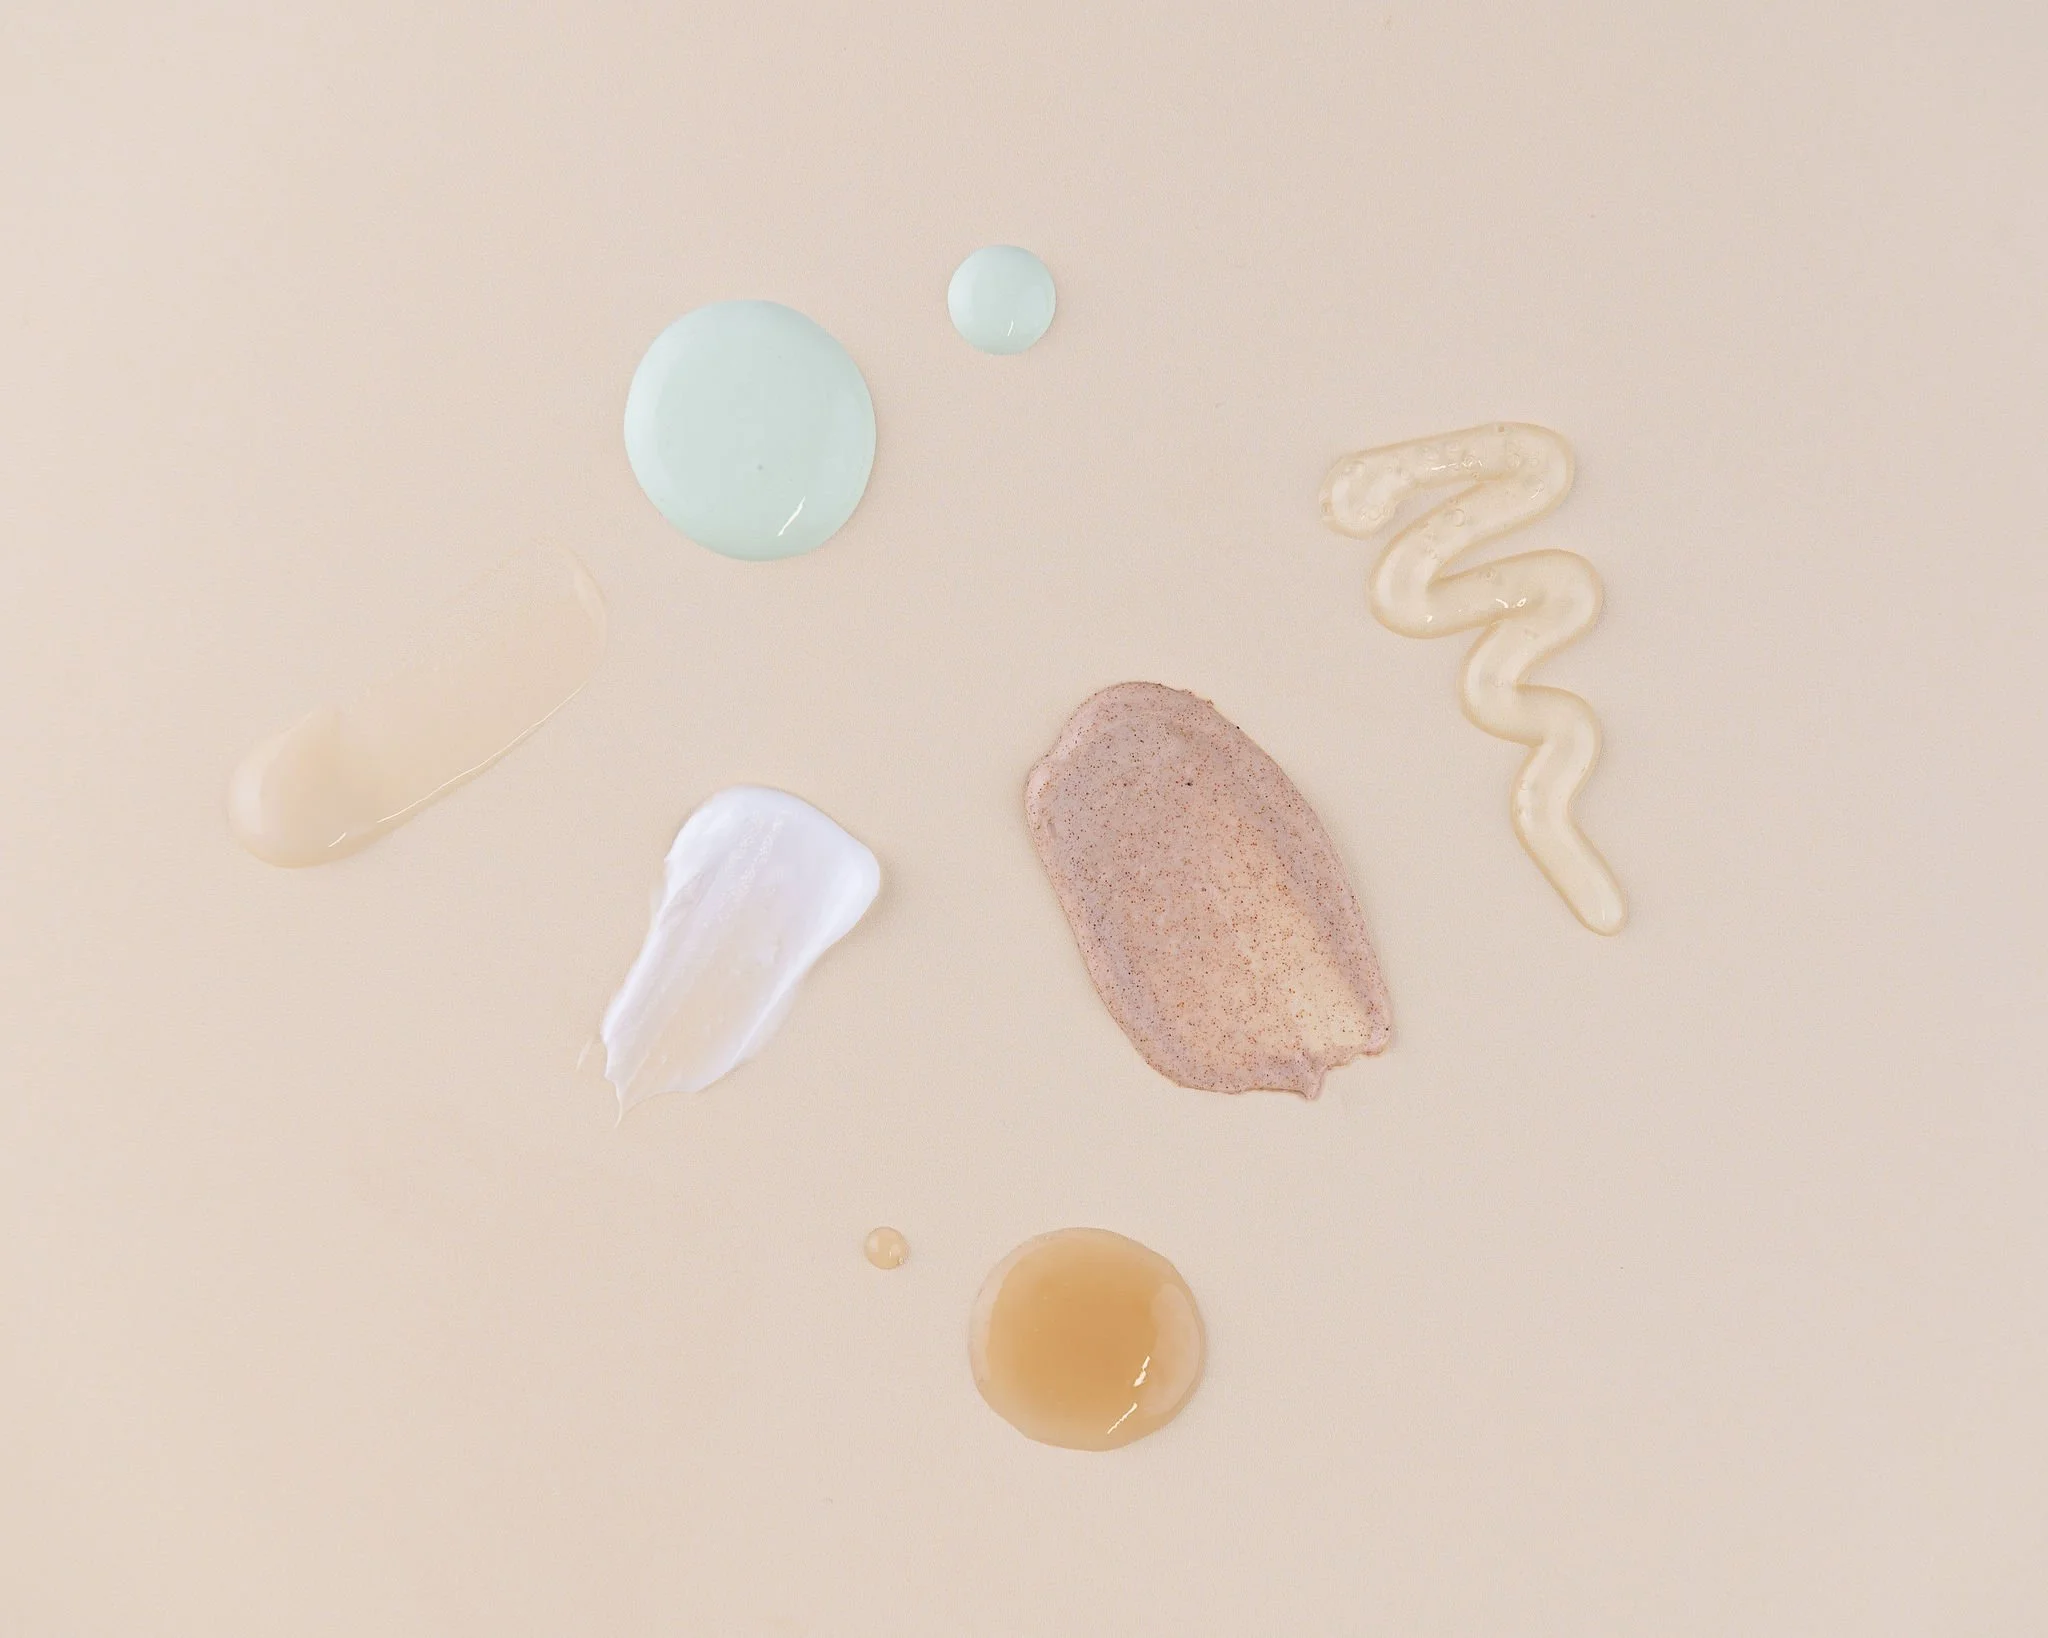
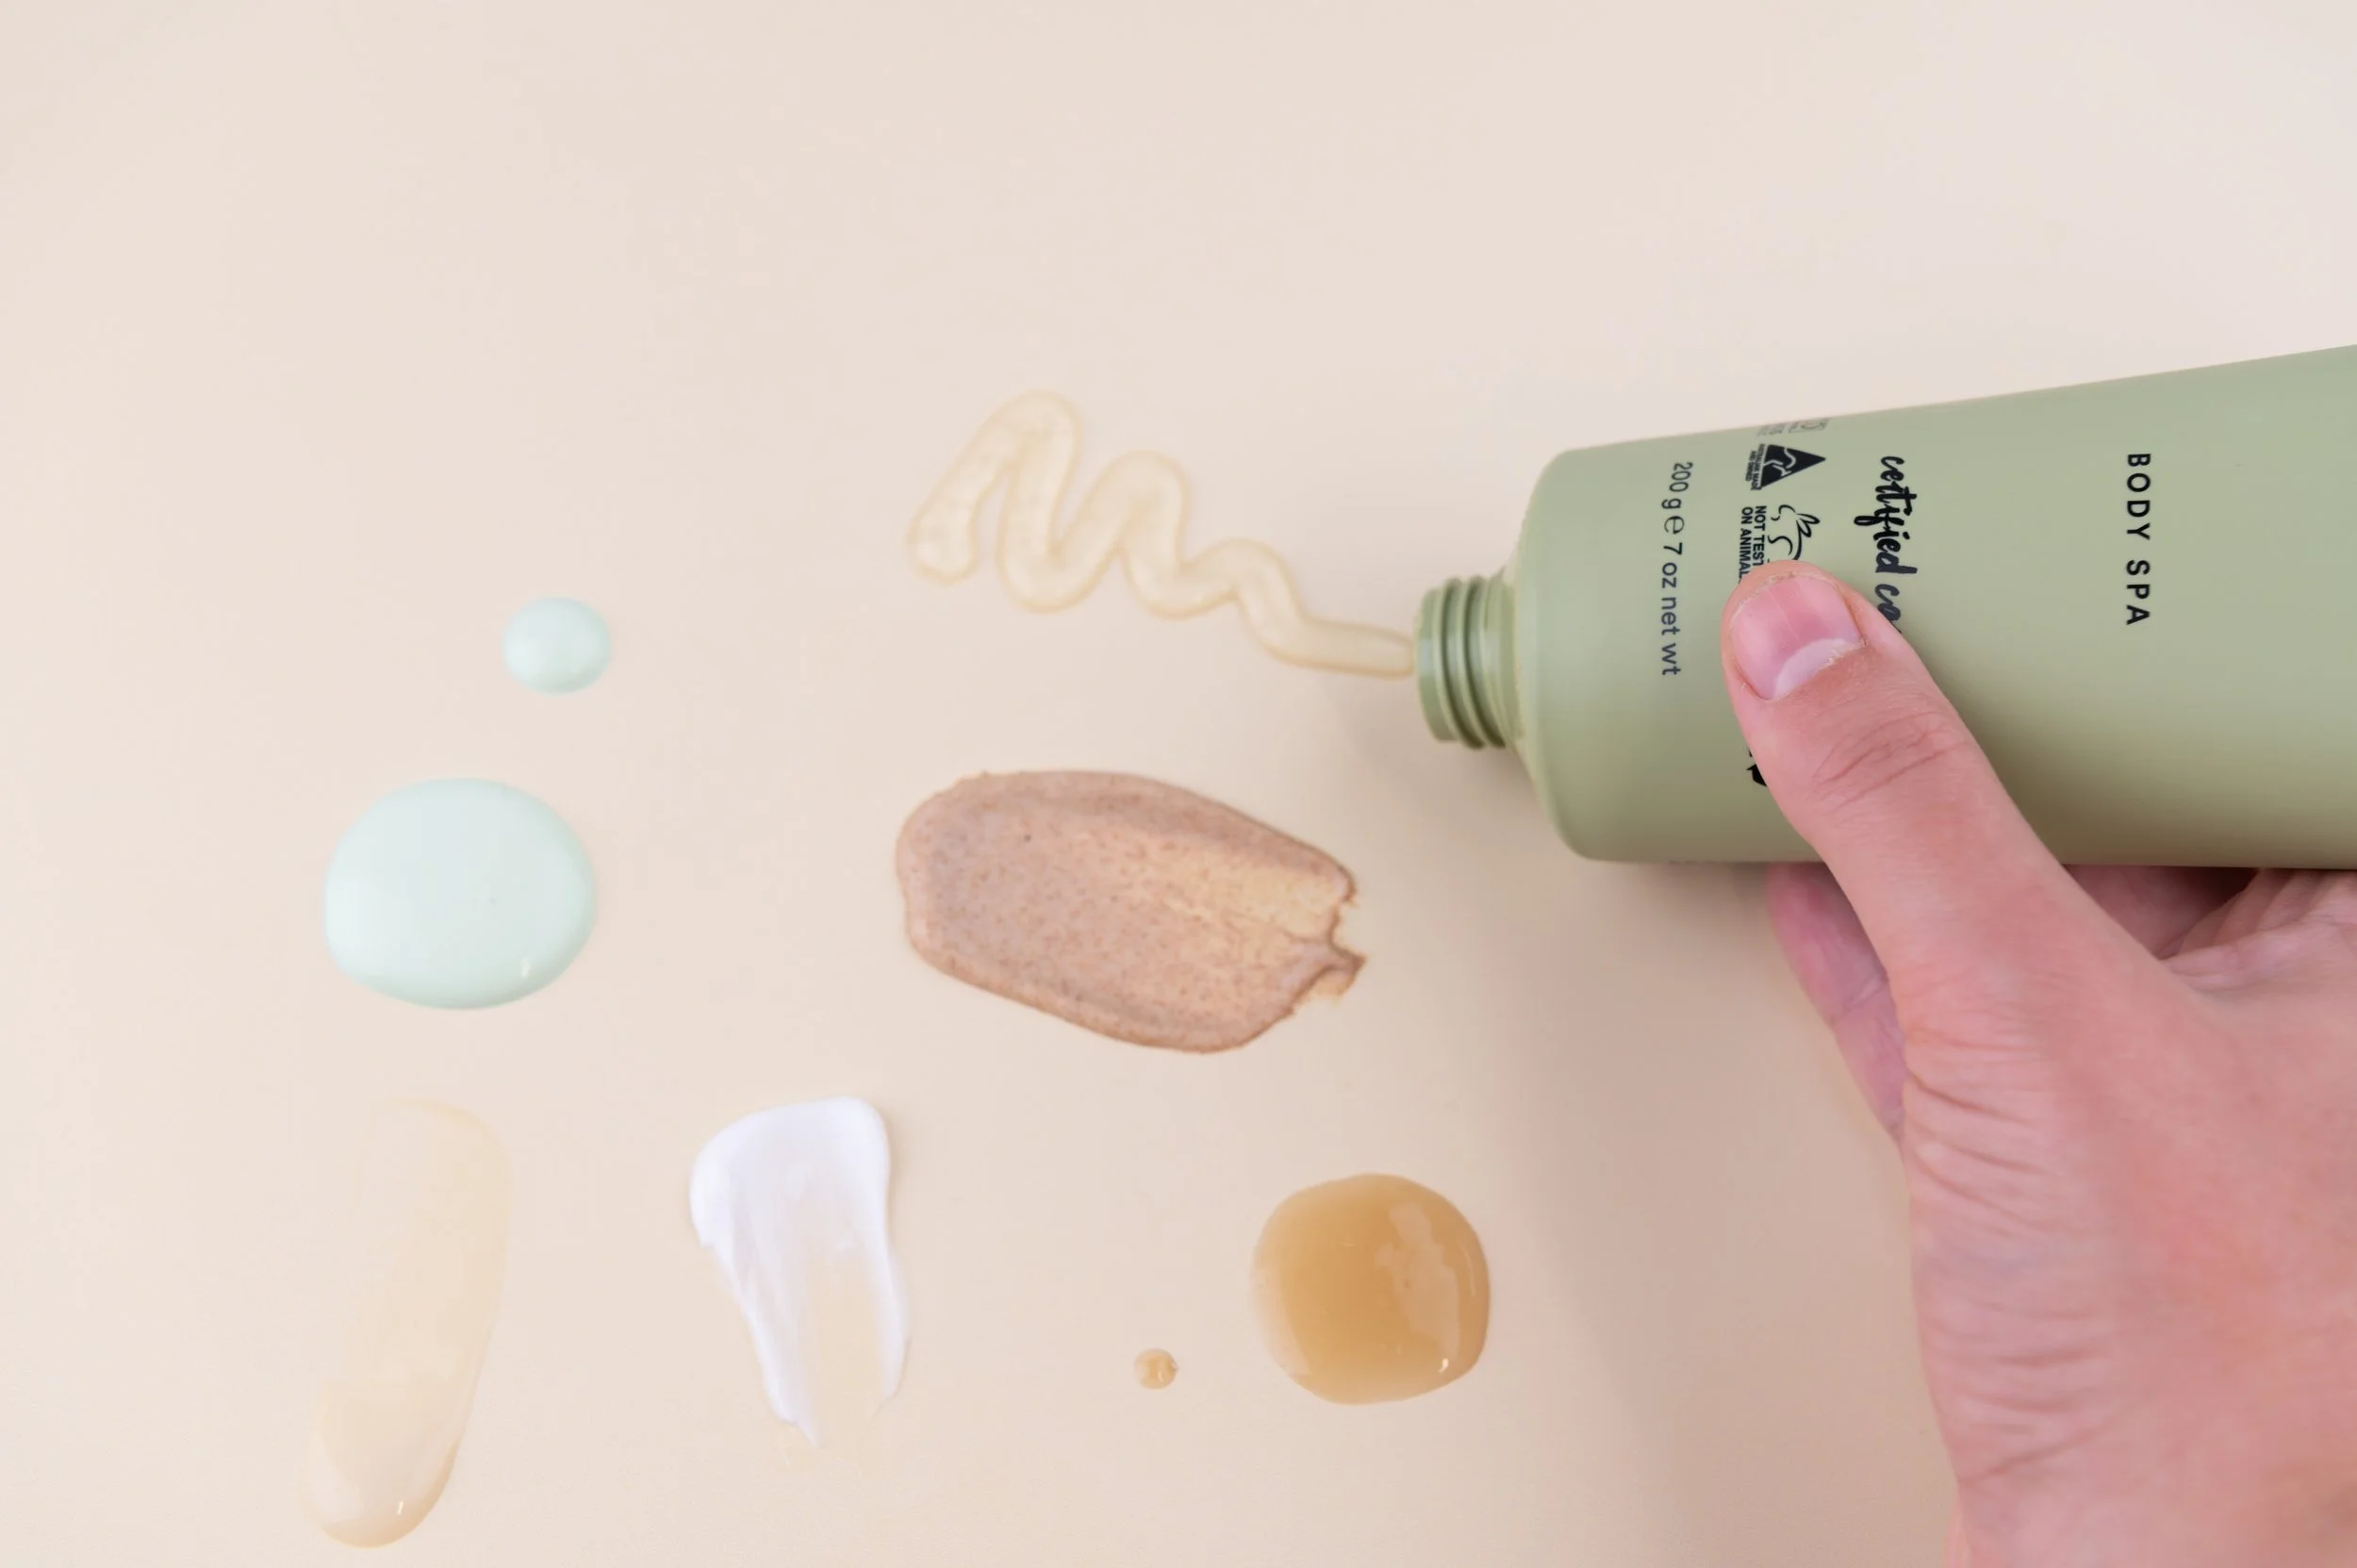
Smearing technique
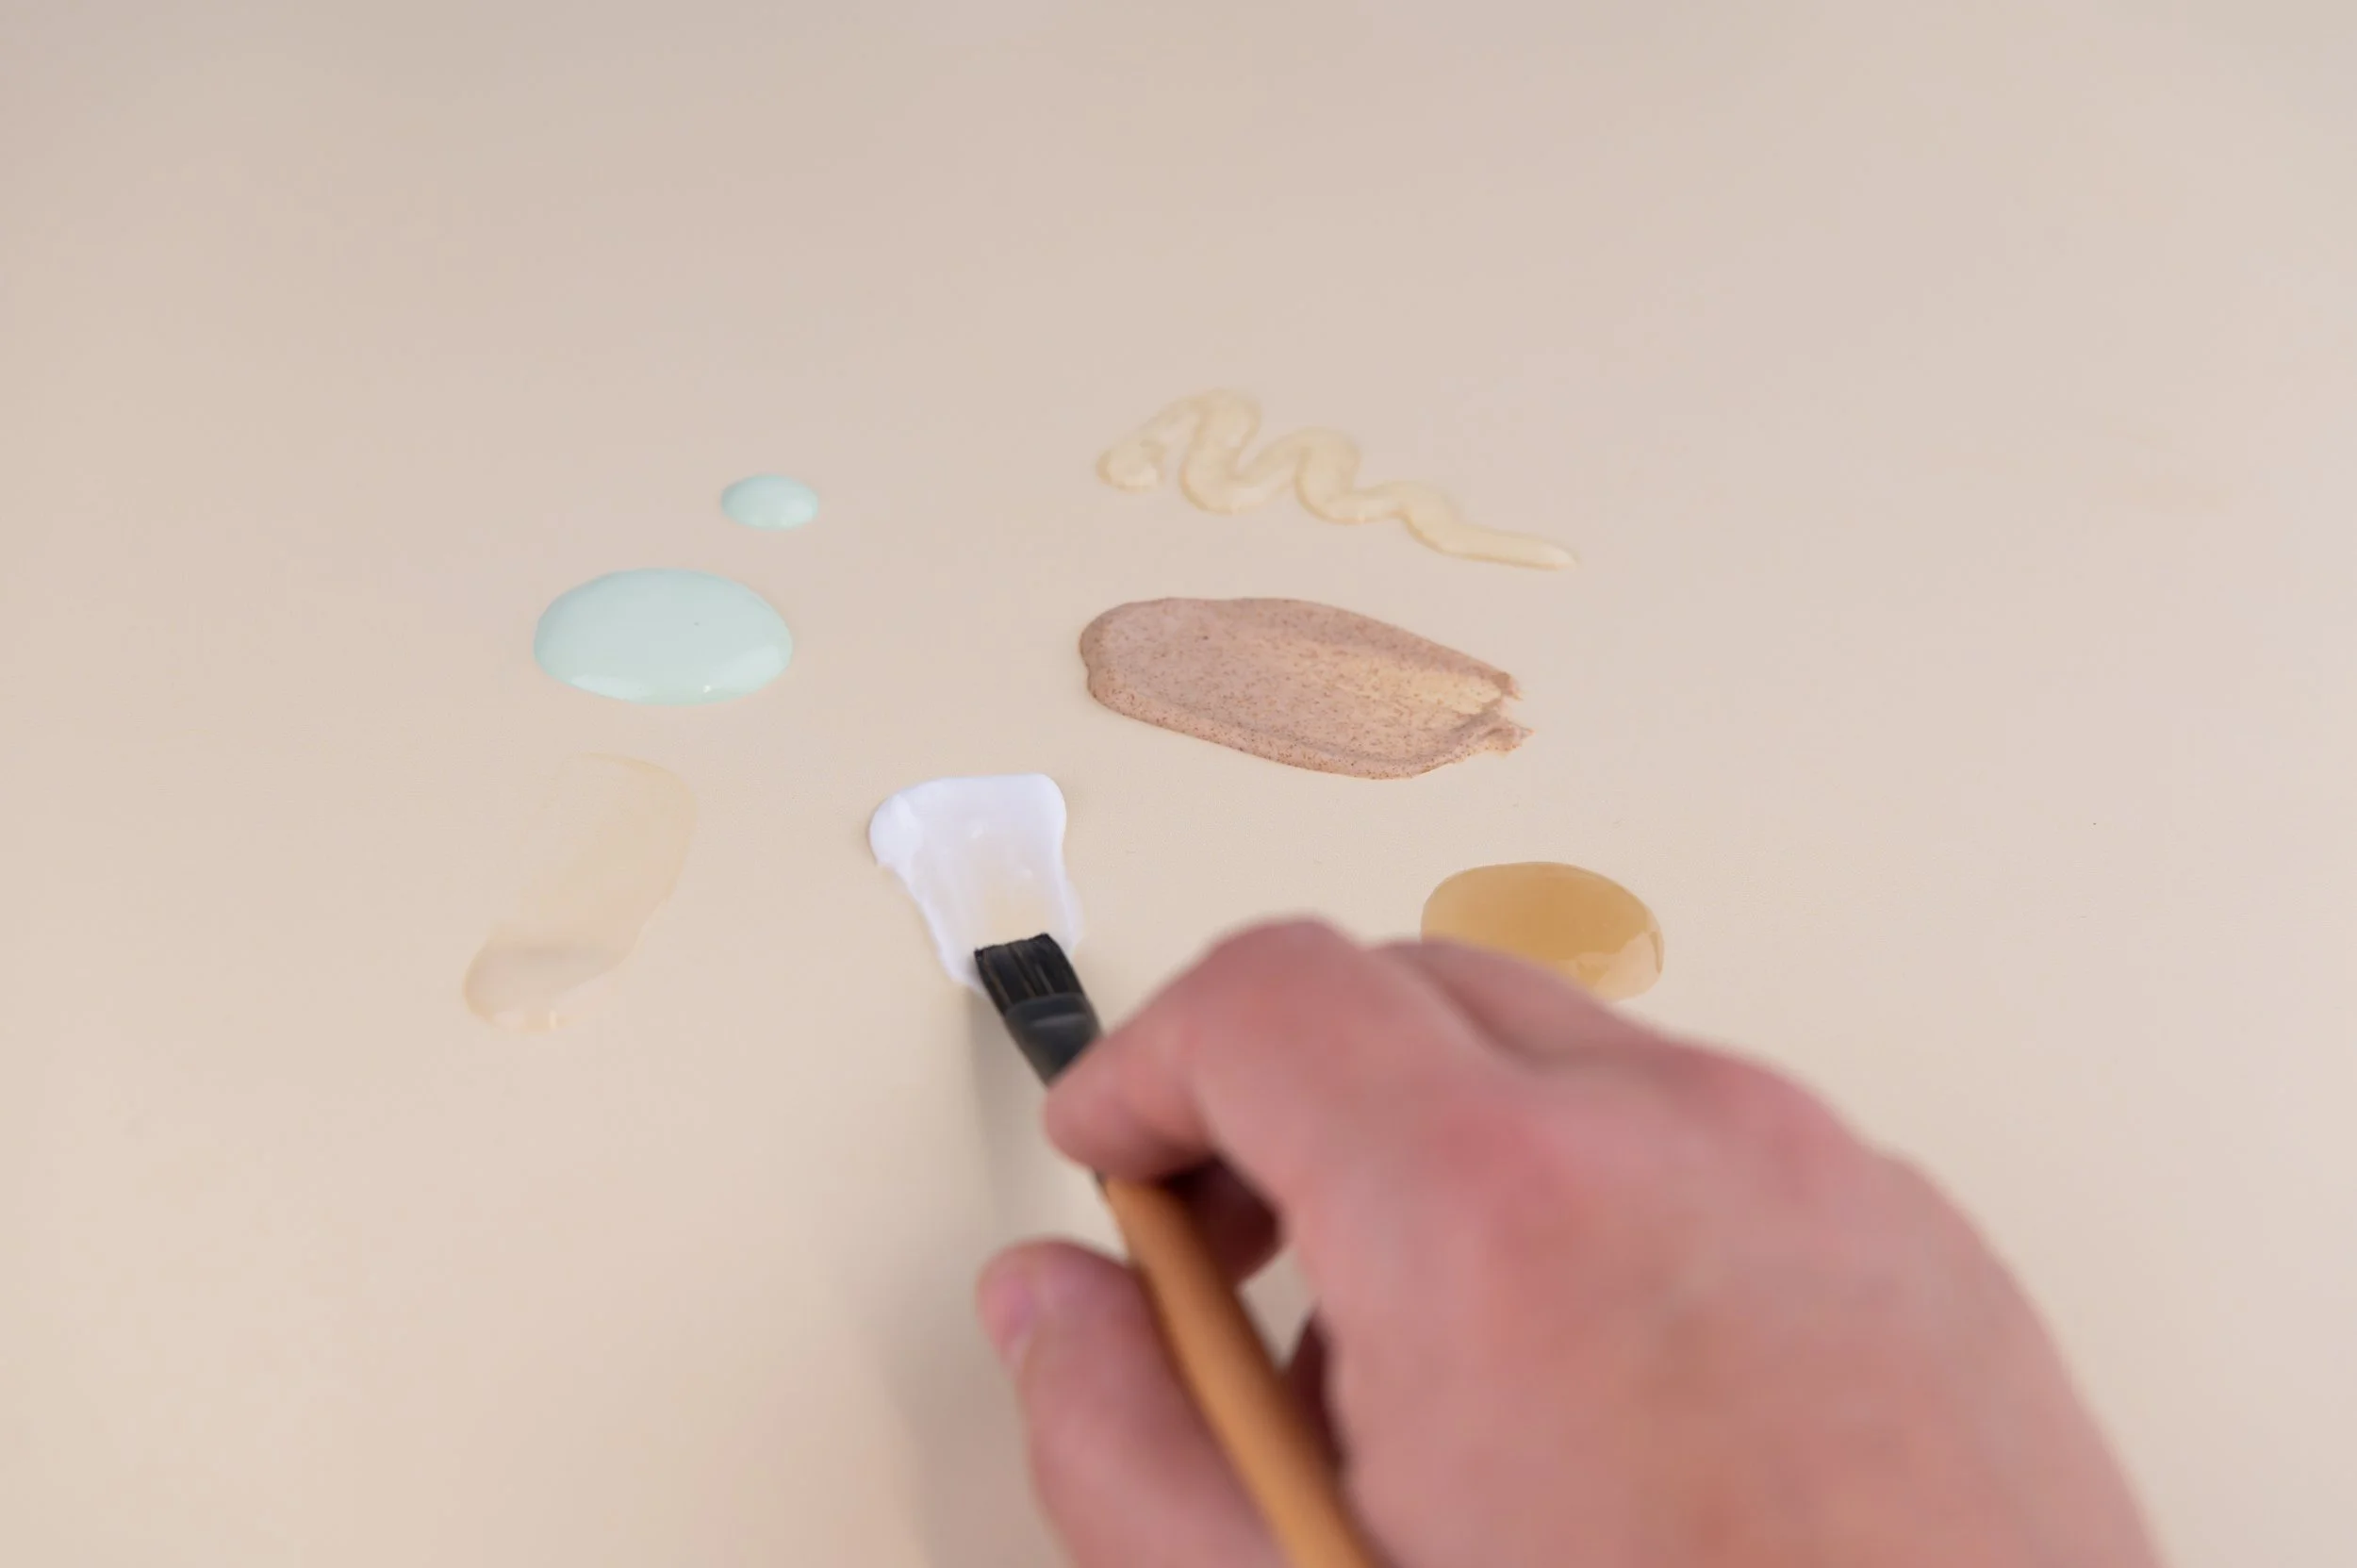
This involves taking a small amount of the product and smearing it onto a flat surface, such as a vinyl backdrop, a piece of glass or an acrylic tile, and photographing it up close. This allows the viewer to see the texture and consistency of the product in detail, giving them a better idea of what to expect.
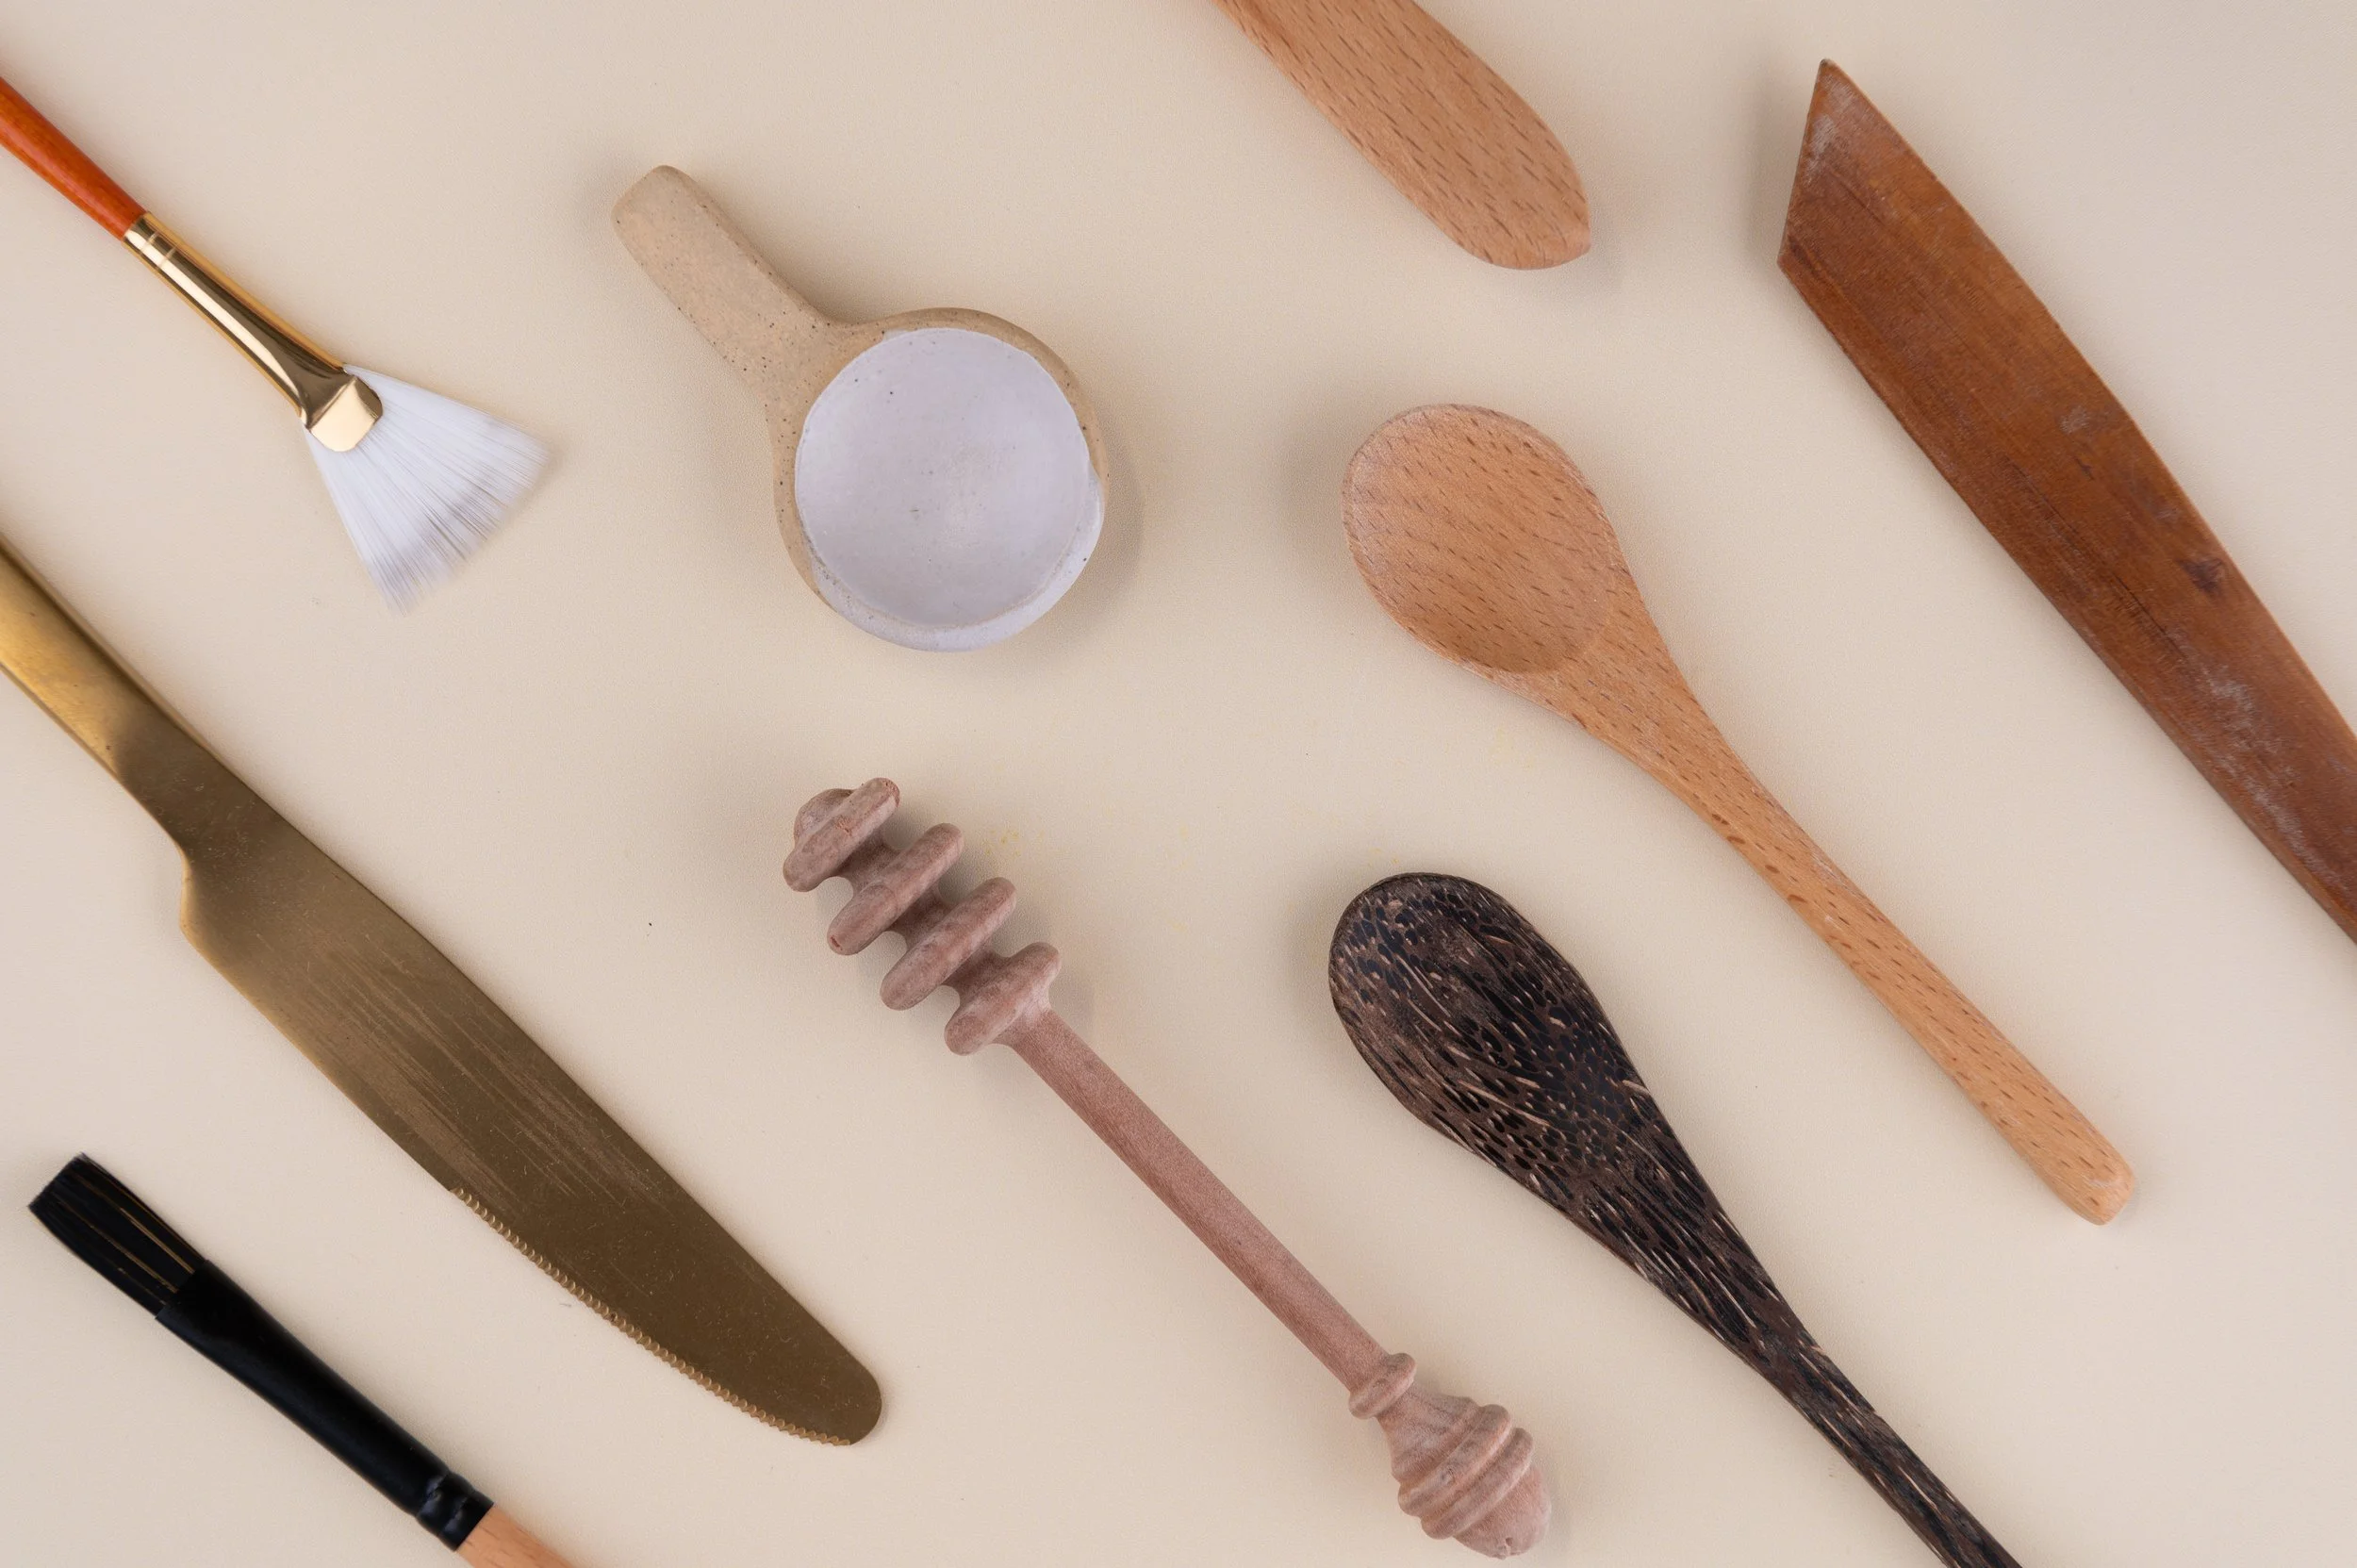
When using this technique, be sure to choose a surface that is easy to clean and won't leave any residue on the product. You can also experiment with different tools for smearing, such as a spatula or a small paint brushes or the back of a spoon to create different textures and patterns.
Don't be discouraged if it takes a few attempts to create the desired effect. I like to have a vsriety of brushes, spatulas and spoons on hand and experiment until I achieve the desired effect. It’s also a good Idea to keep some paper towels nearby so you can easily wipe away any unsuccessful attempts and start over as needed.

Angle
The angle of your shot can also affect how the texture of your product appears in the photo. Experiment with different angles to find the best one that showcases the texture. A low angle can help to emphasize the depth and dimension of the texture, while a top-down view can highlight the surface details.
Props: Props can also be used to enhance the texture of your product. For example, you can use a textured surface as a backdrop, or add other objects with interesting textures to the shot. Be sure to choose props that complement the product and don't distract from the texture you're trying to highlight.
Focus:
When taking close-up shots of products with texture, it's important to make sure that the focus is sharp on the texture itself. Use a narrow aperture (high f-stop number) to increase the depth of field and ensure that the entire texture is in focus. If you are having trouble getting enough detail in your texture shot you might like to try using a macro lense. This will allow you come in much closer and capture more intricate details. If you are shooting with your phone you can purchase a macro lense attachment for around $50. I reccomend the:
Editing:
Finally, post-processing can also help to enhance the texture of your product in your photos. Adjusting the contrast and clarity can bring out the details of the texture, while adjusting the saturation can help to make the colors pop. Just be careful not to overdo it, as this can make the texture appear unnatural.
OK, so there you have it. I hope this blog has been helpful and gave you some ideas for photographing your product textures. As always, if you create anything awesome please share your pics in the Facebook Group Photography for Makers - I’d love to see your work!