
Getting great pictures of your market stall
Markets are an excellent opportunity to photograph your products. You have gone through a lot of effort to create an appealing stall display. This display will probably also work really well as a styled photo set - so why not feed two birds with one seed!
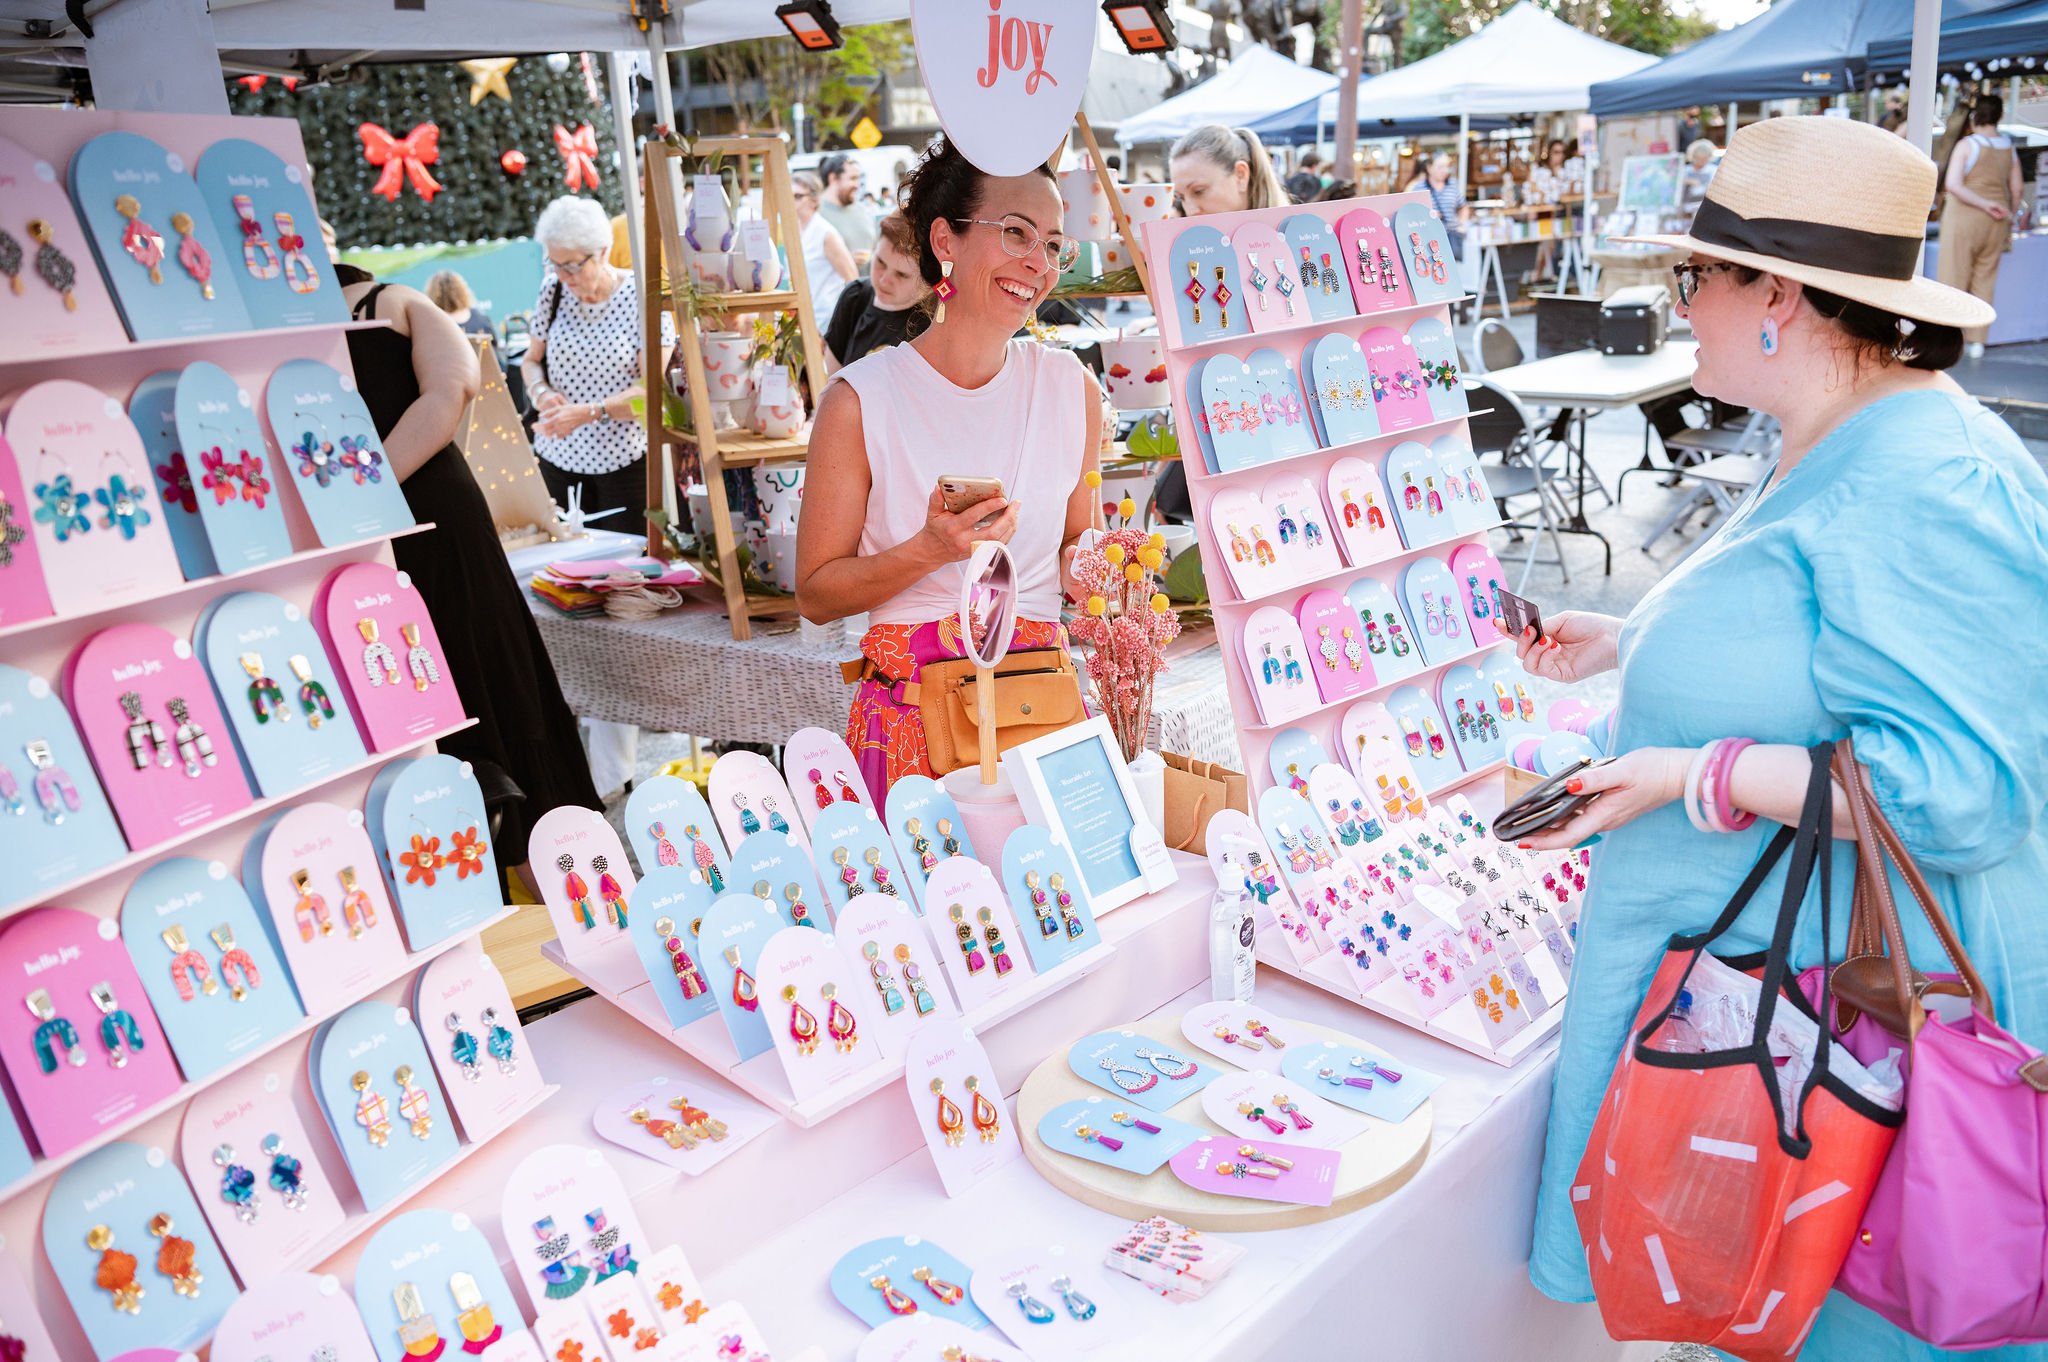
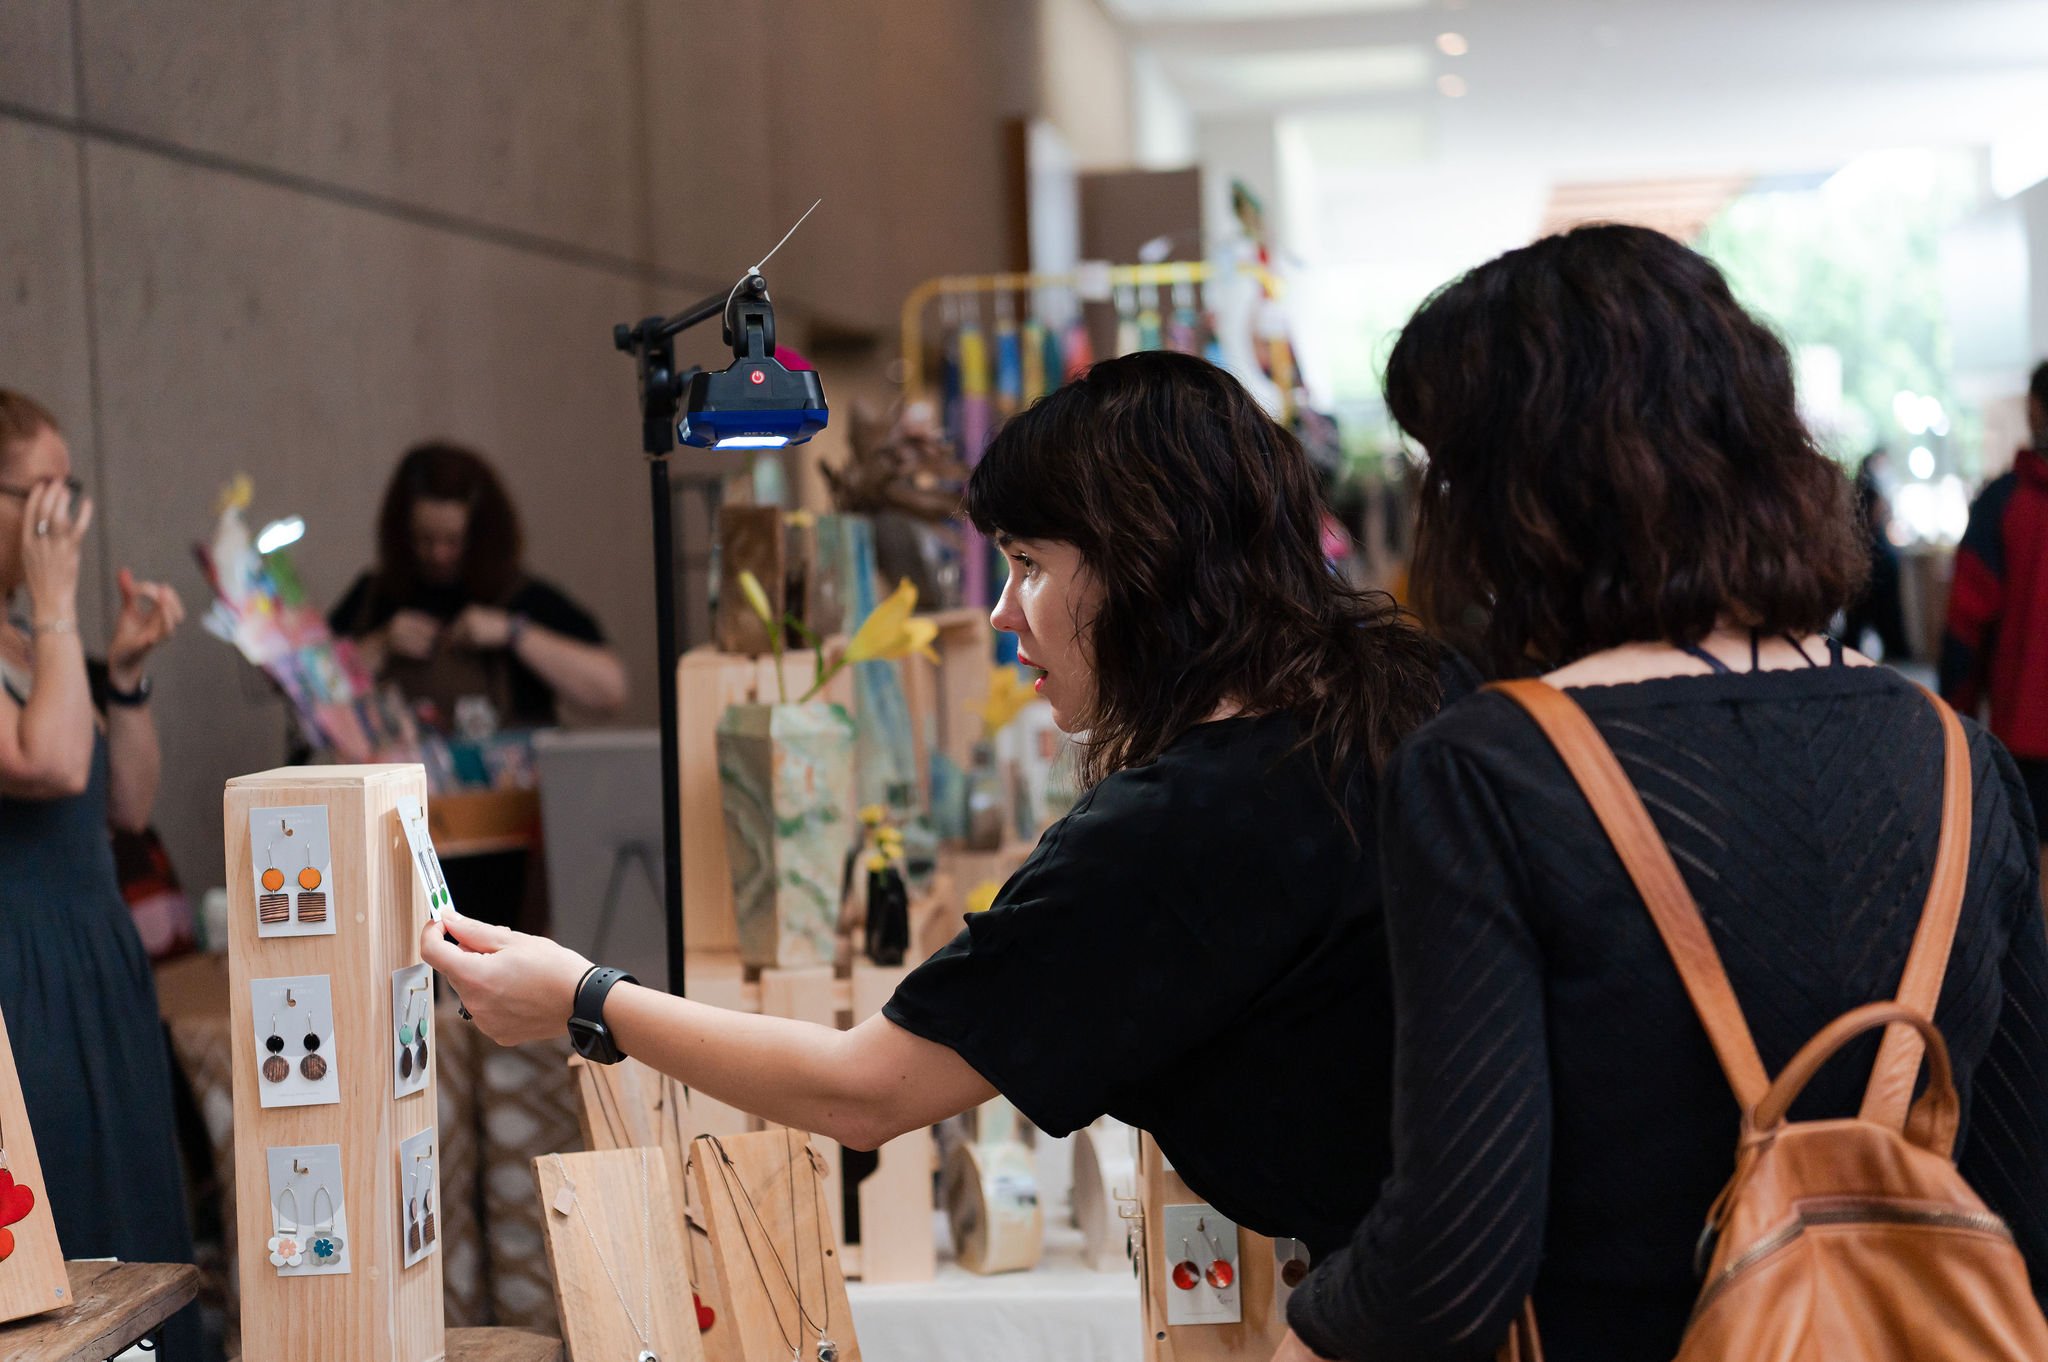
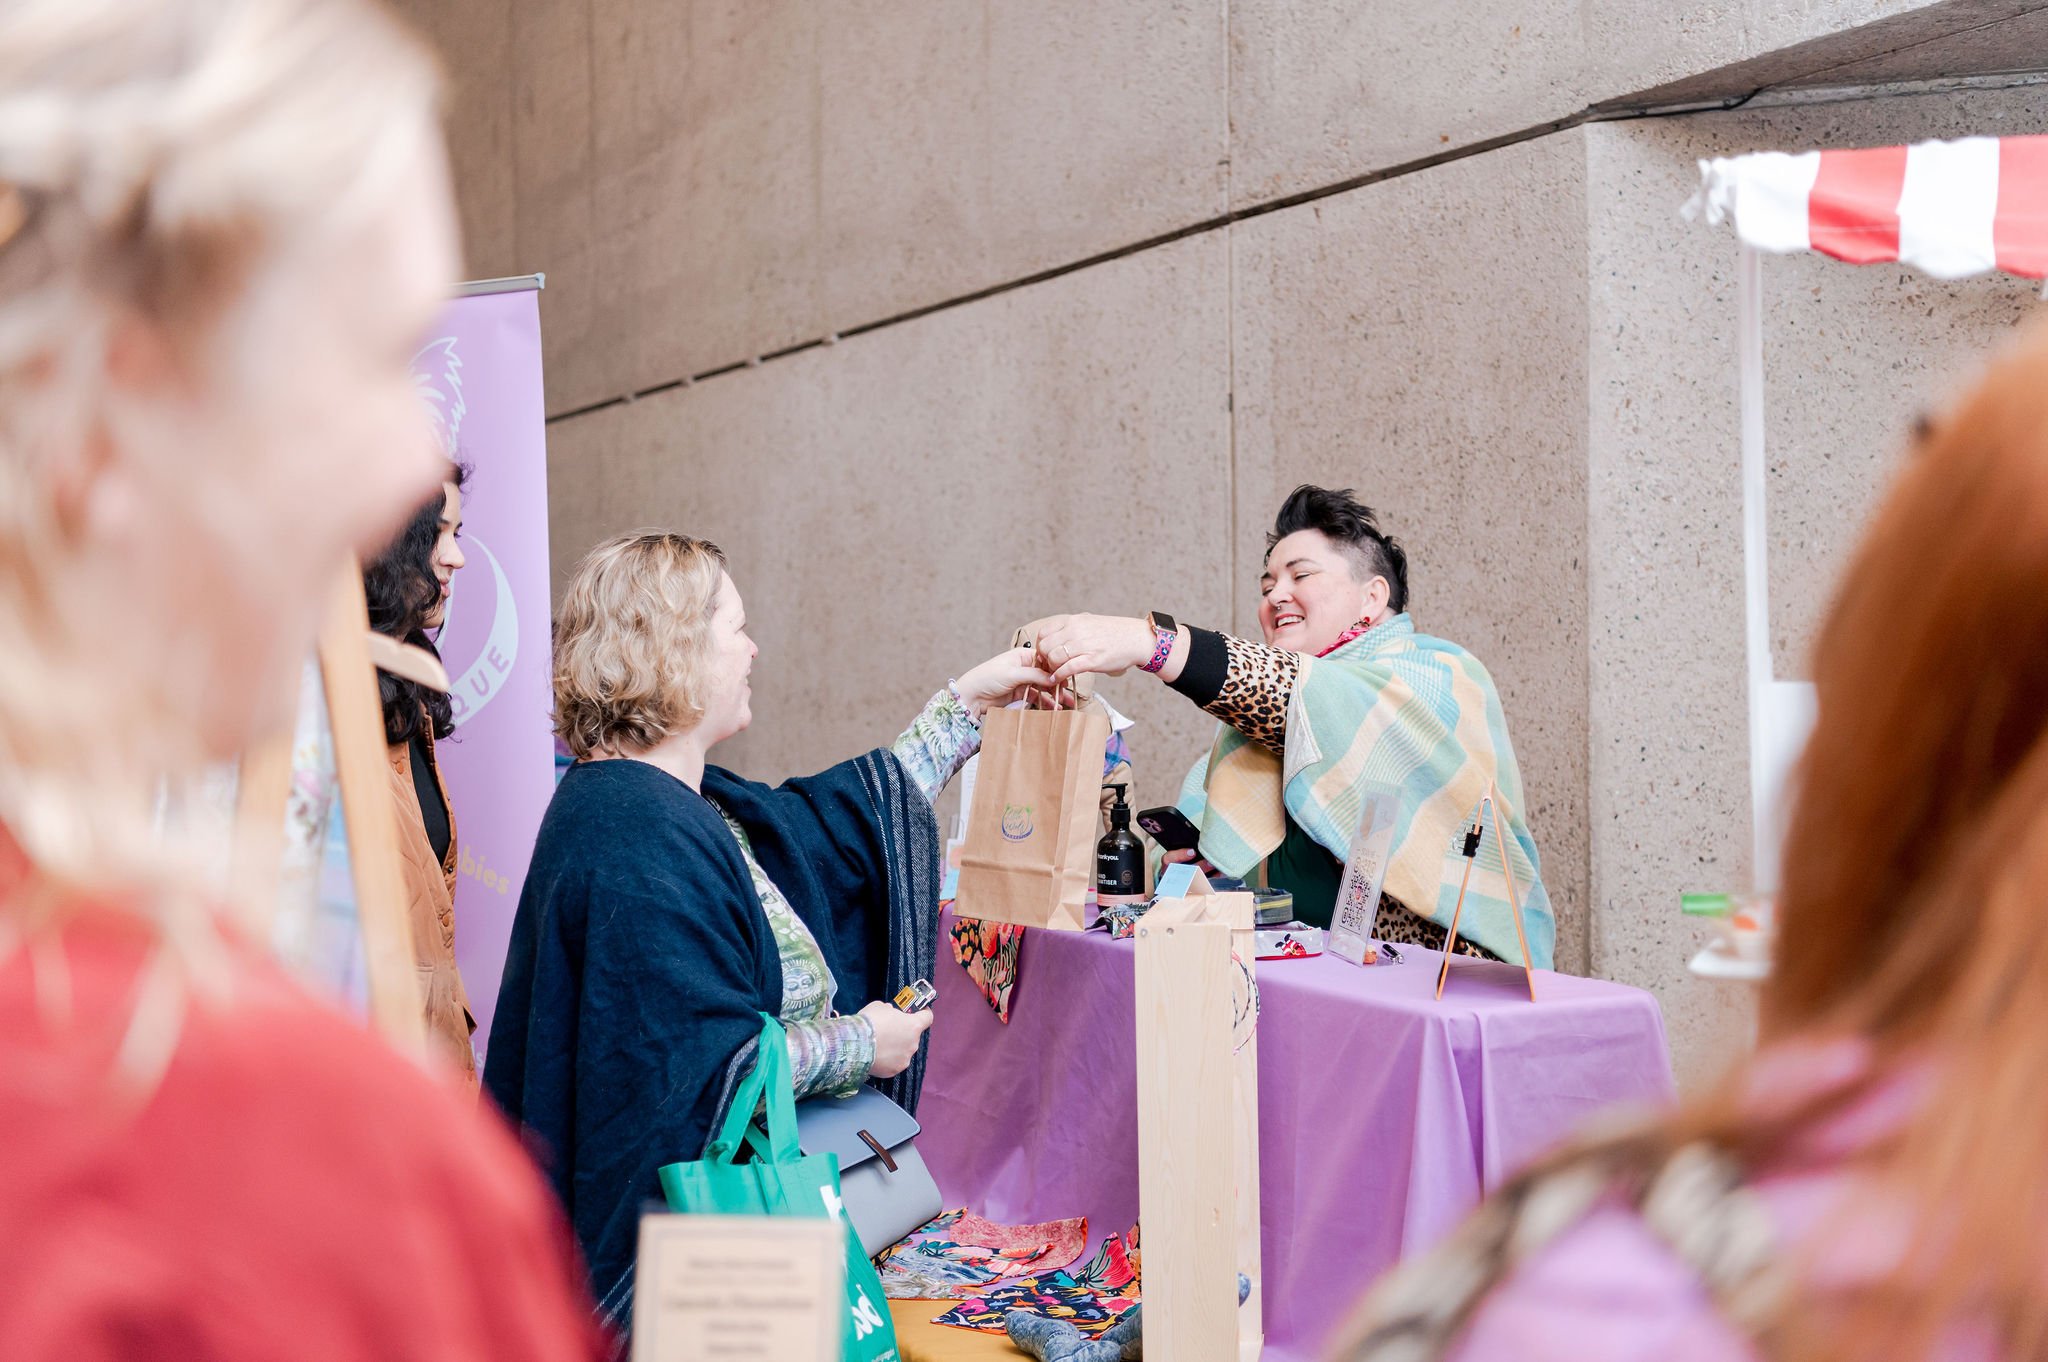
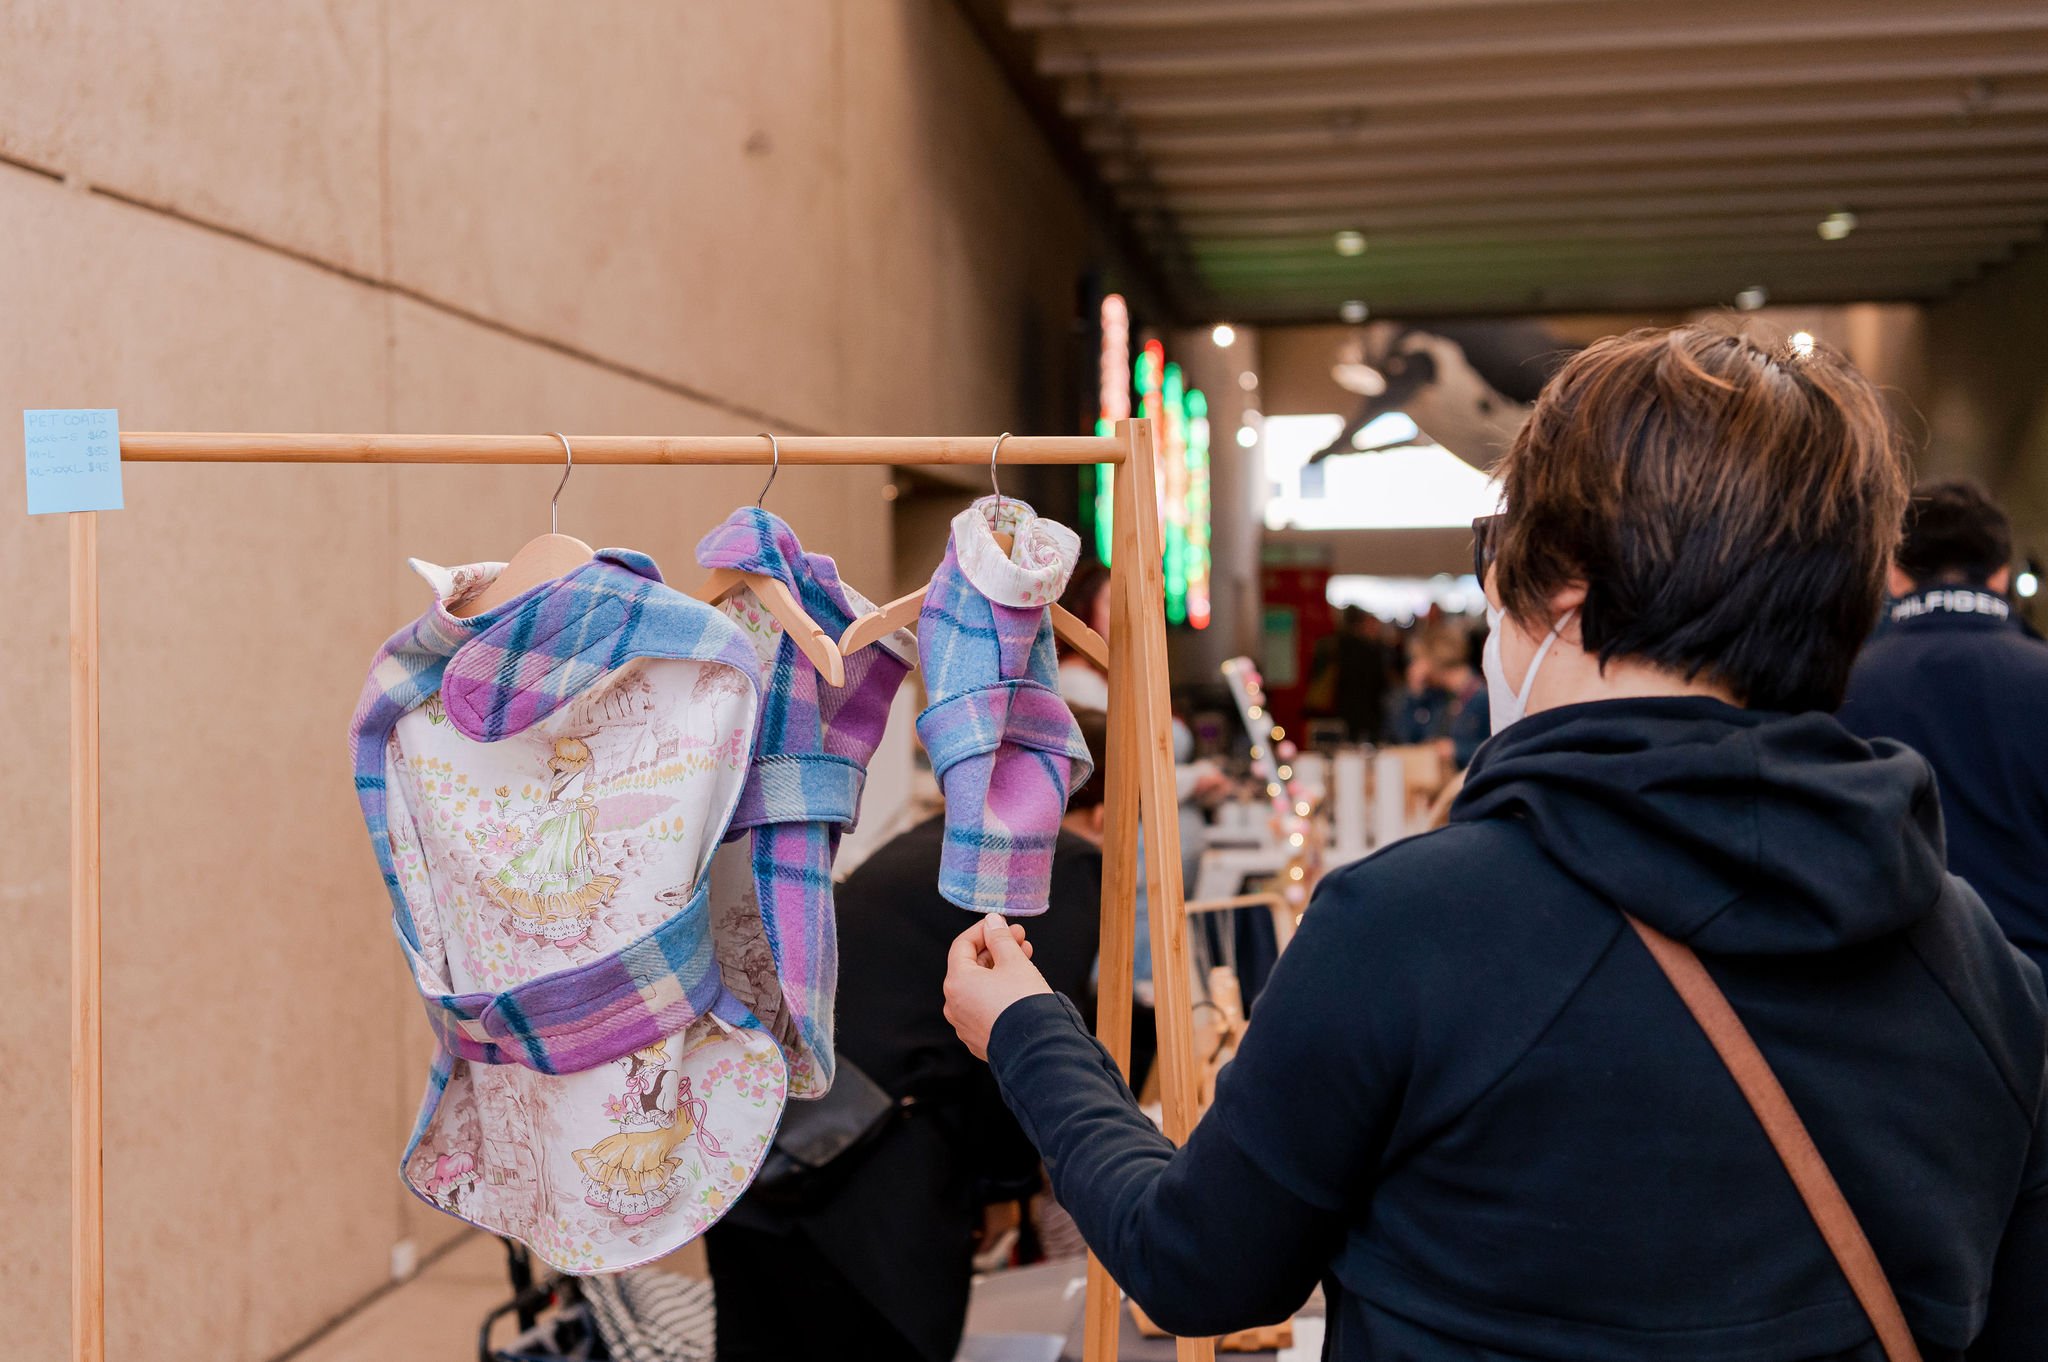
Photographing your products at the market is also a great opportunity to bring your products to life by getting some photos of people admiring them and interacting with them - these types of images really help your products feel more real, attainable and desirable. Over the years I have photographed a lot of markets with the wonderful BrisStyle community so this month I thought I’d share some of the tricks I’ve learnt along the way.
Setting up your stall
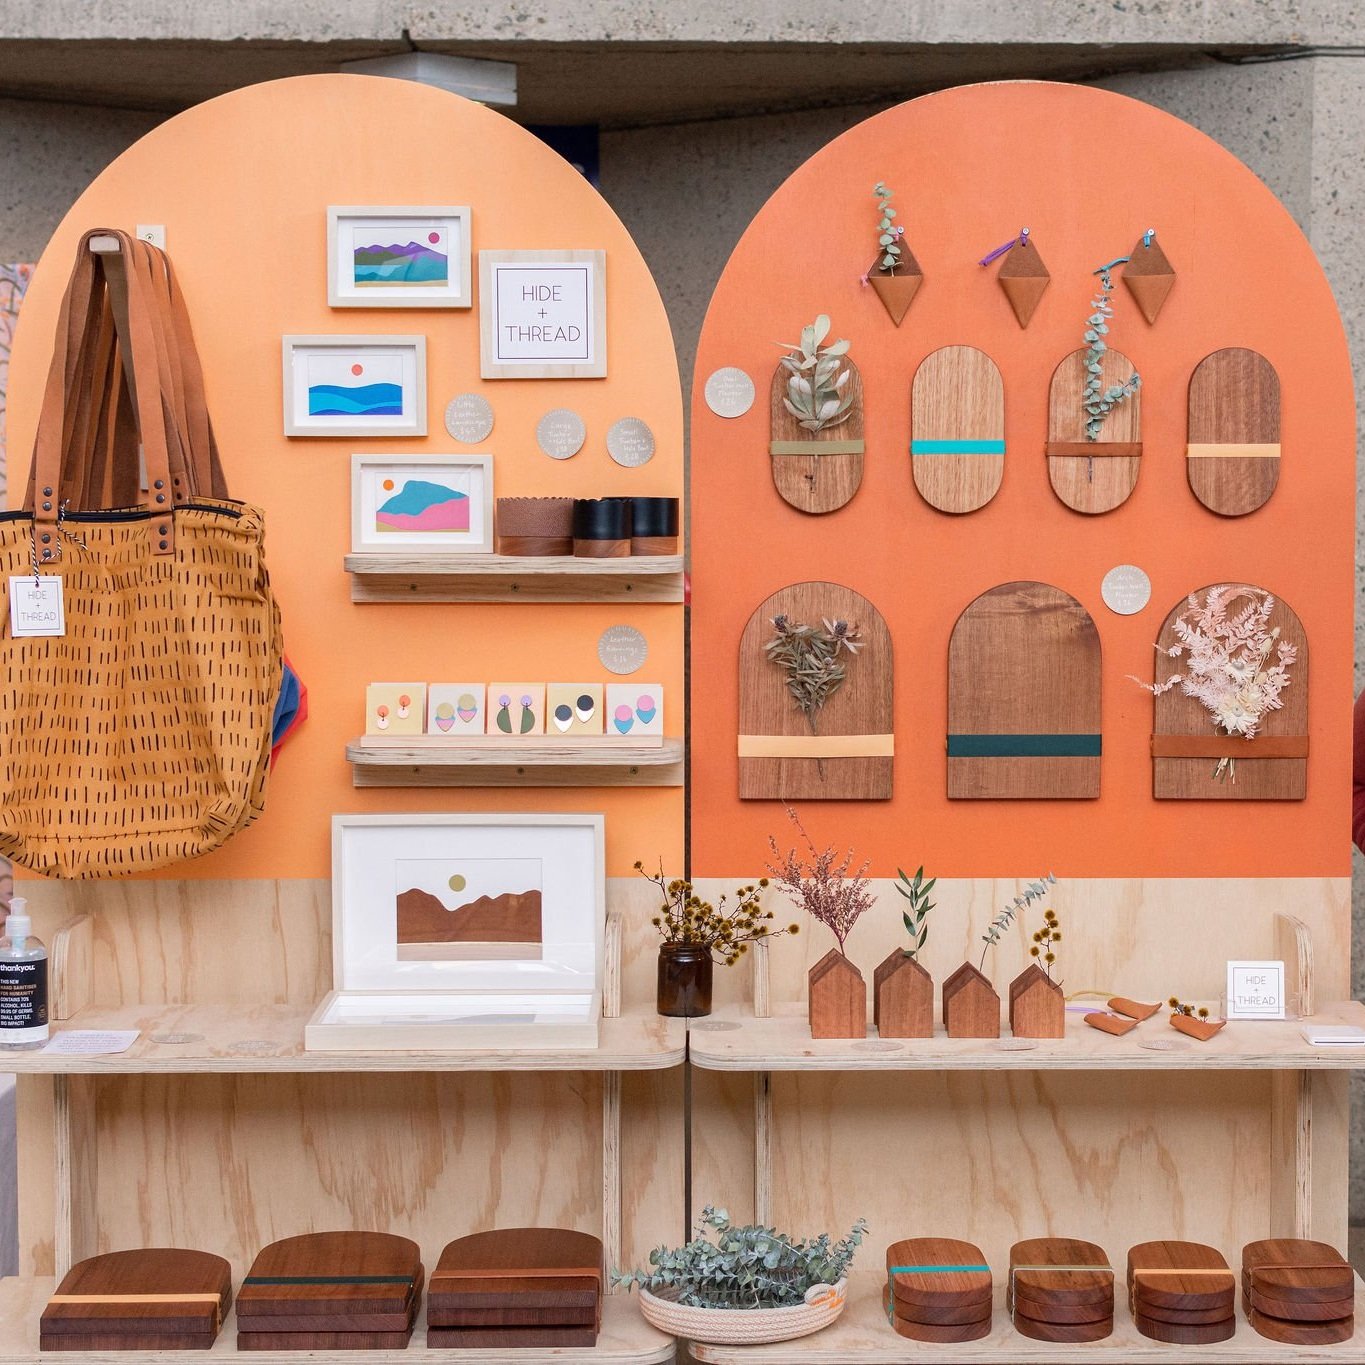
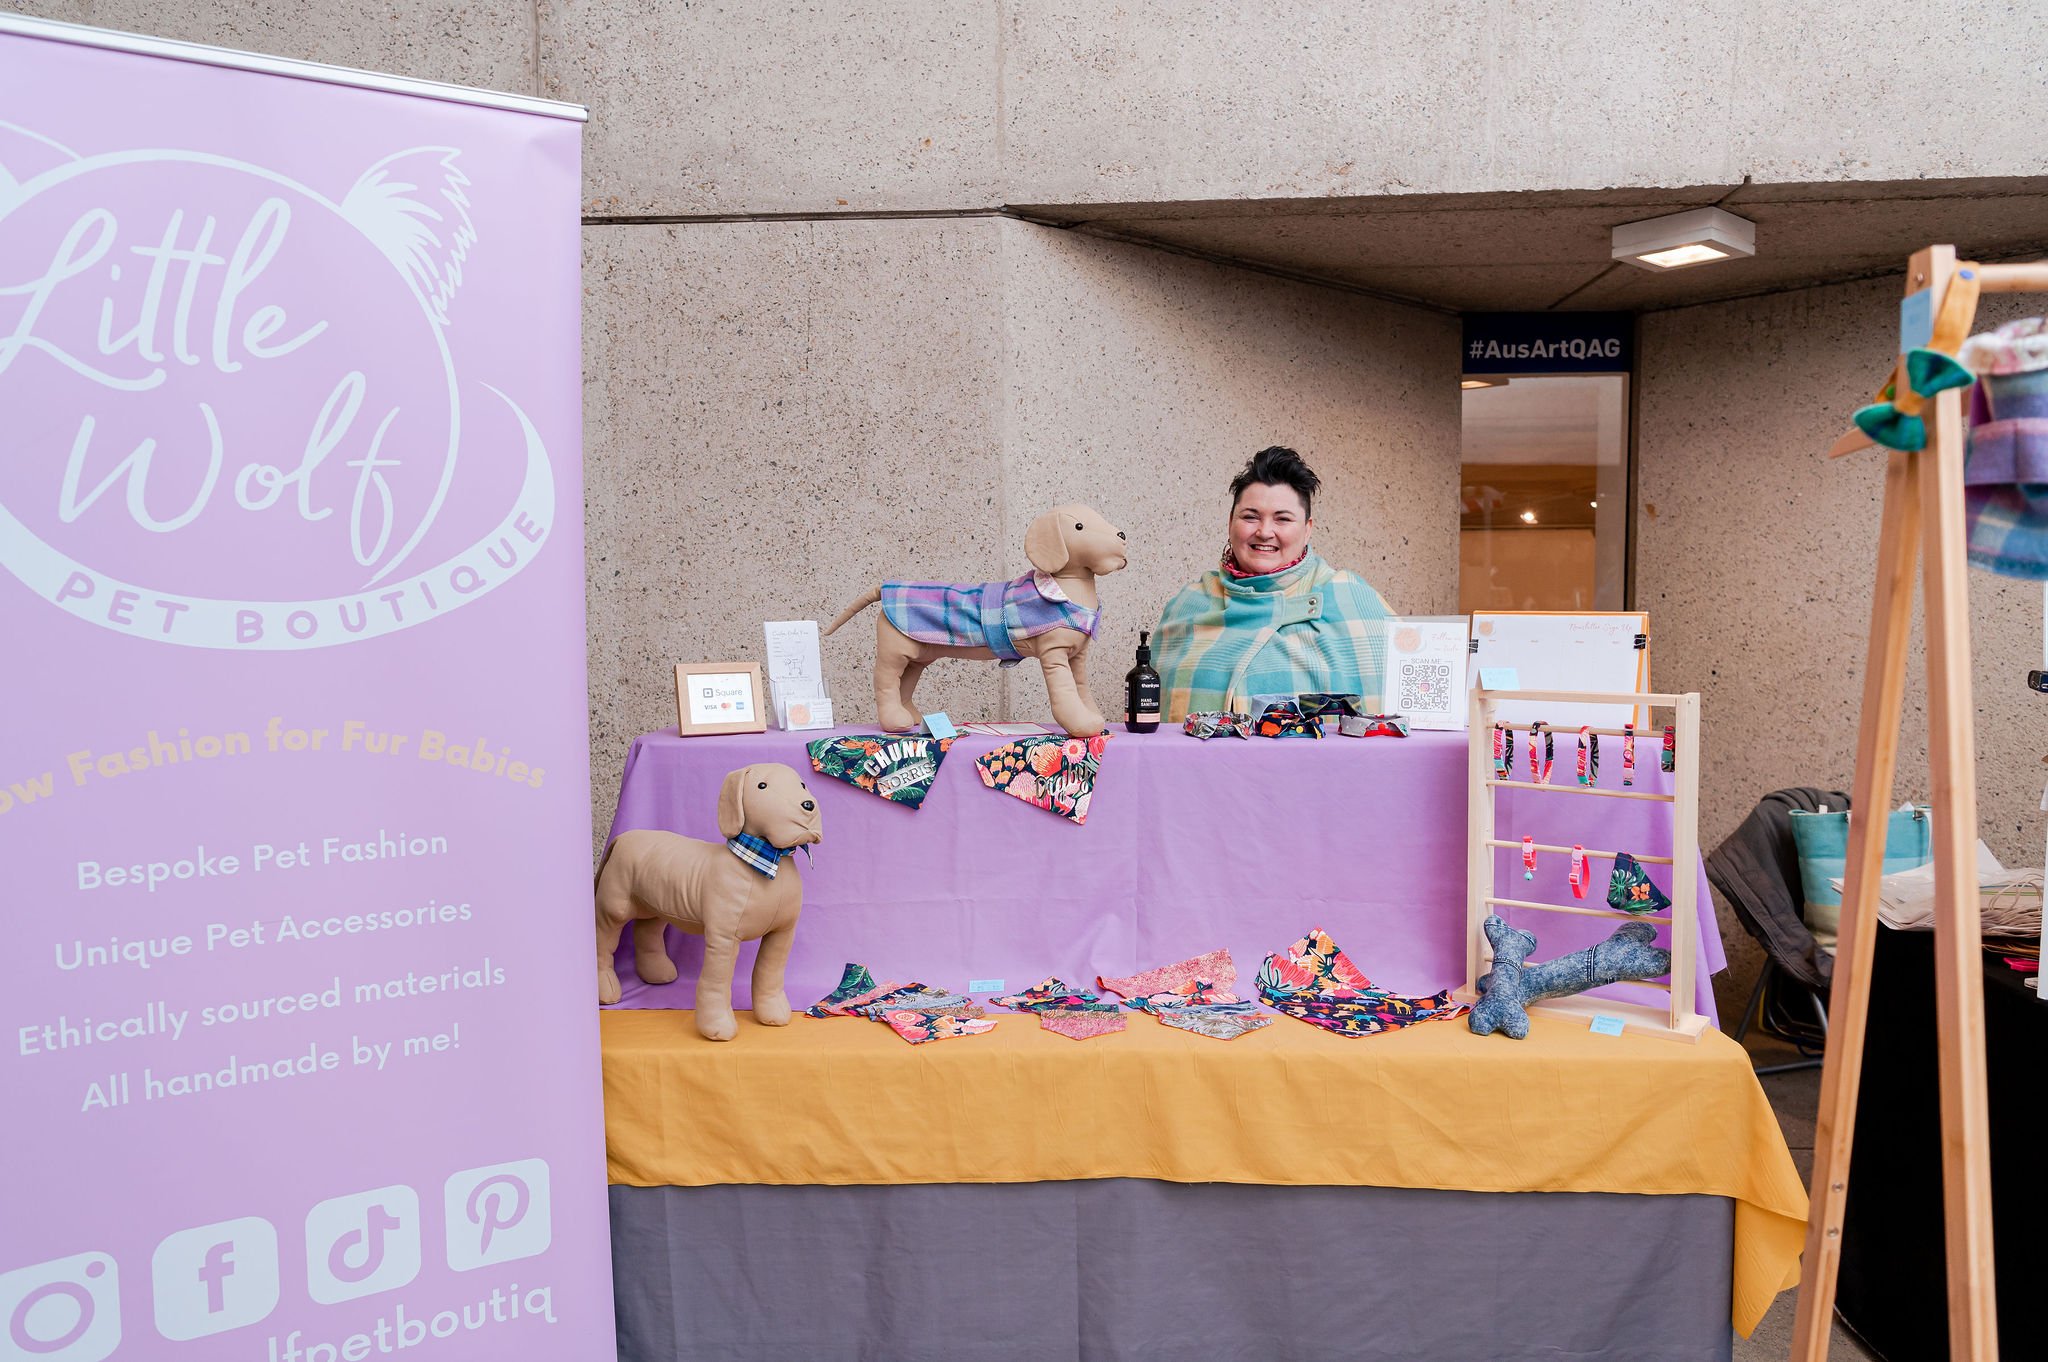
There is a lot that goes into a beautiful stall display. In fact there is a lot of crossover between designing a market stall display and designing a photography set for a product photo shoot.
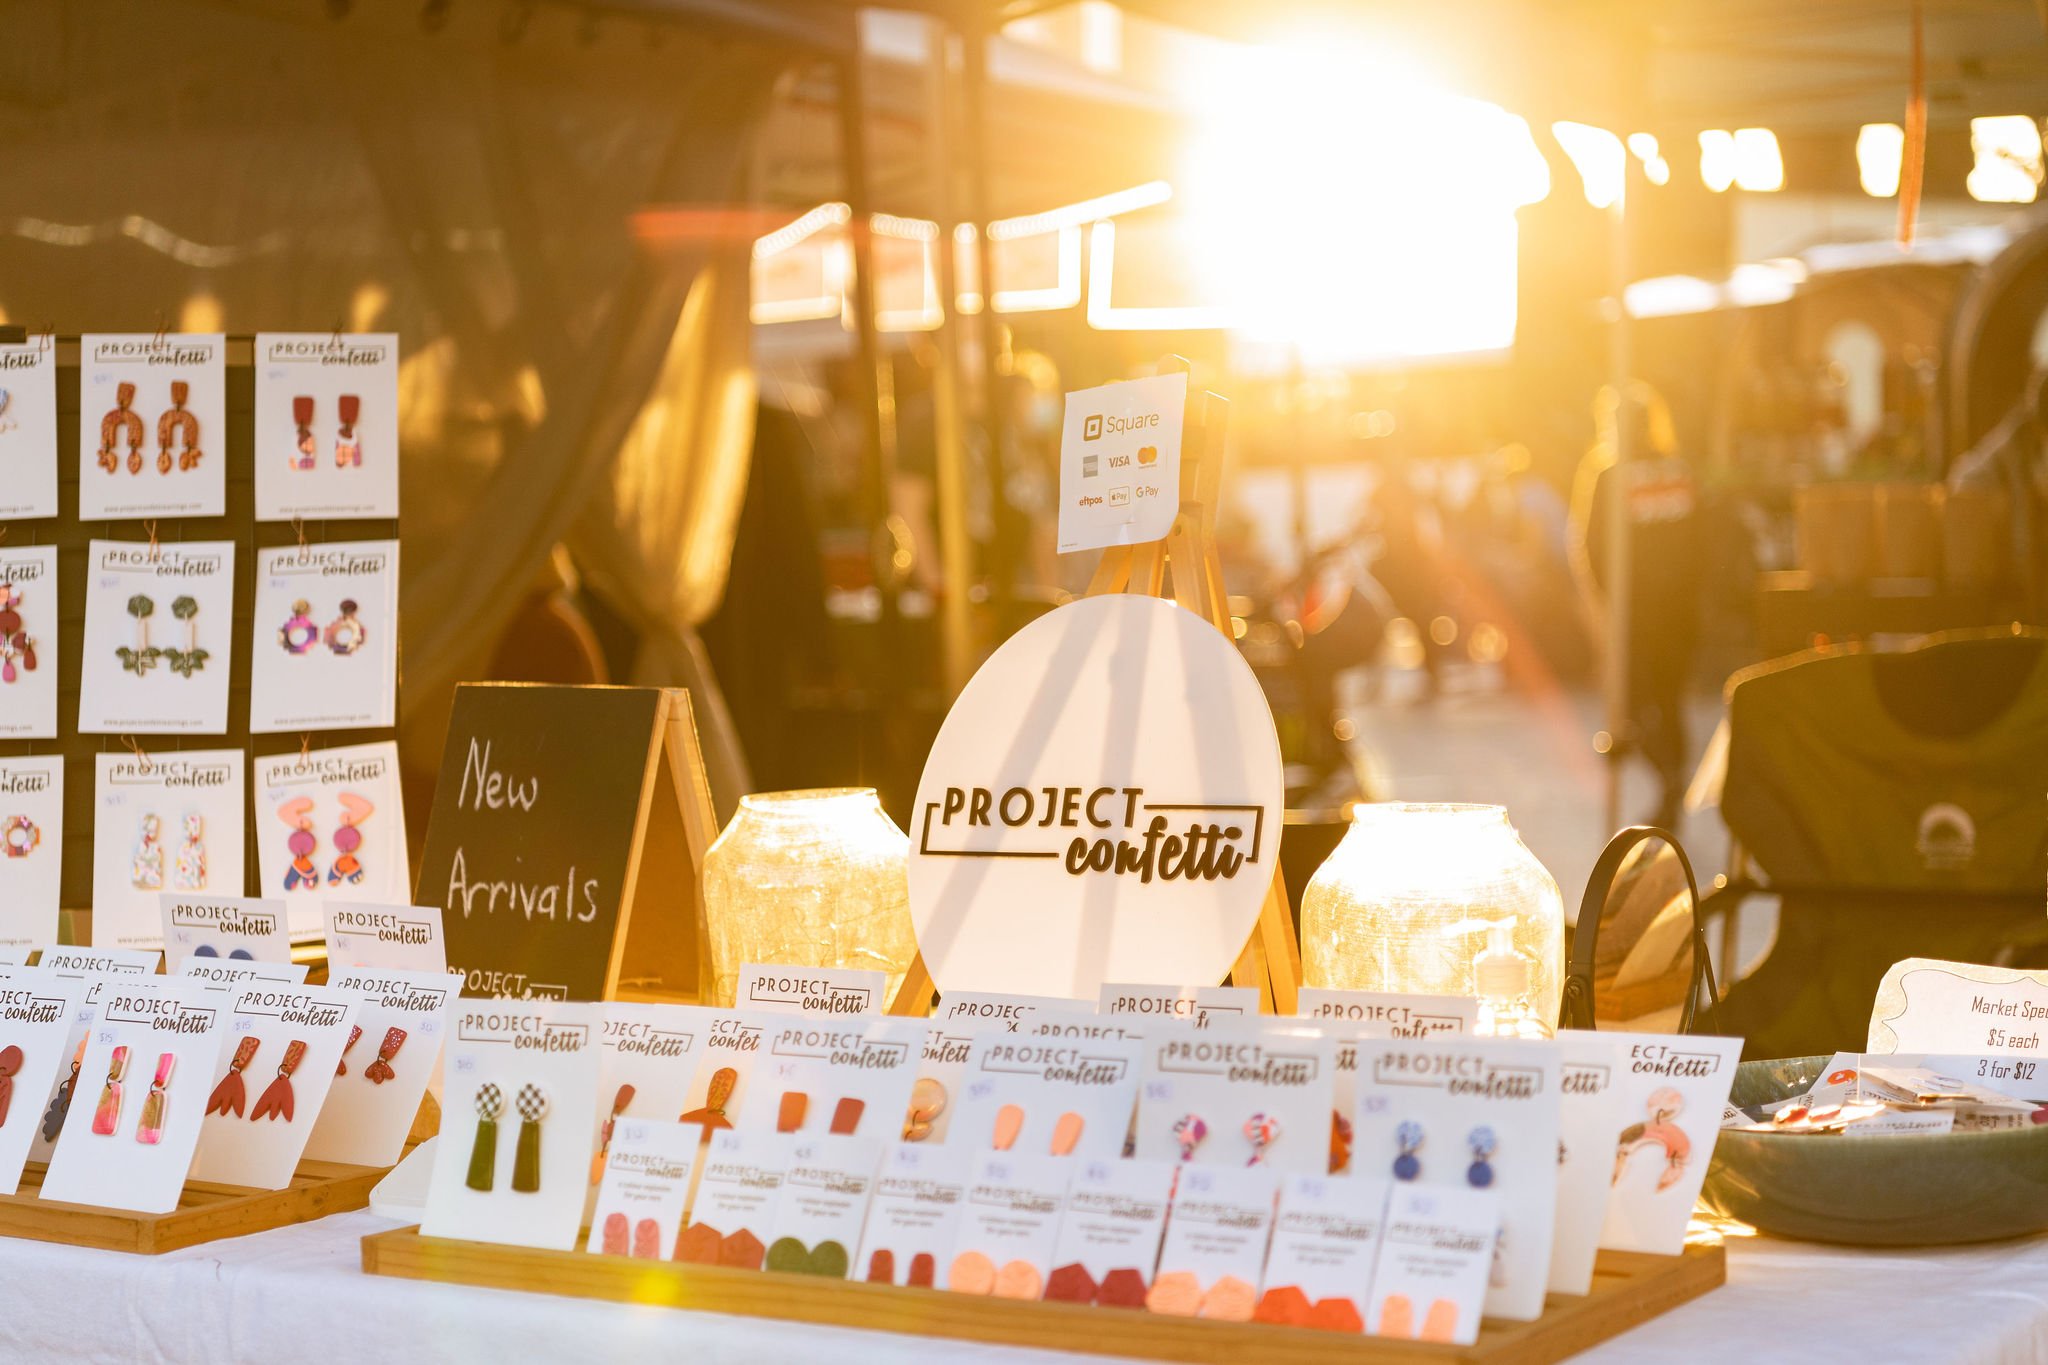
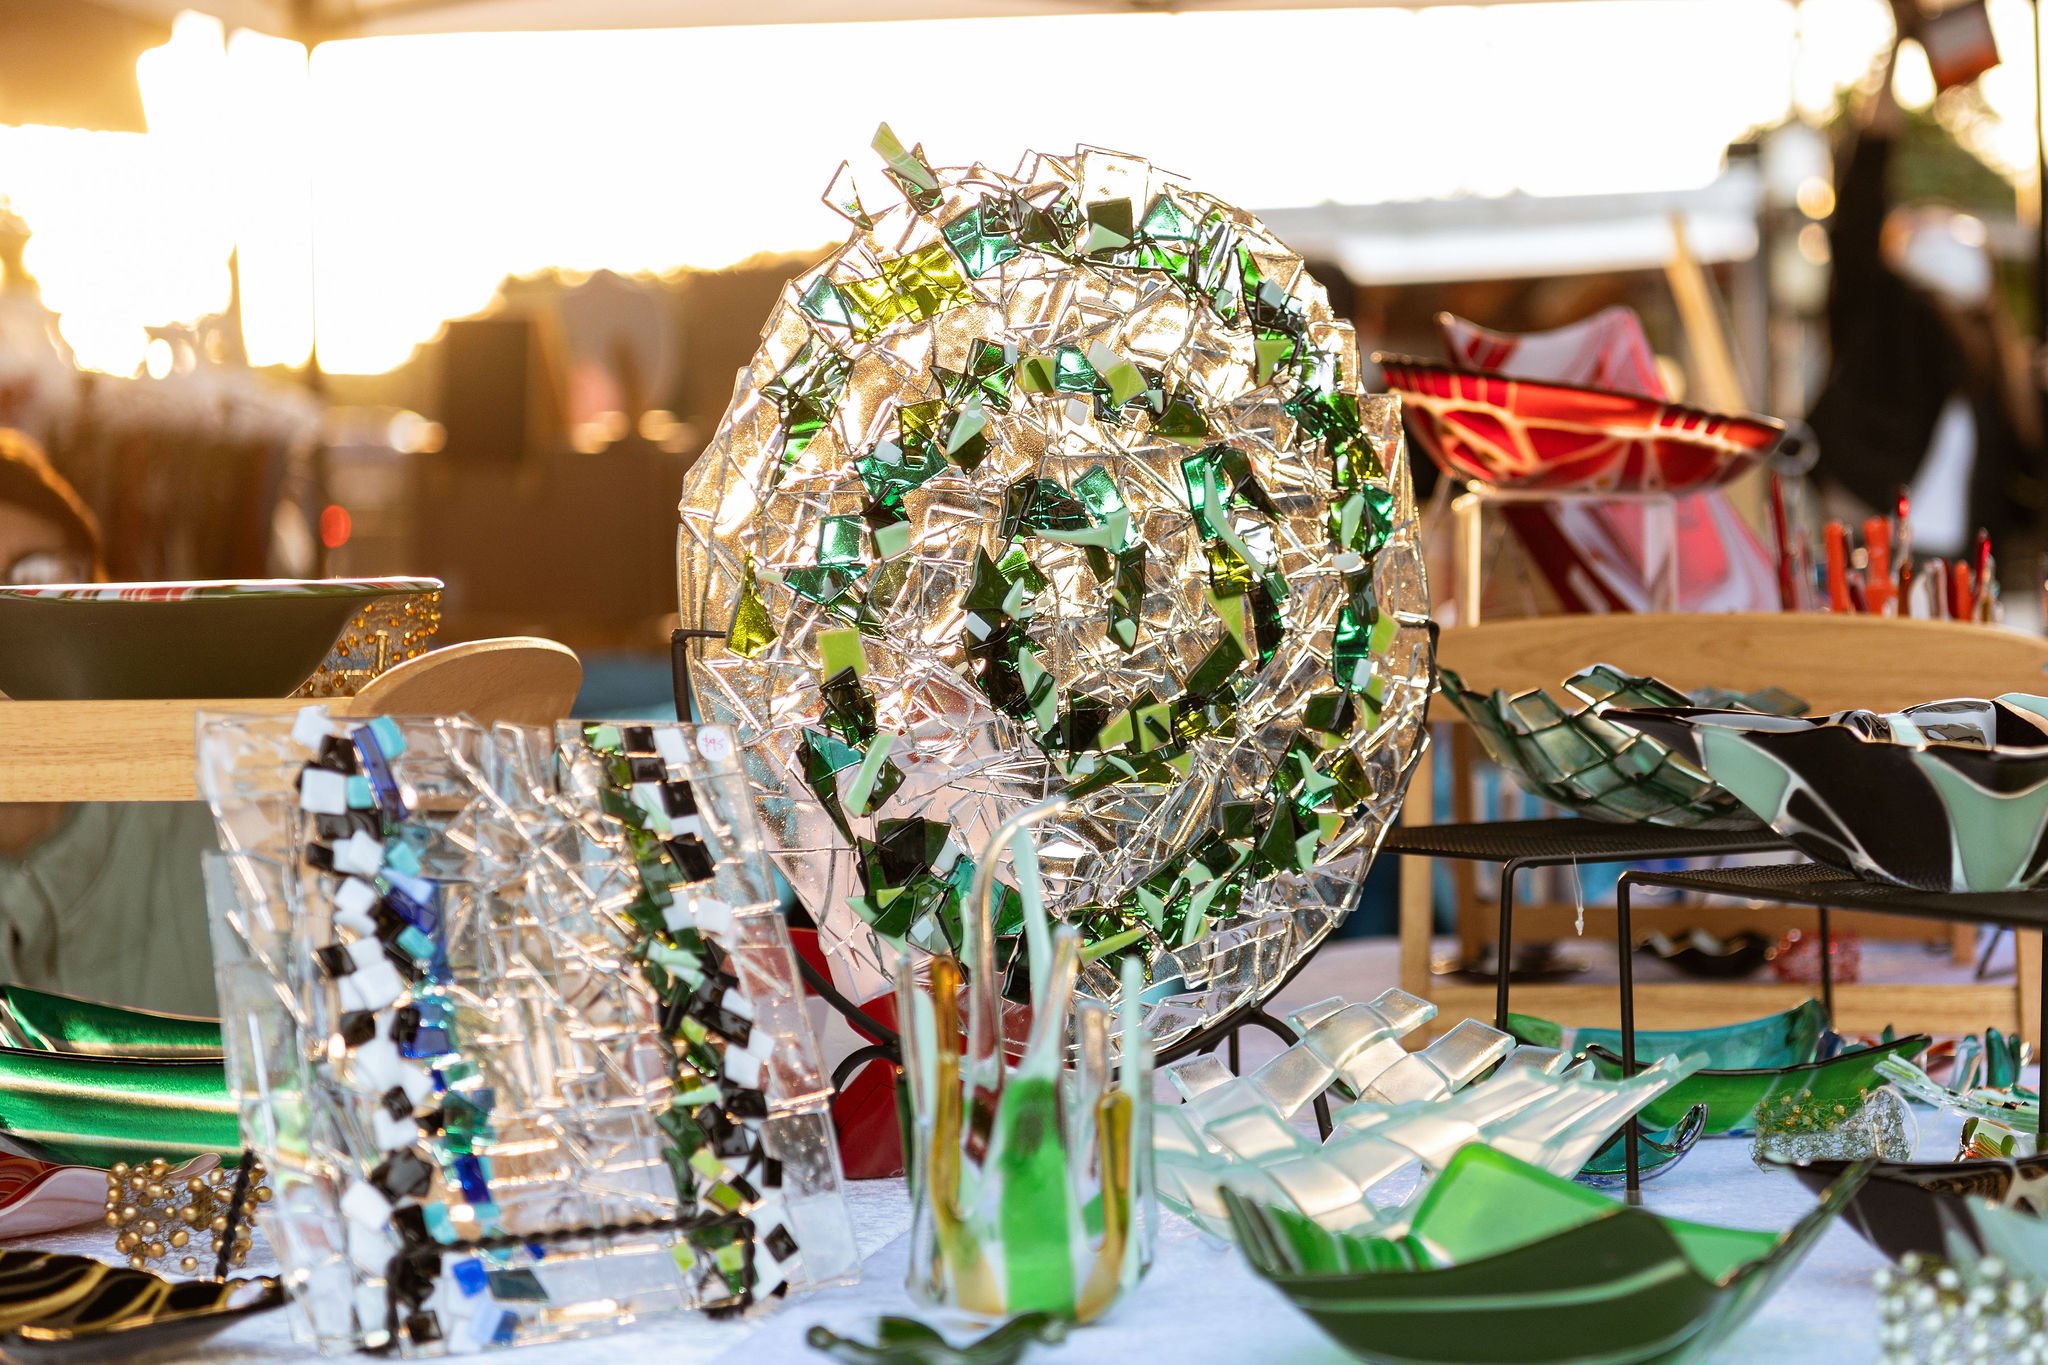
Levels: You only have a small space to work with, so make sure that you maximize how you use it. The best way to do this is to introduce levels. Display your products on blocks, stands, hooks, platforms at varying heights. By doing this you’ll ensure that your stall seems fuller and there is something interesting to look at at every height.
Use your brand colours: Build your stands, display props, decorative props and signs in the colours you have chosen for your brand. This will not only give your stall visual harmony but help you to build and re-enforce a recognisable brand.
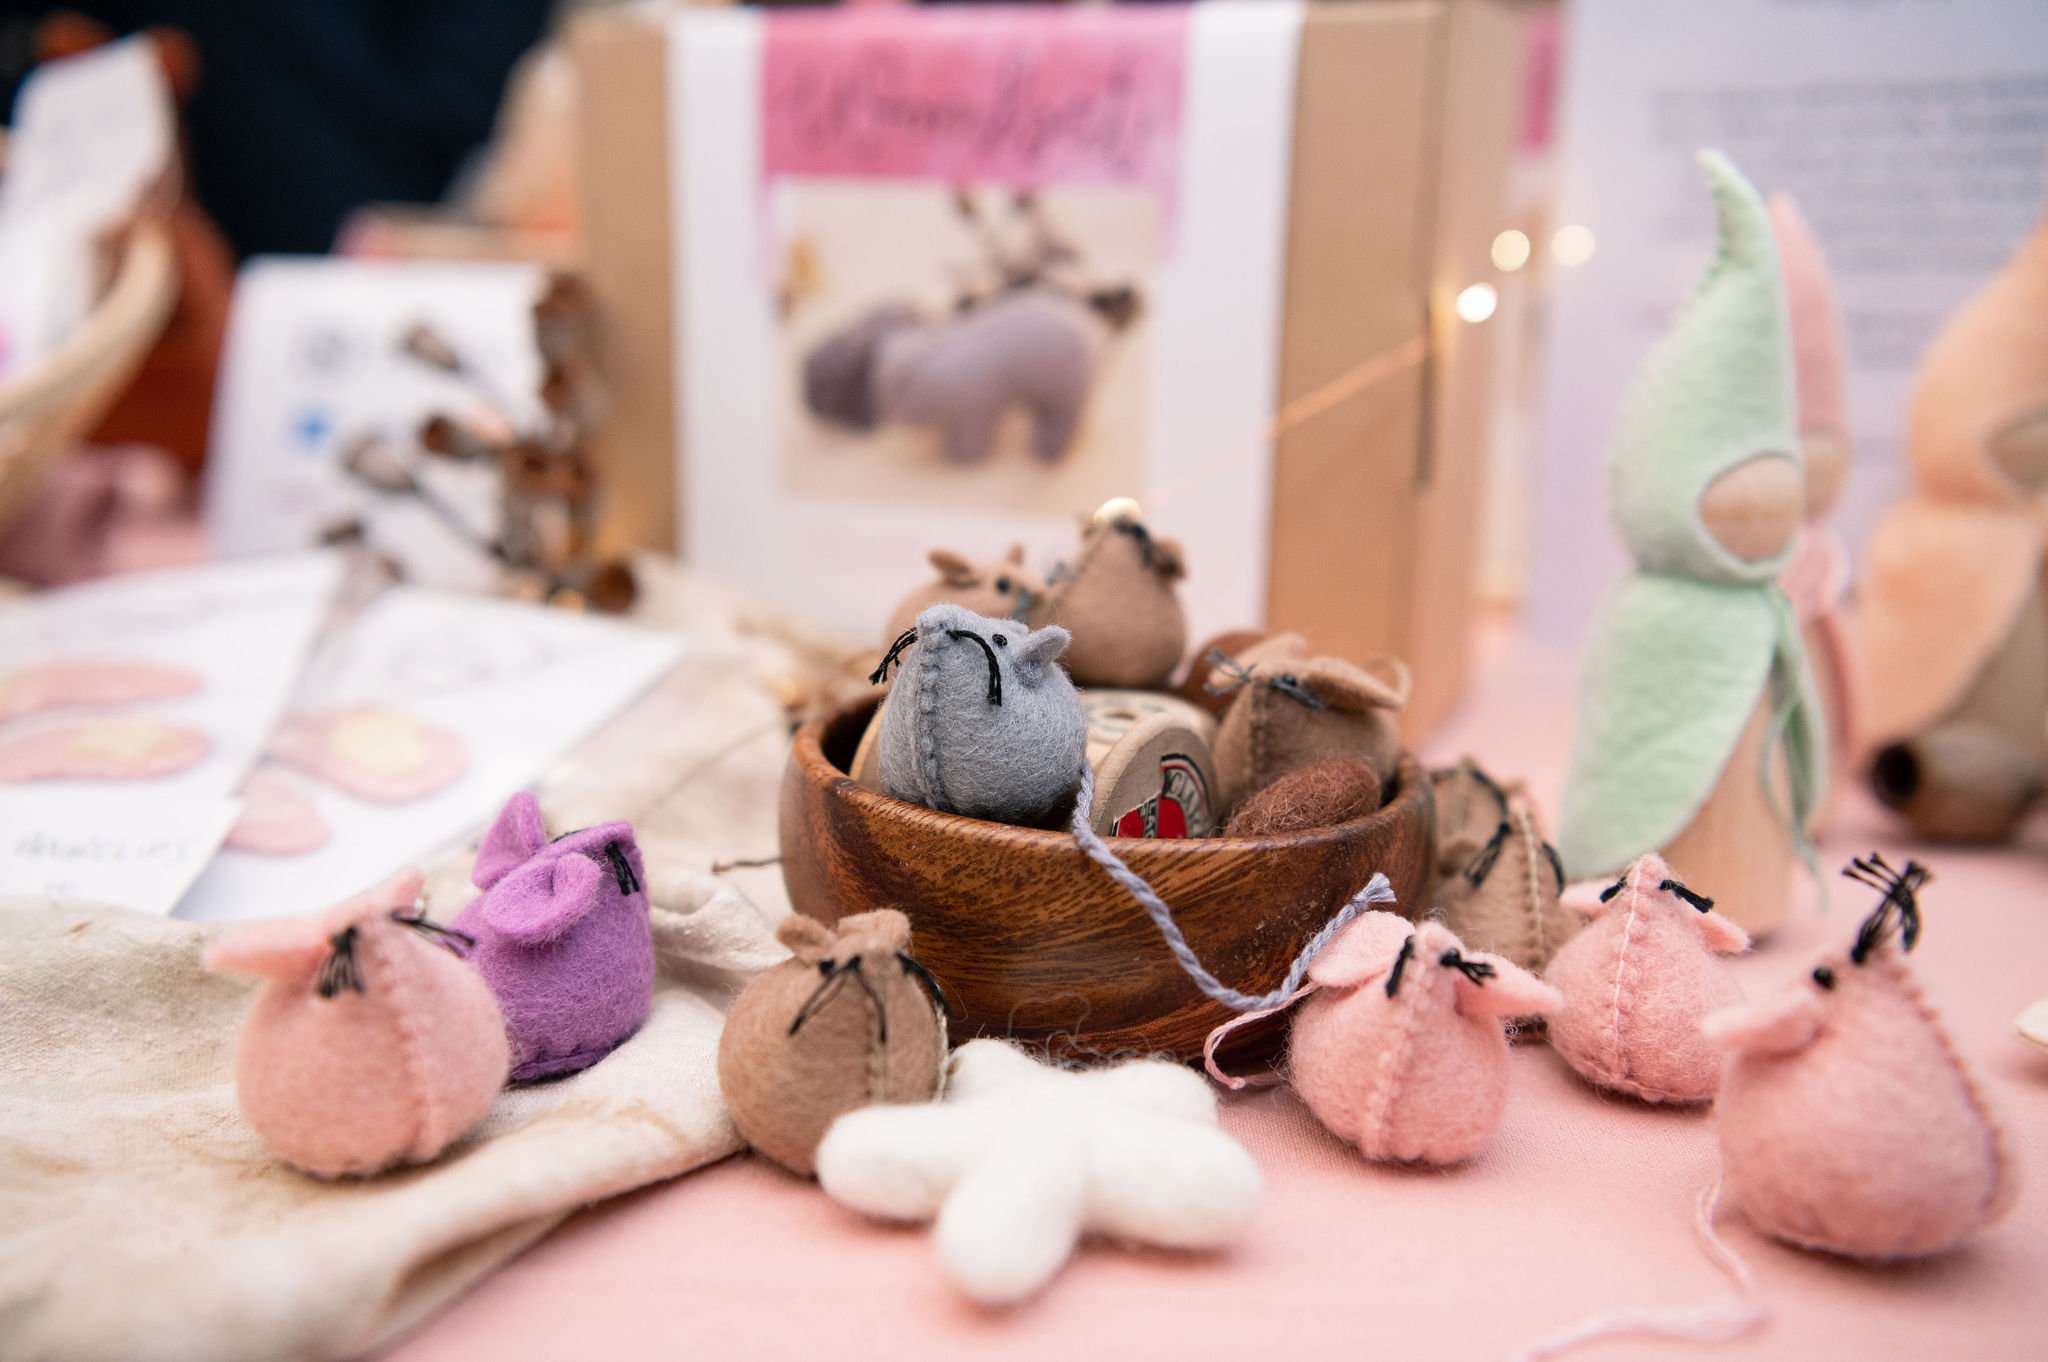
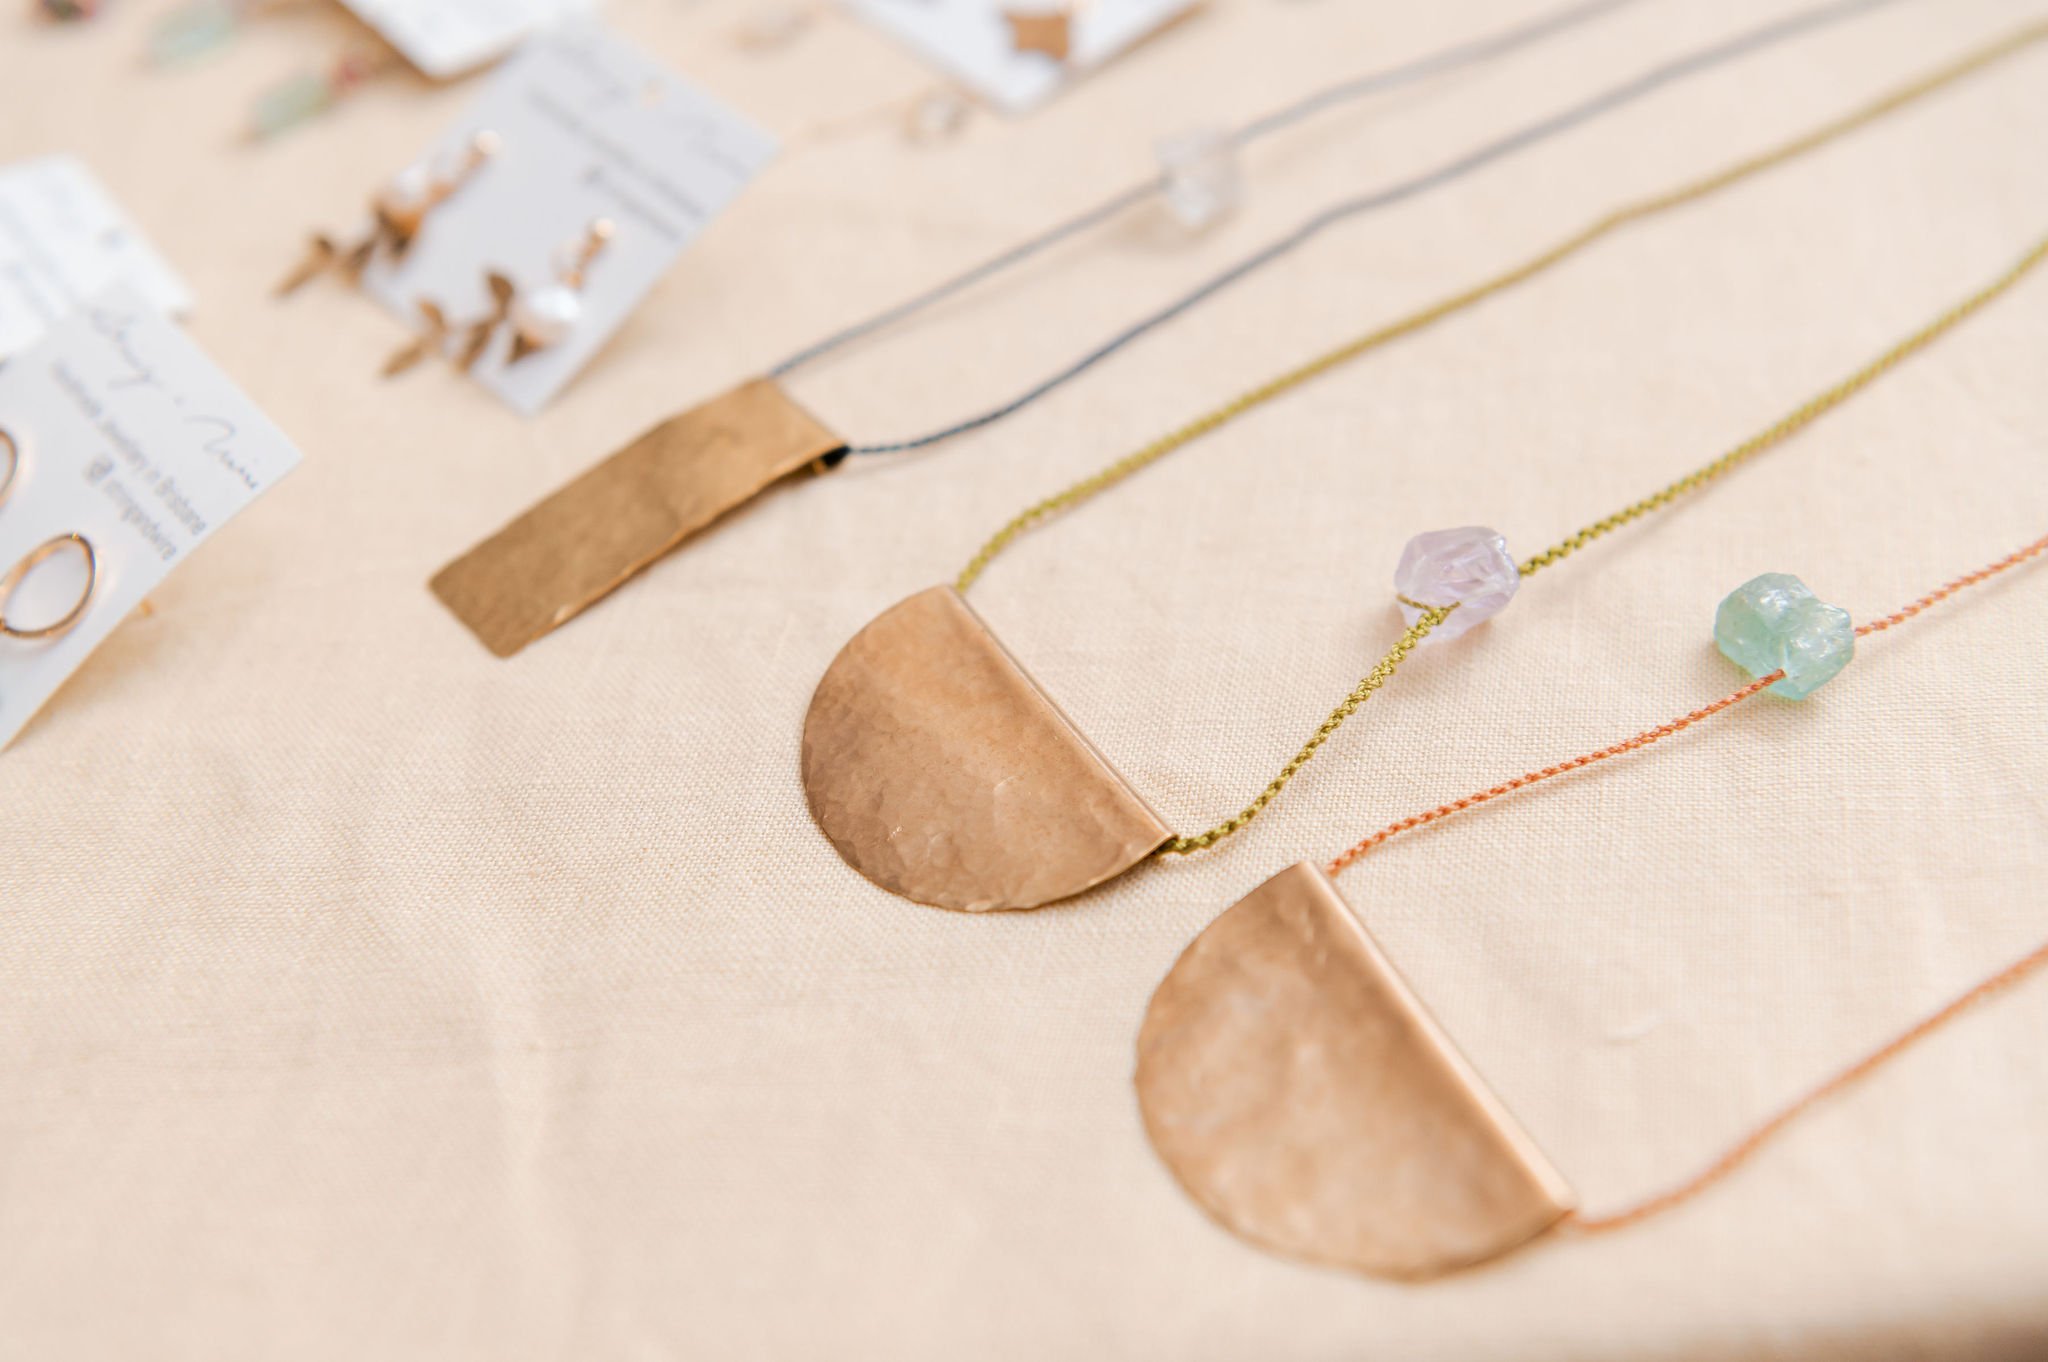
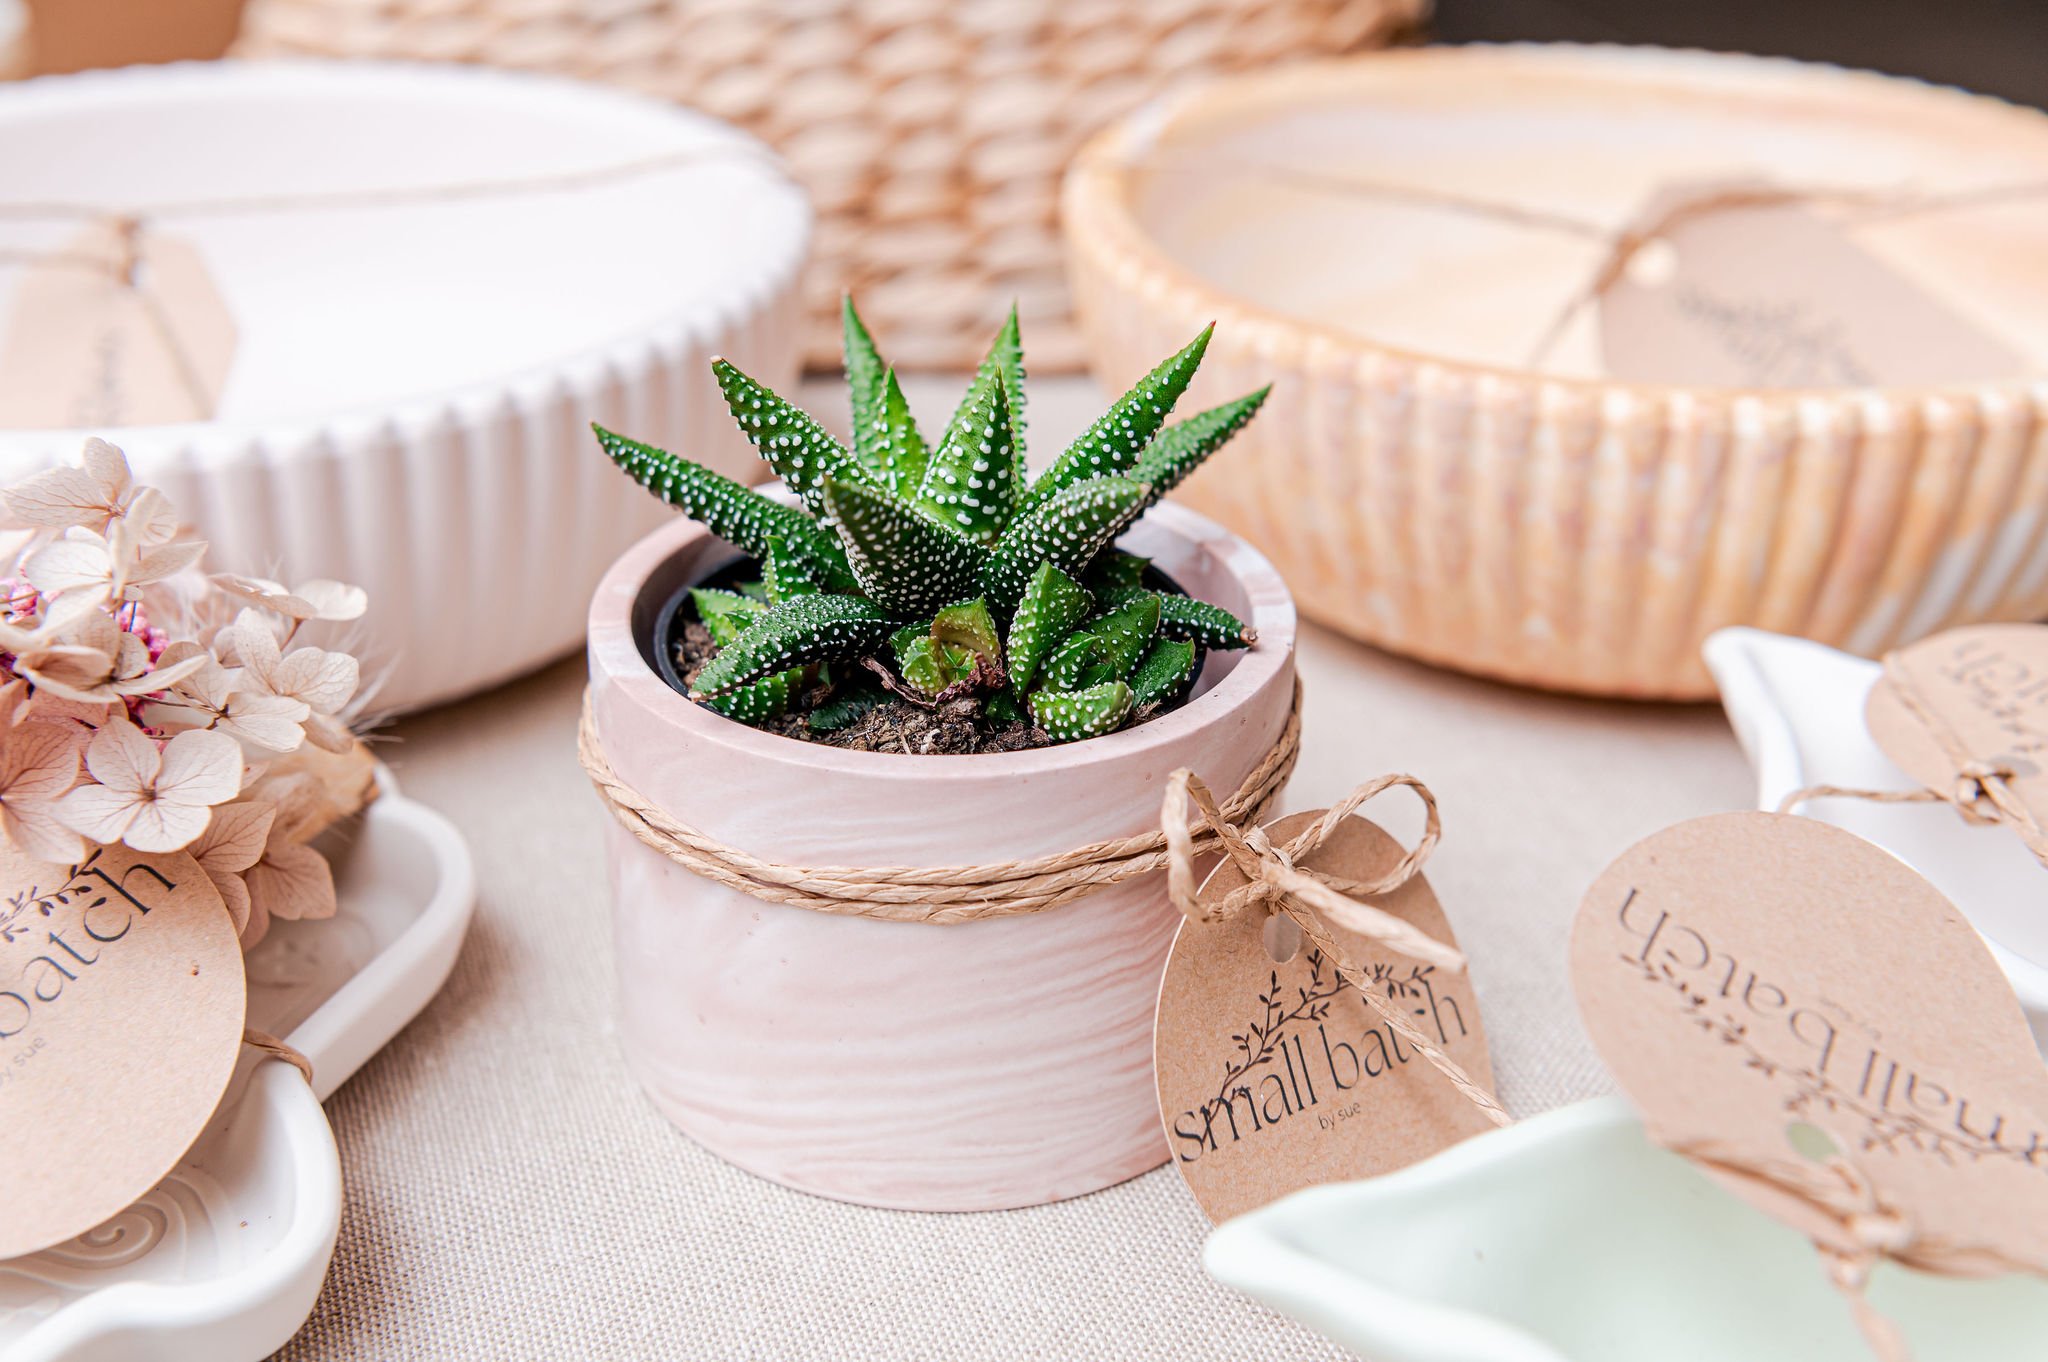
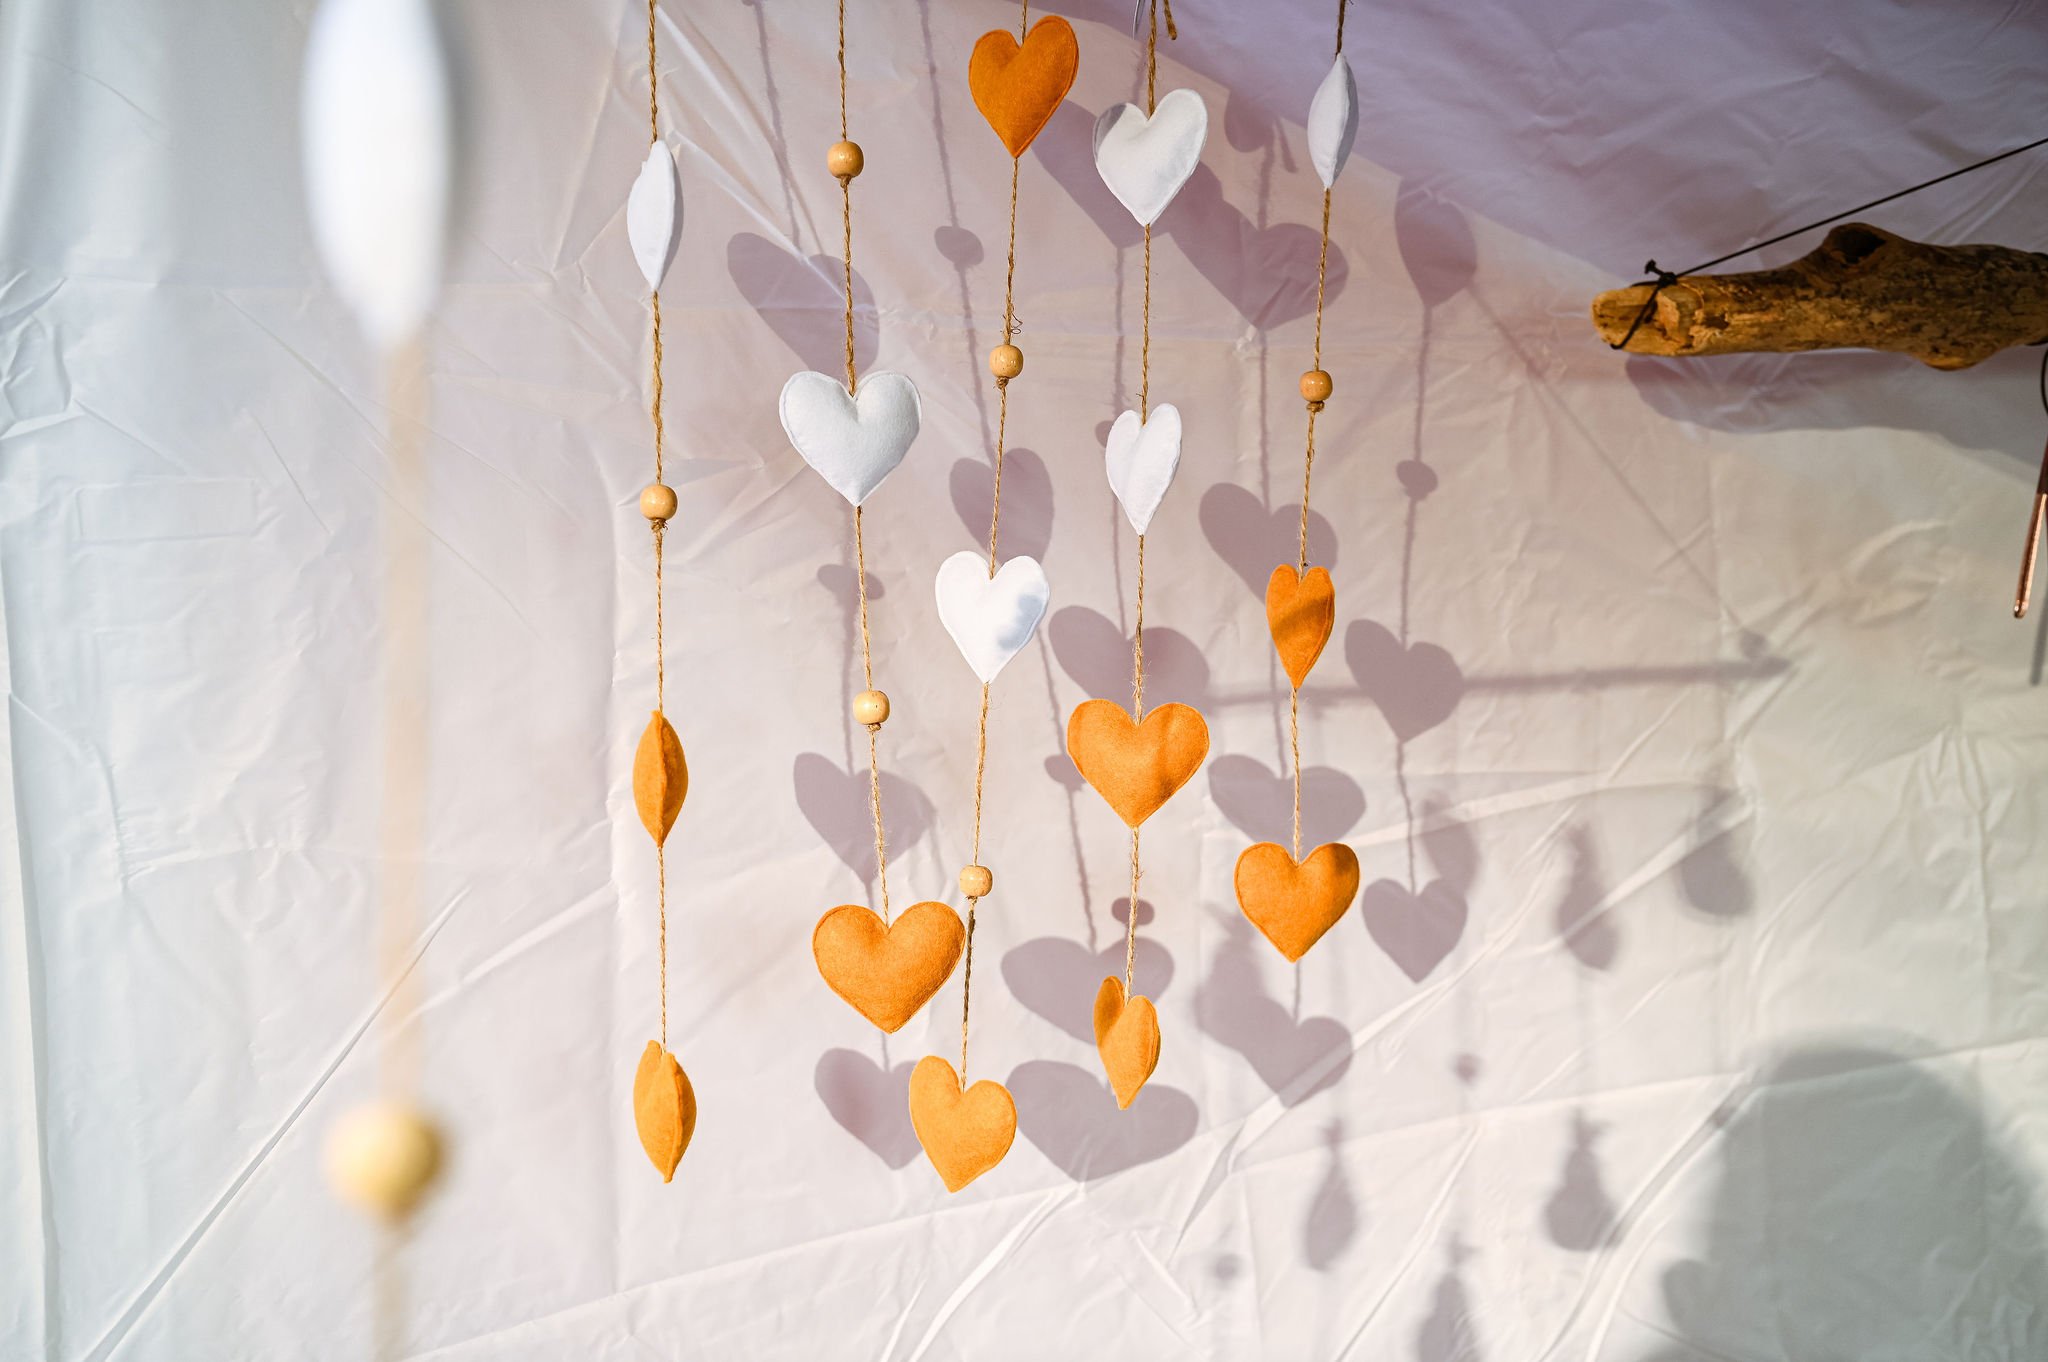
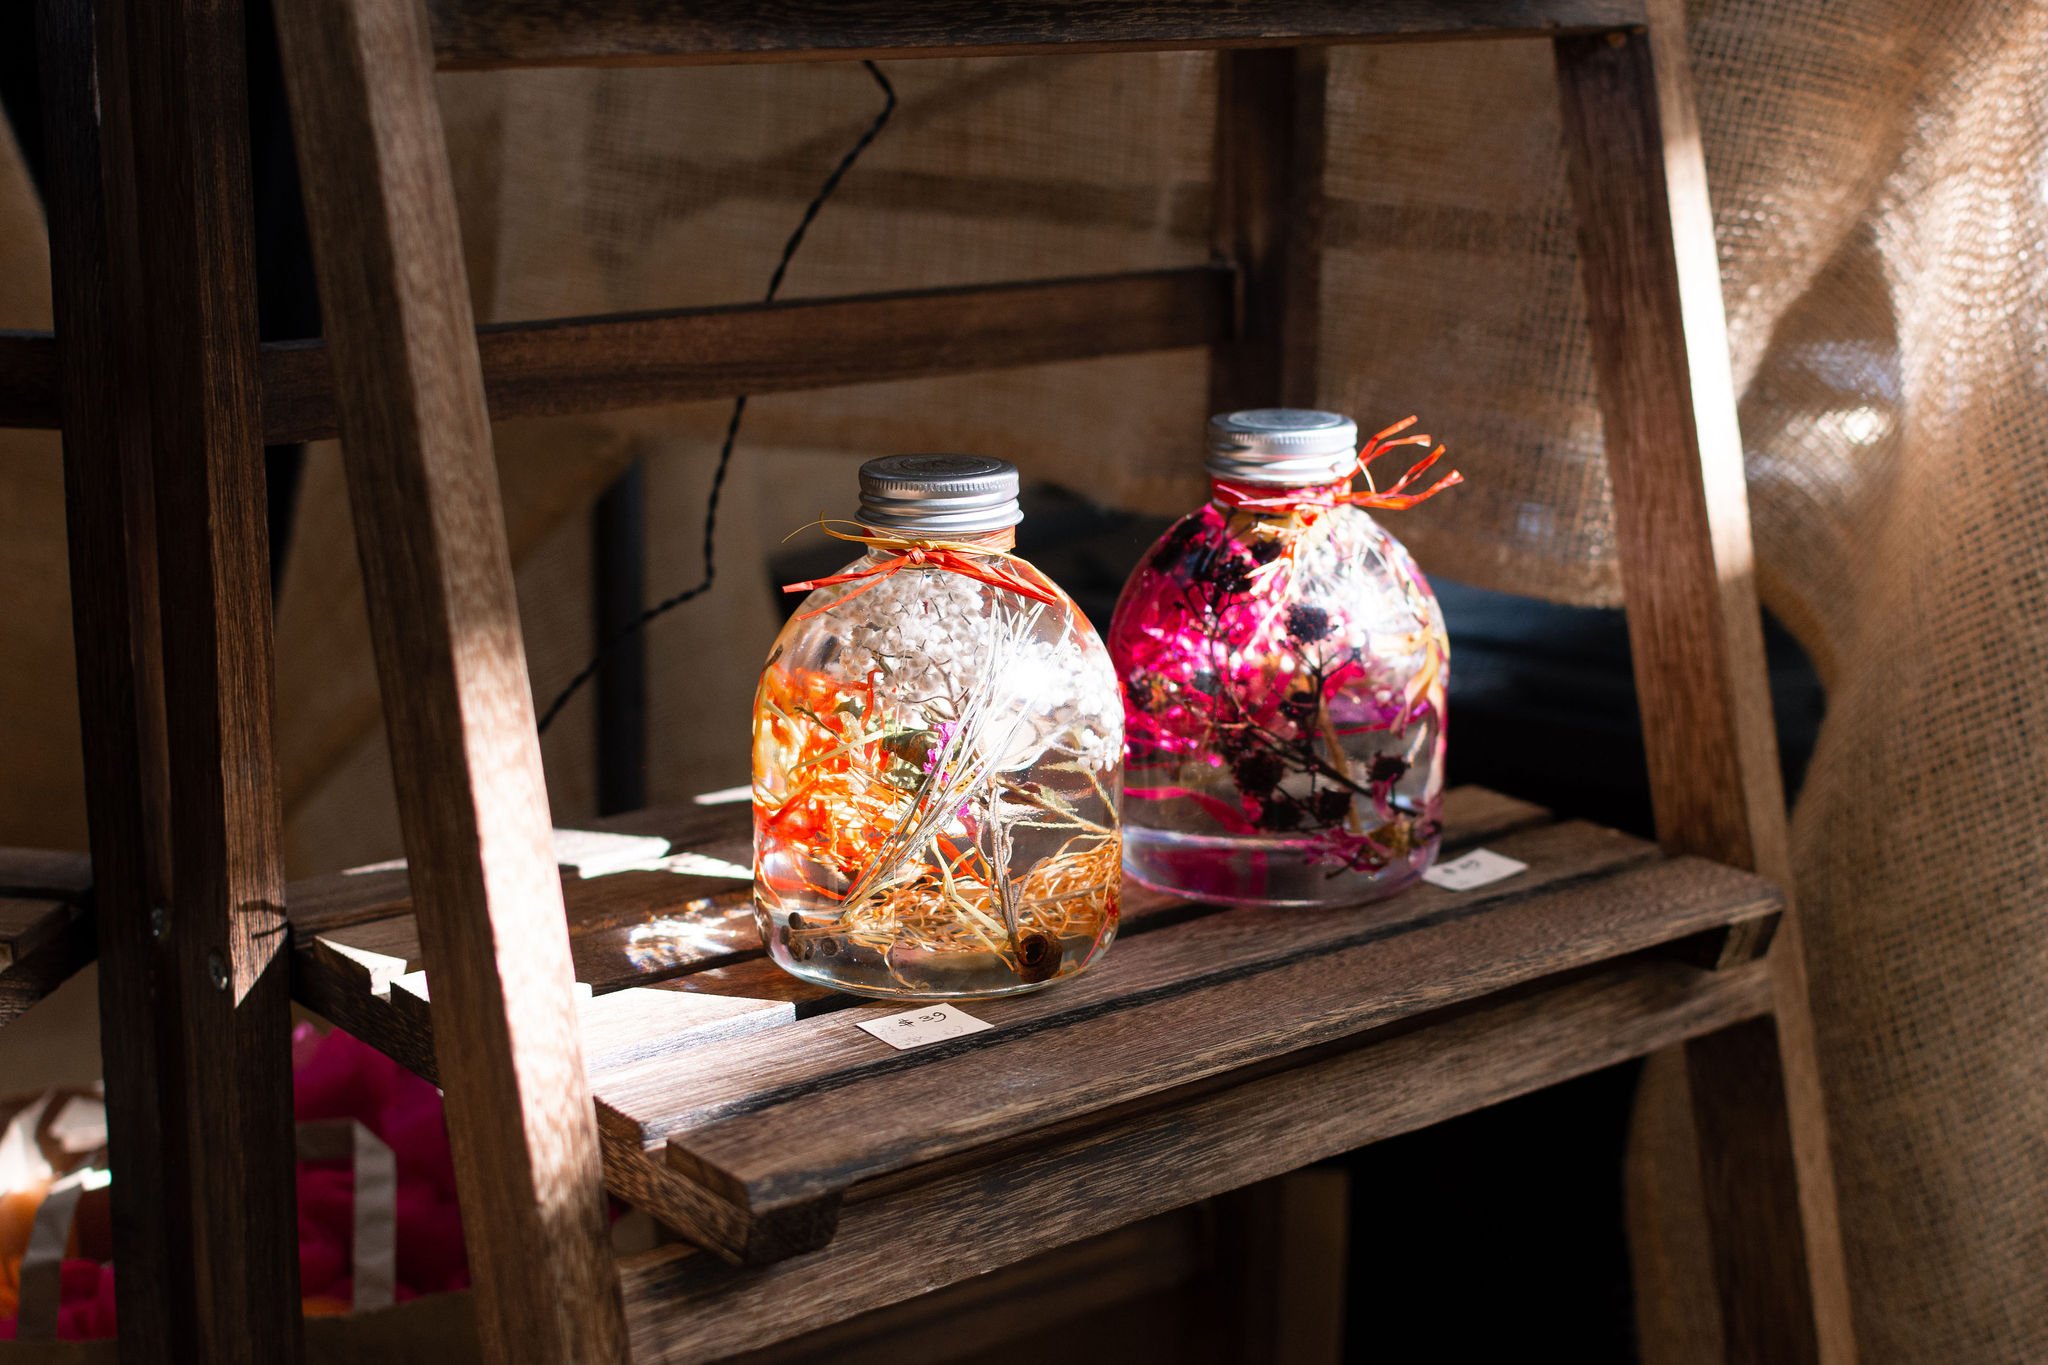
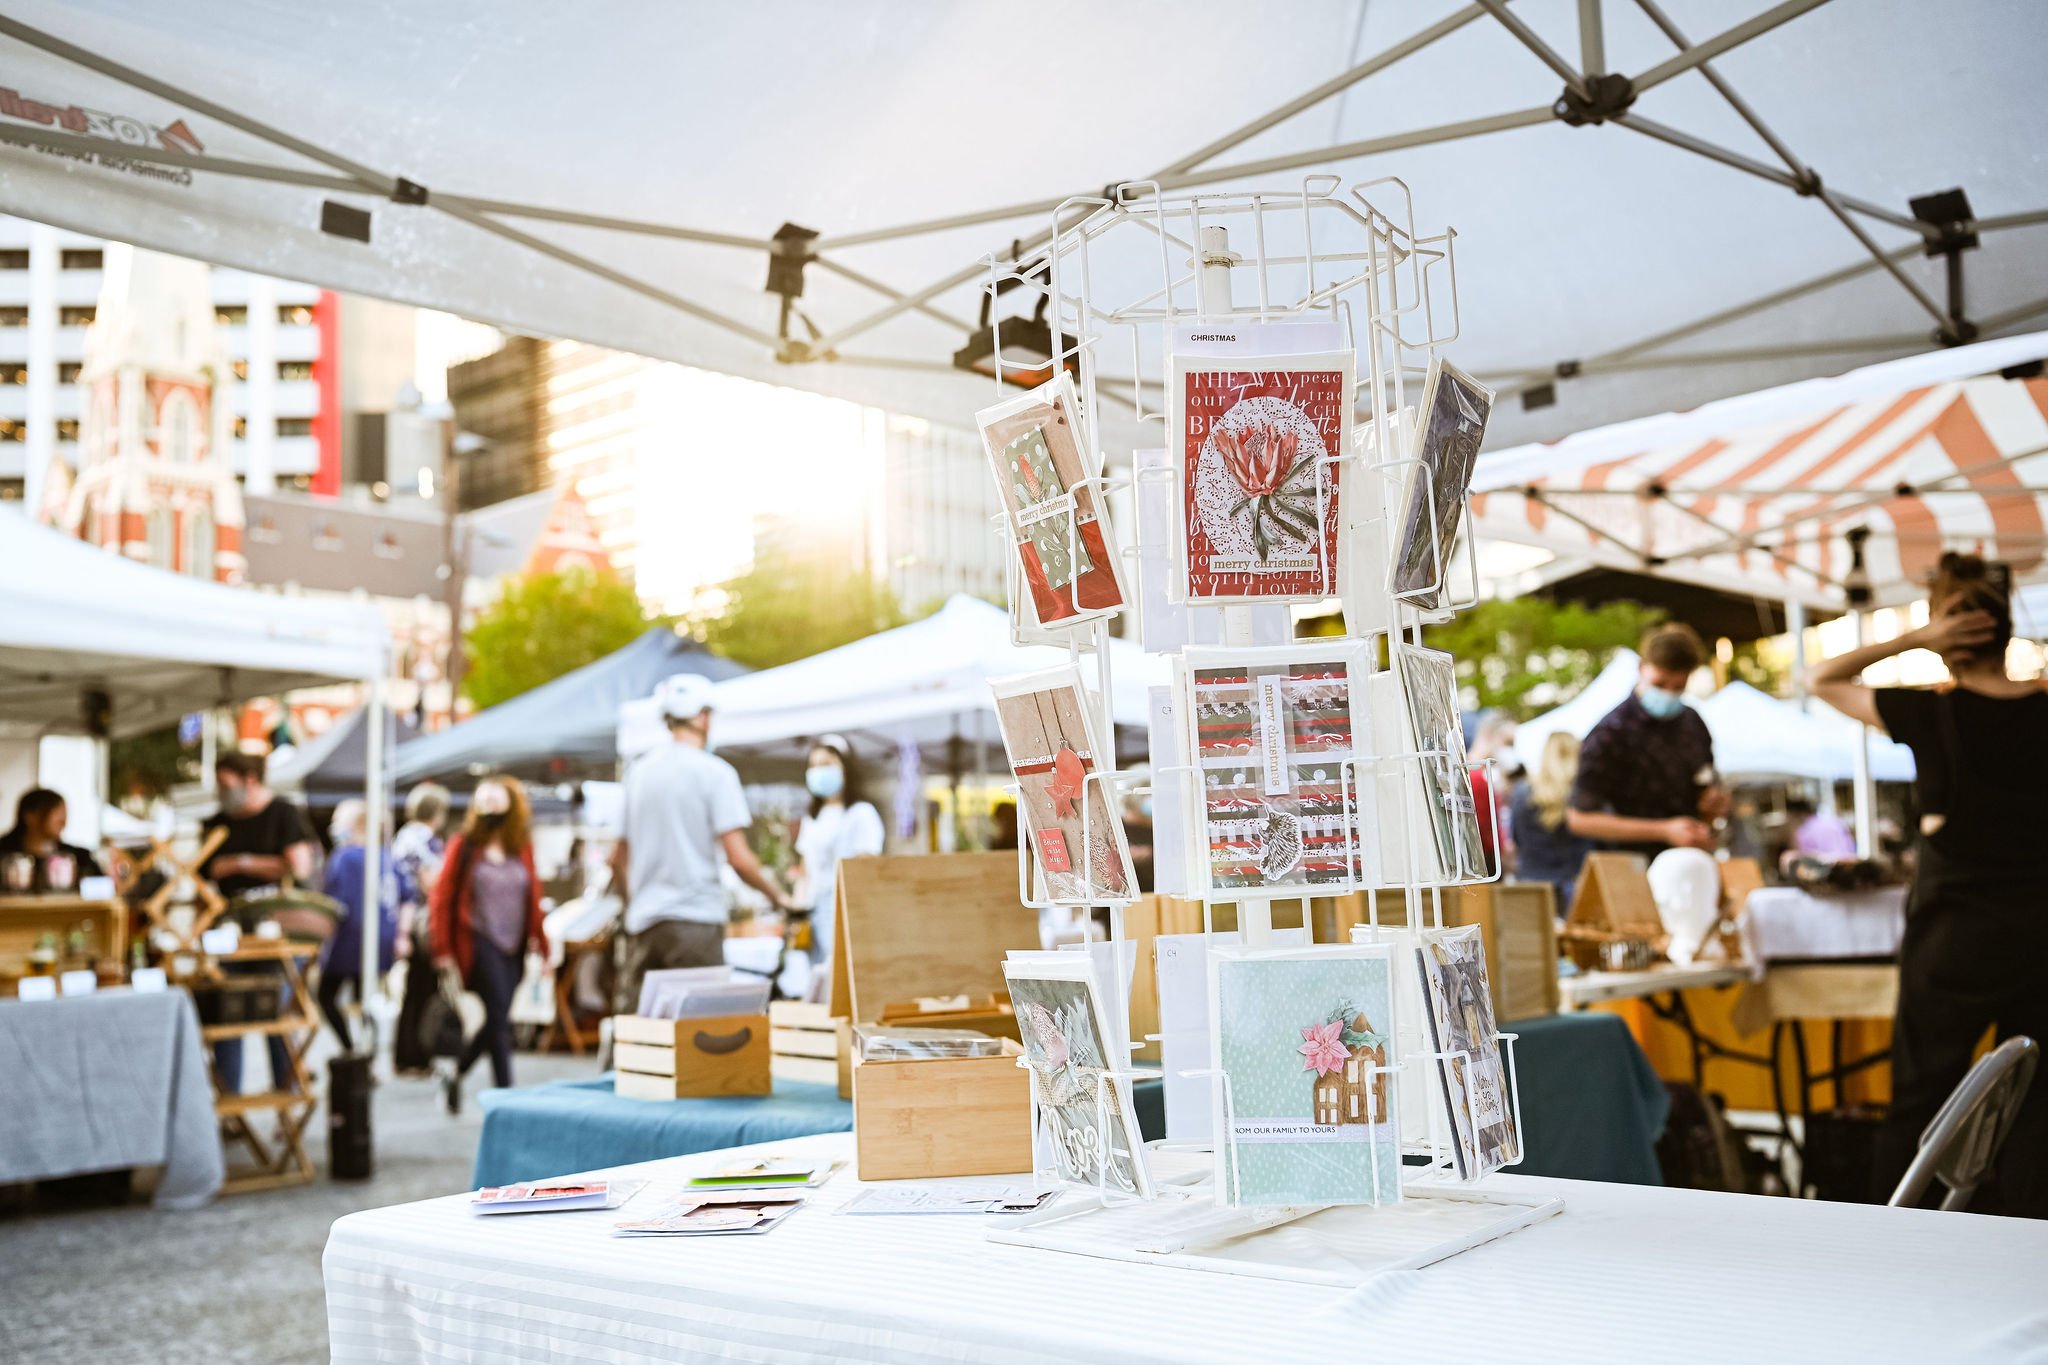
Add decorative props: Pick objects which support your products but wont steal the spotlight. Things like flowers, plants, mirrors and textured props like material and stones are great choices. Remember to keep your colour story strong and only use props that reinforce or work in harmony with your brand colours.

Do a test run
Once you have done all this you should have created the perfect market stall AND product photography set! Its a good idea to do a test run of your stall at home before the market.
Pick a location/time of day with beautiful light. Set up your stall just as you will for the market. Place your largest/ best selling products in the prime locations in your stall. Fill in the spaces with smaller products. Move products and props around until you feel you have a balanced layout.
Now capture some photos of your stall before market day. Crop in nice and close so that you are only capturing small segments of the stall (avoid getting any backgrounds in your photos - no one needs to know you are at home and not the market :P )
Light & time of day
Markets are busy places. A lot of people are going to pass through your stall and touch your products or move things around - which can end up messing up your meticulously laid out display. So try and get some photos of your stall early in the day before the hoards of people come through.
First thing after your setup can be a good time to take photos. If it is early in the day the light tends to be soft and angular and creates good dimension in your images. If you're doing a twilight market the late afternoon rays (just before sunset) will also give you this soft angular light. This time of day the rays will be very golden and warm.
Try to avoid taking photos in the middle of the day when the sun is highest in the sky as this is when the light will be the most harsh.
Equipment
If your market is outdoors you’ll most probably want to invest in a marque to protect you from the elements. Marques should be white if possible as they will make sure that you get nice white light casting on your products. Coloured marques (particularly blue, green or red) cast a very strong tinted light onto everything inside them and will make it nearly impossible to get a good photograph as well as distort the colours of your products for shoppers.
If the market is indoors in a dark location it can be a good idea to invest in some lights. Again you want to think about the colour temperature of the lights you choose. Household light bulbs cast a very warm yellow light that will cast a colour tint onto your stall. It's best to look for LED lights with temperature settings - ideally a white daylight setting.
Story telling
A market day is a story so be sure to capture the complete narrative through images. Aim to capture one of each of the following images:
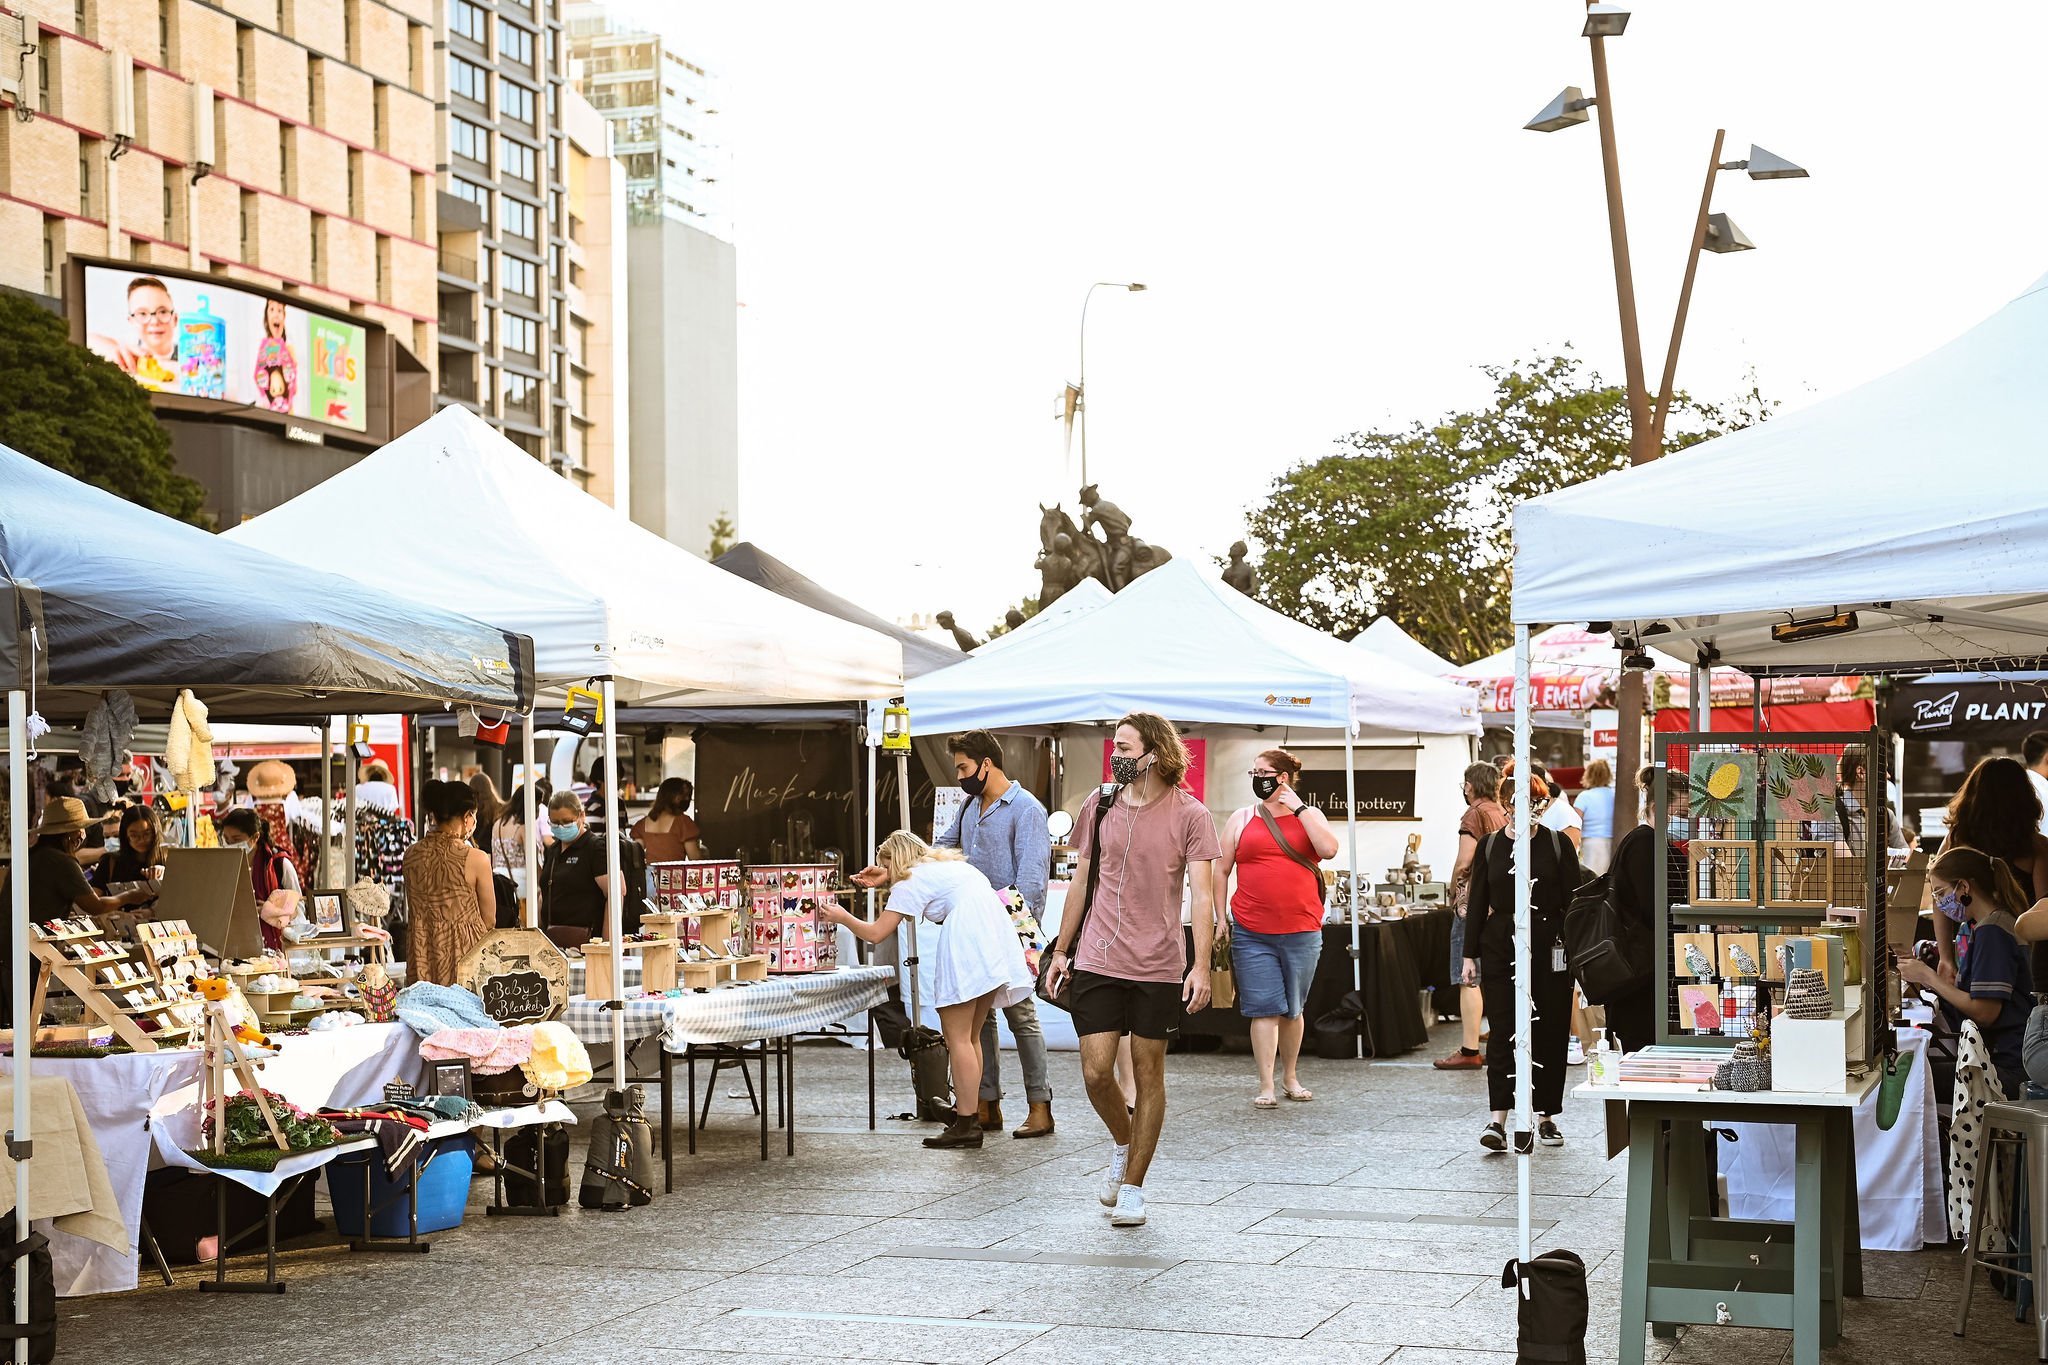
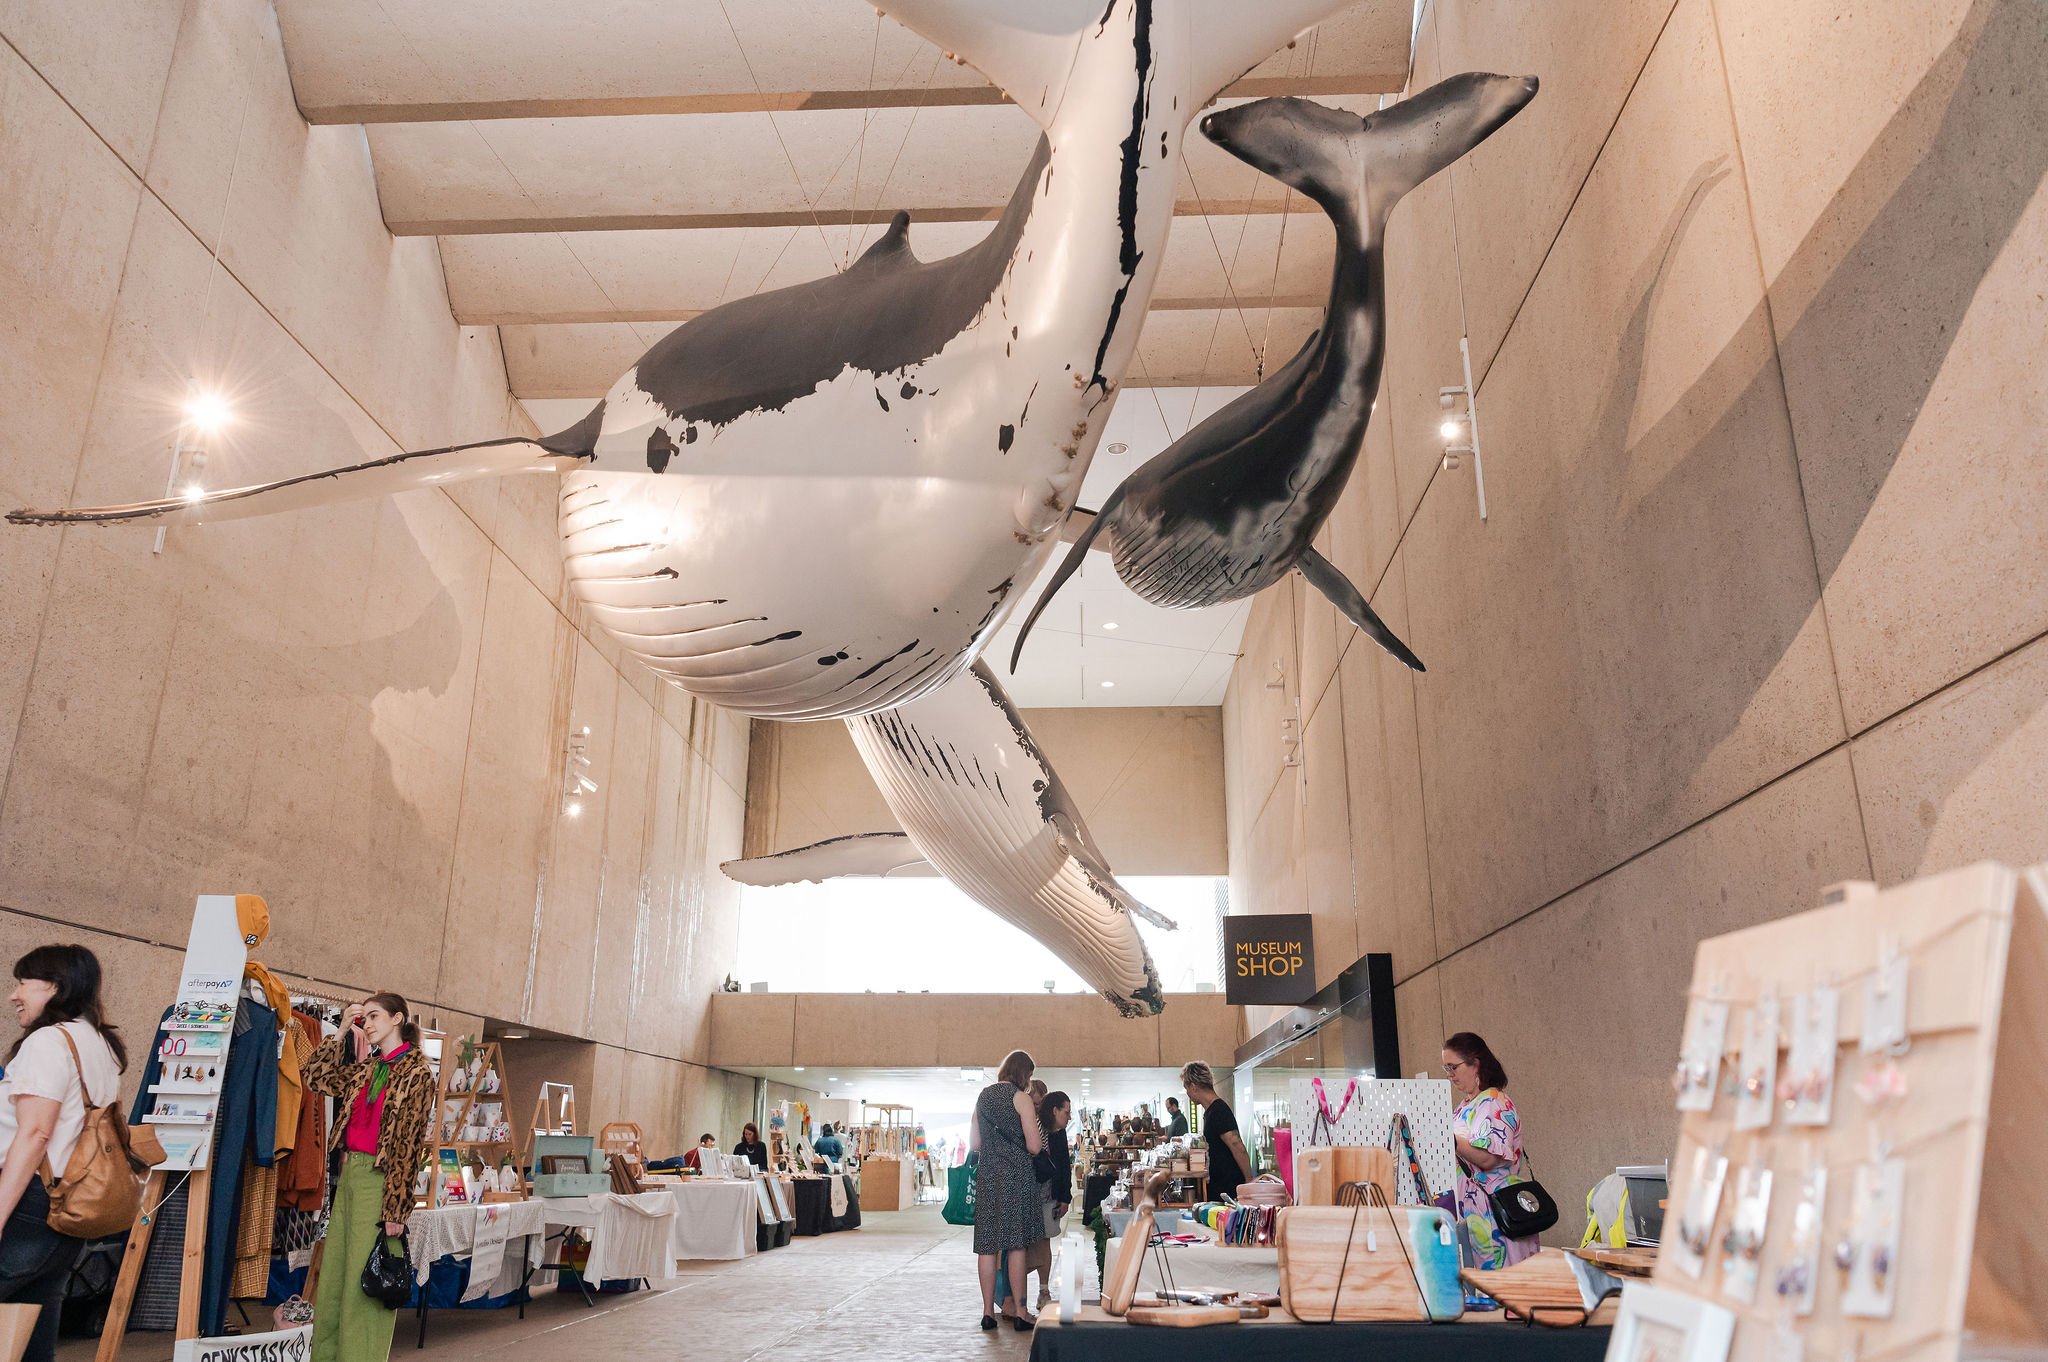
Establishing shot: Set the scene of the day by capturing a wide shot of the location where the market is taking place
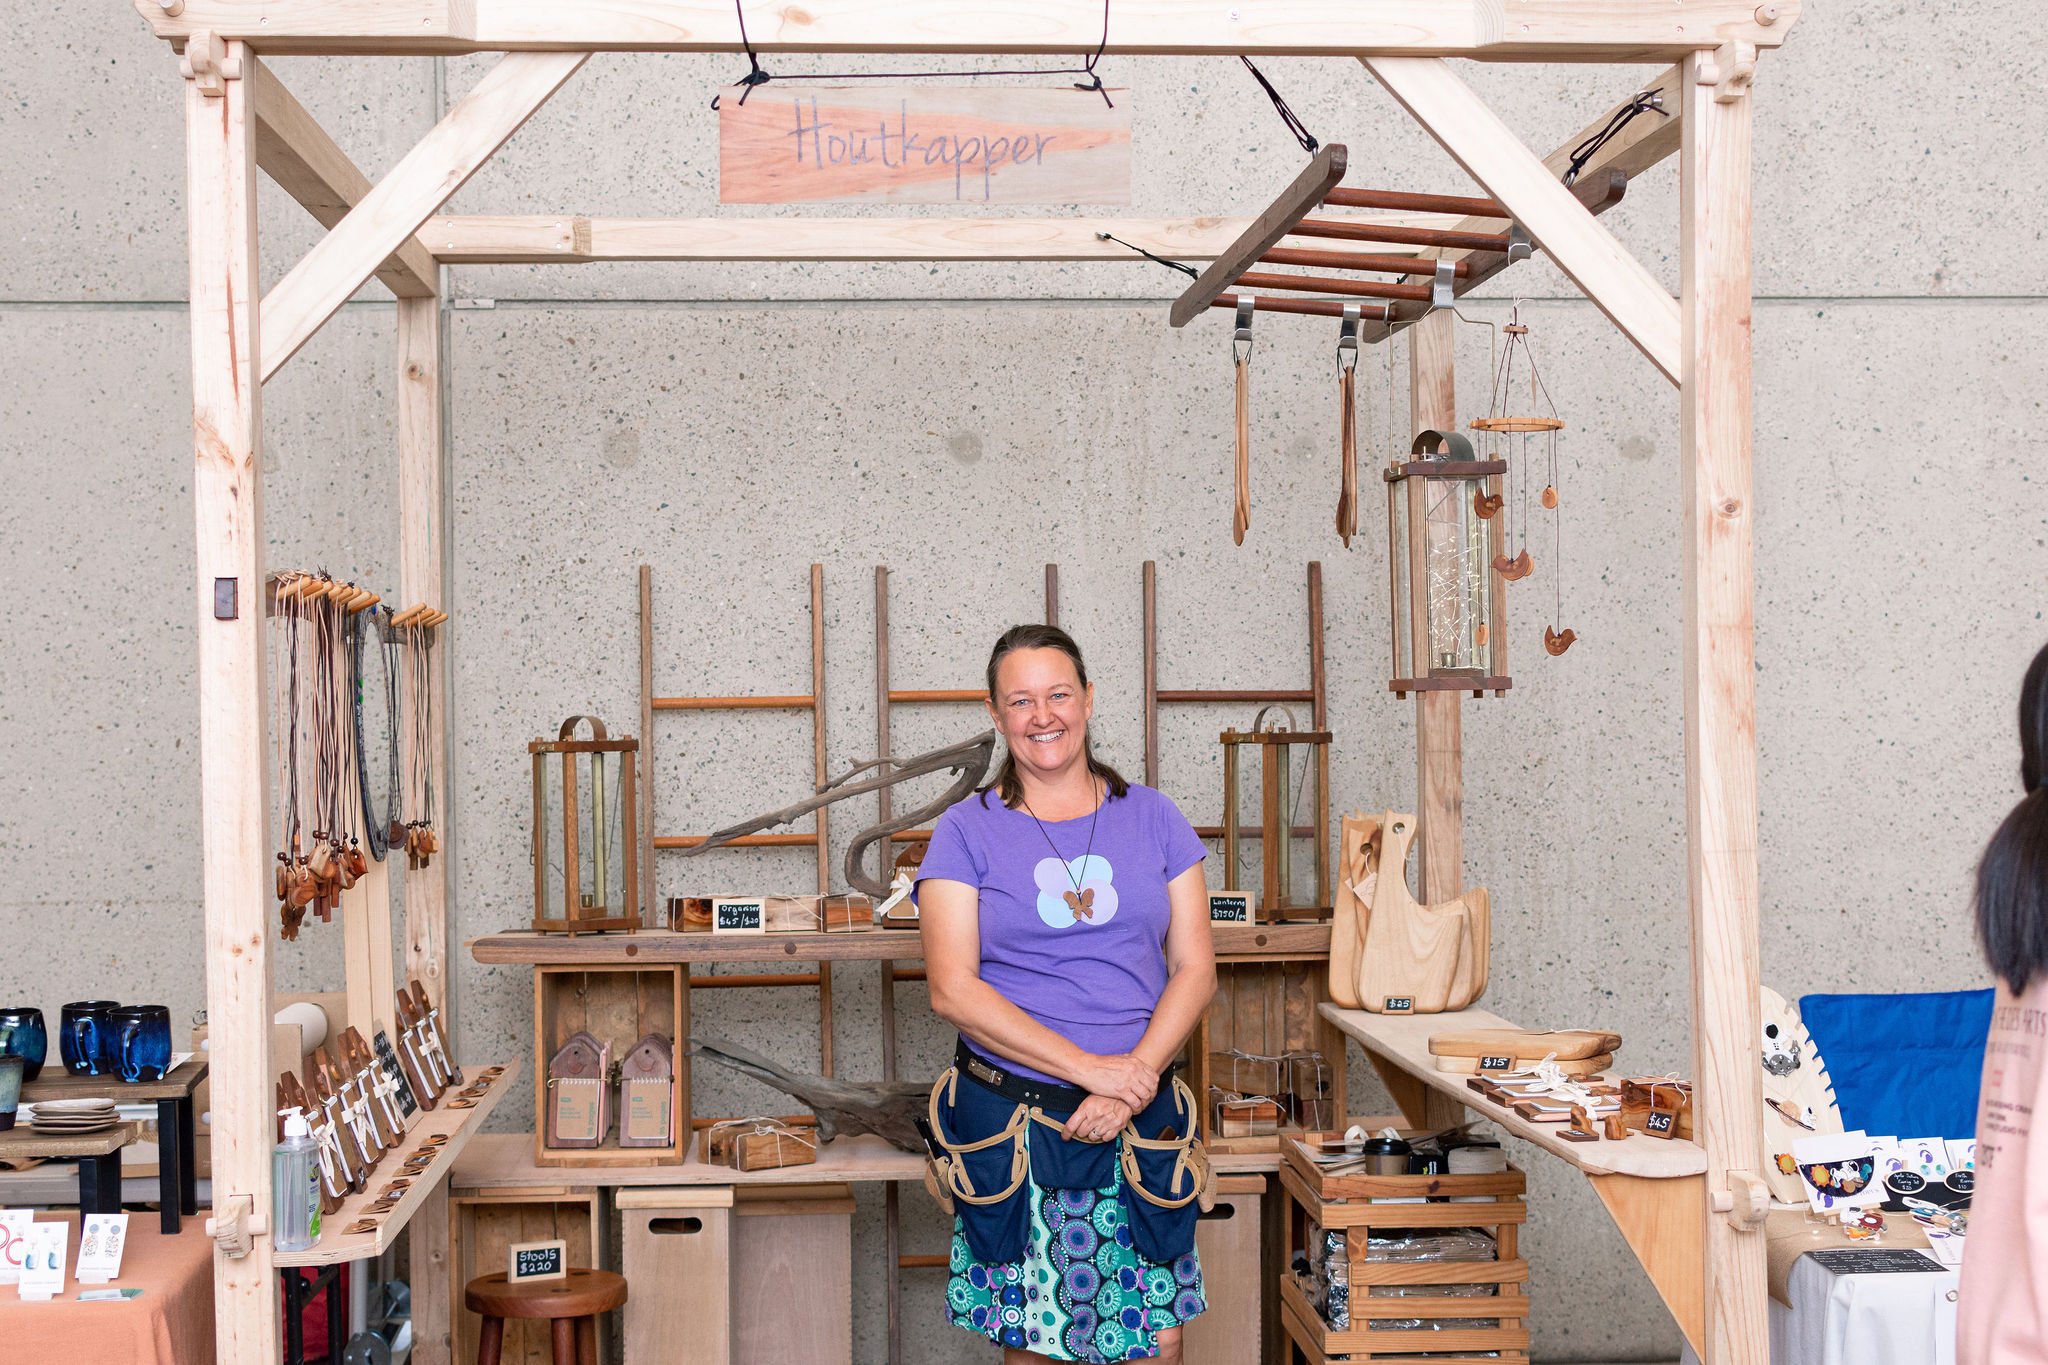
Full shot: This will be of your market stall and generally from square on, allowing your stall to fill the frame while keeping some awareness of the background scenery.
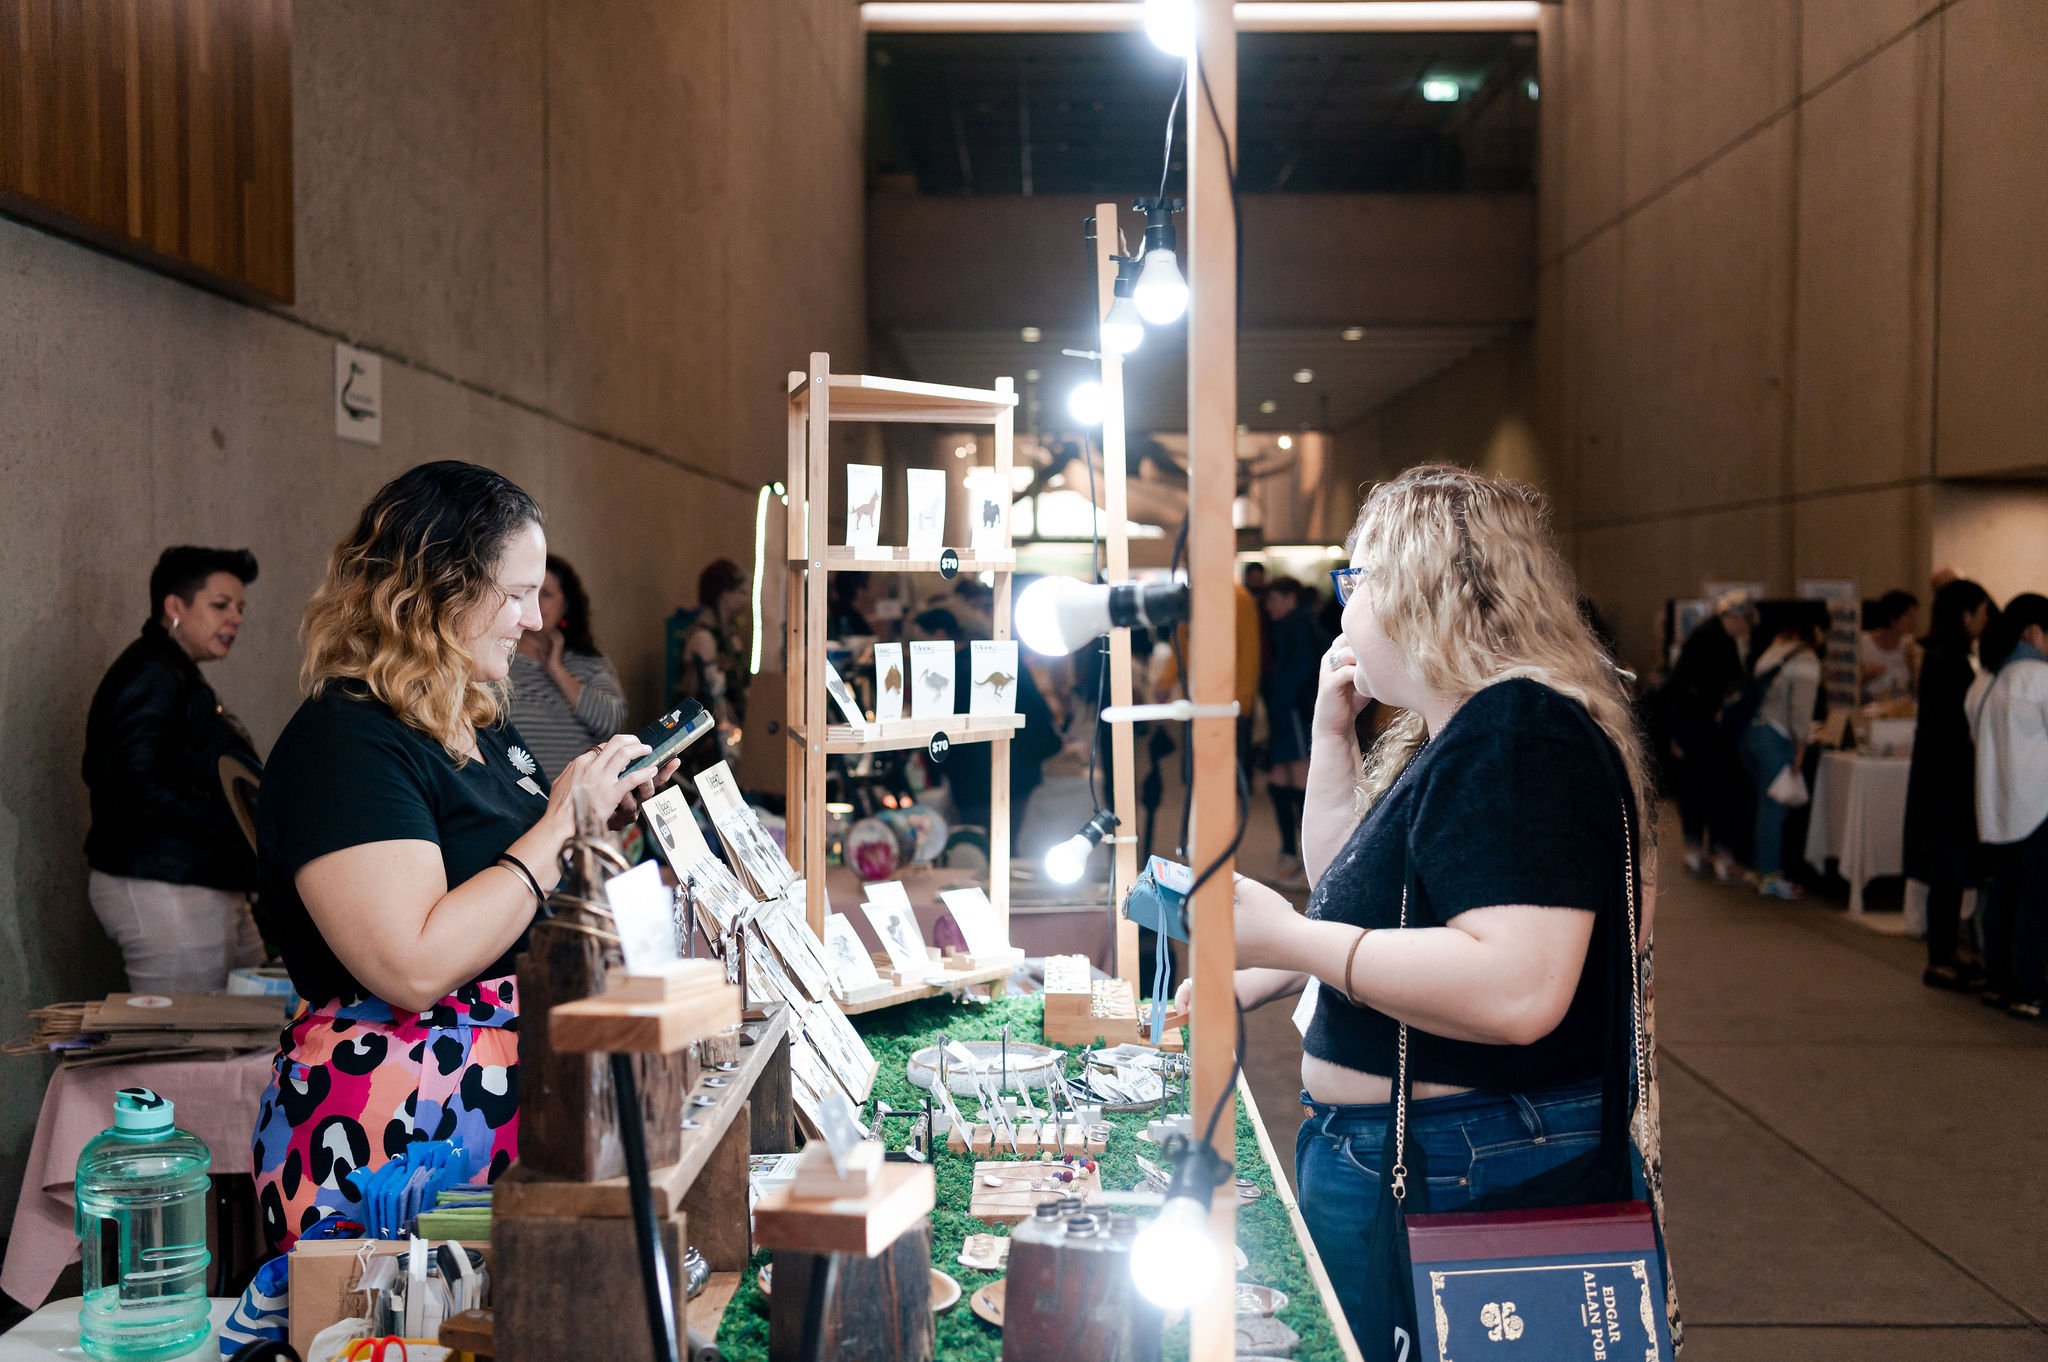
Shoppers: If possible capture some images of people shopping in your stall. It's fantastic if you can also be in the shot chatting and smiling with your shoppers so you might need to make friends with your stall neighbours and get their help with this one.
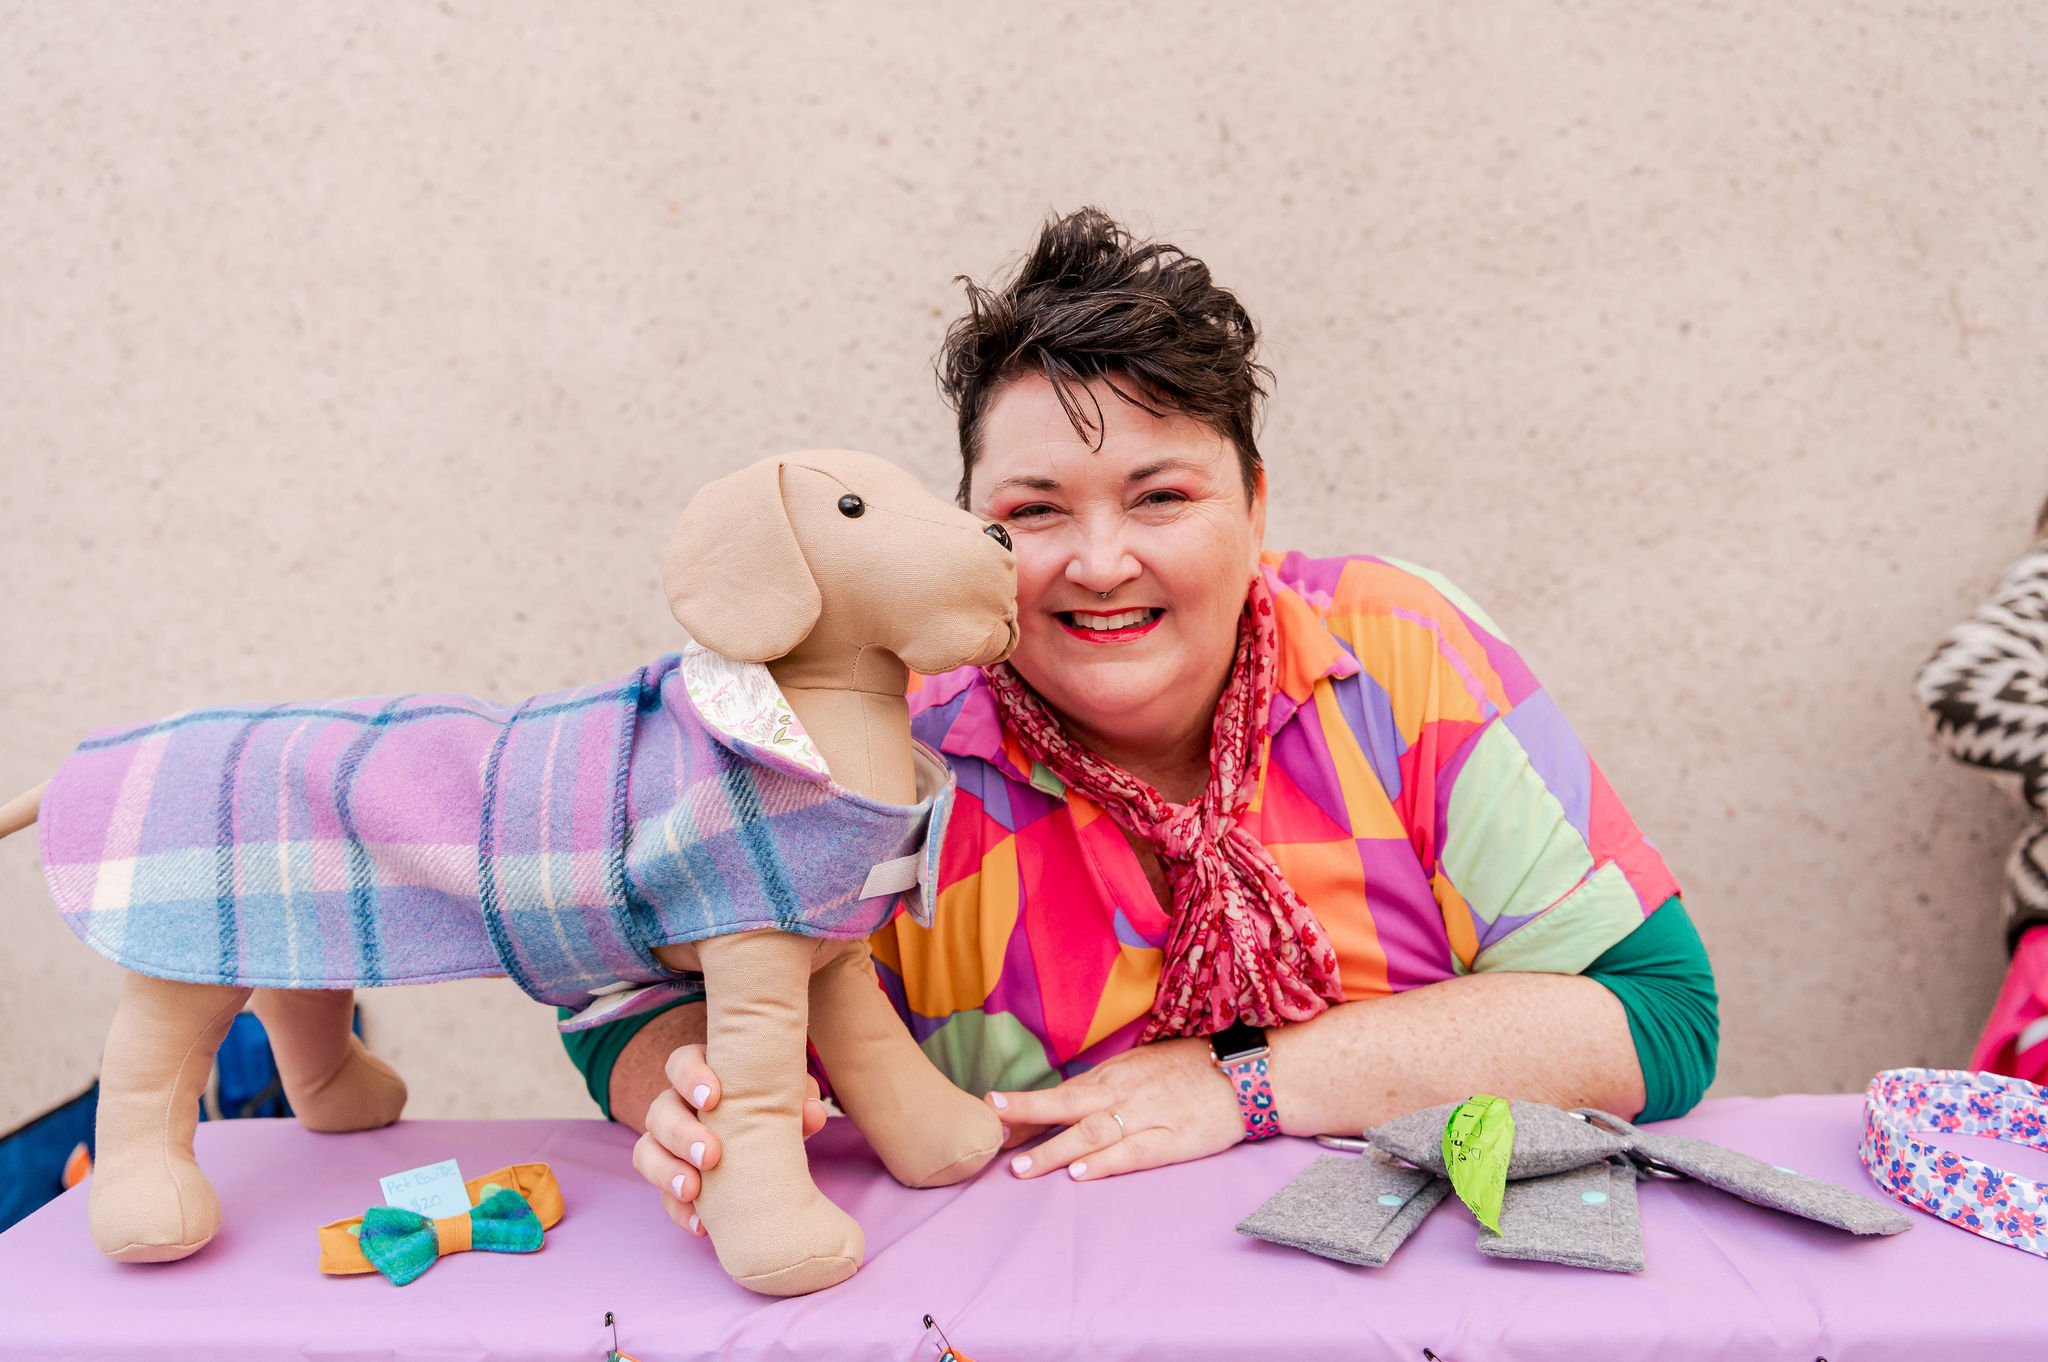
A Portrait: Again this is one that you will need to get the assistance of a friend or neighbour for this one. It's a good idea to take this shot at the start of the day when you and your stall are looking and feeling fresh.
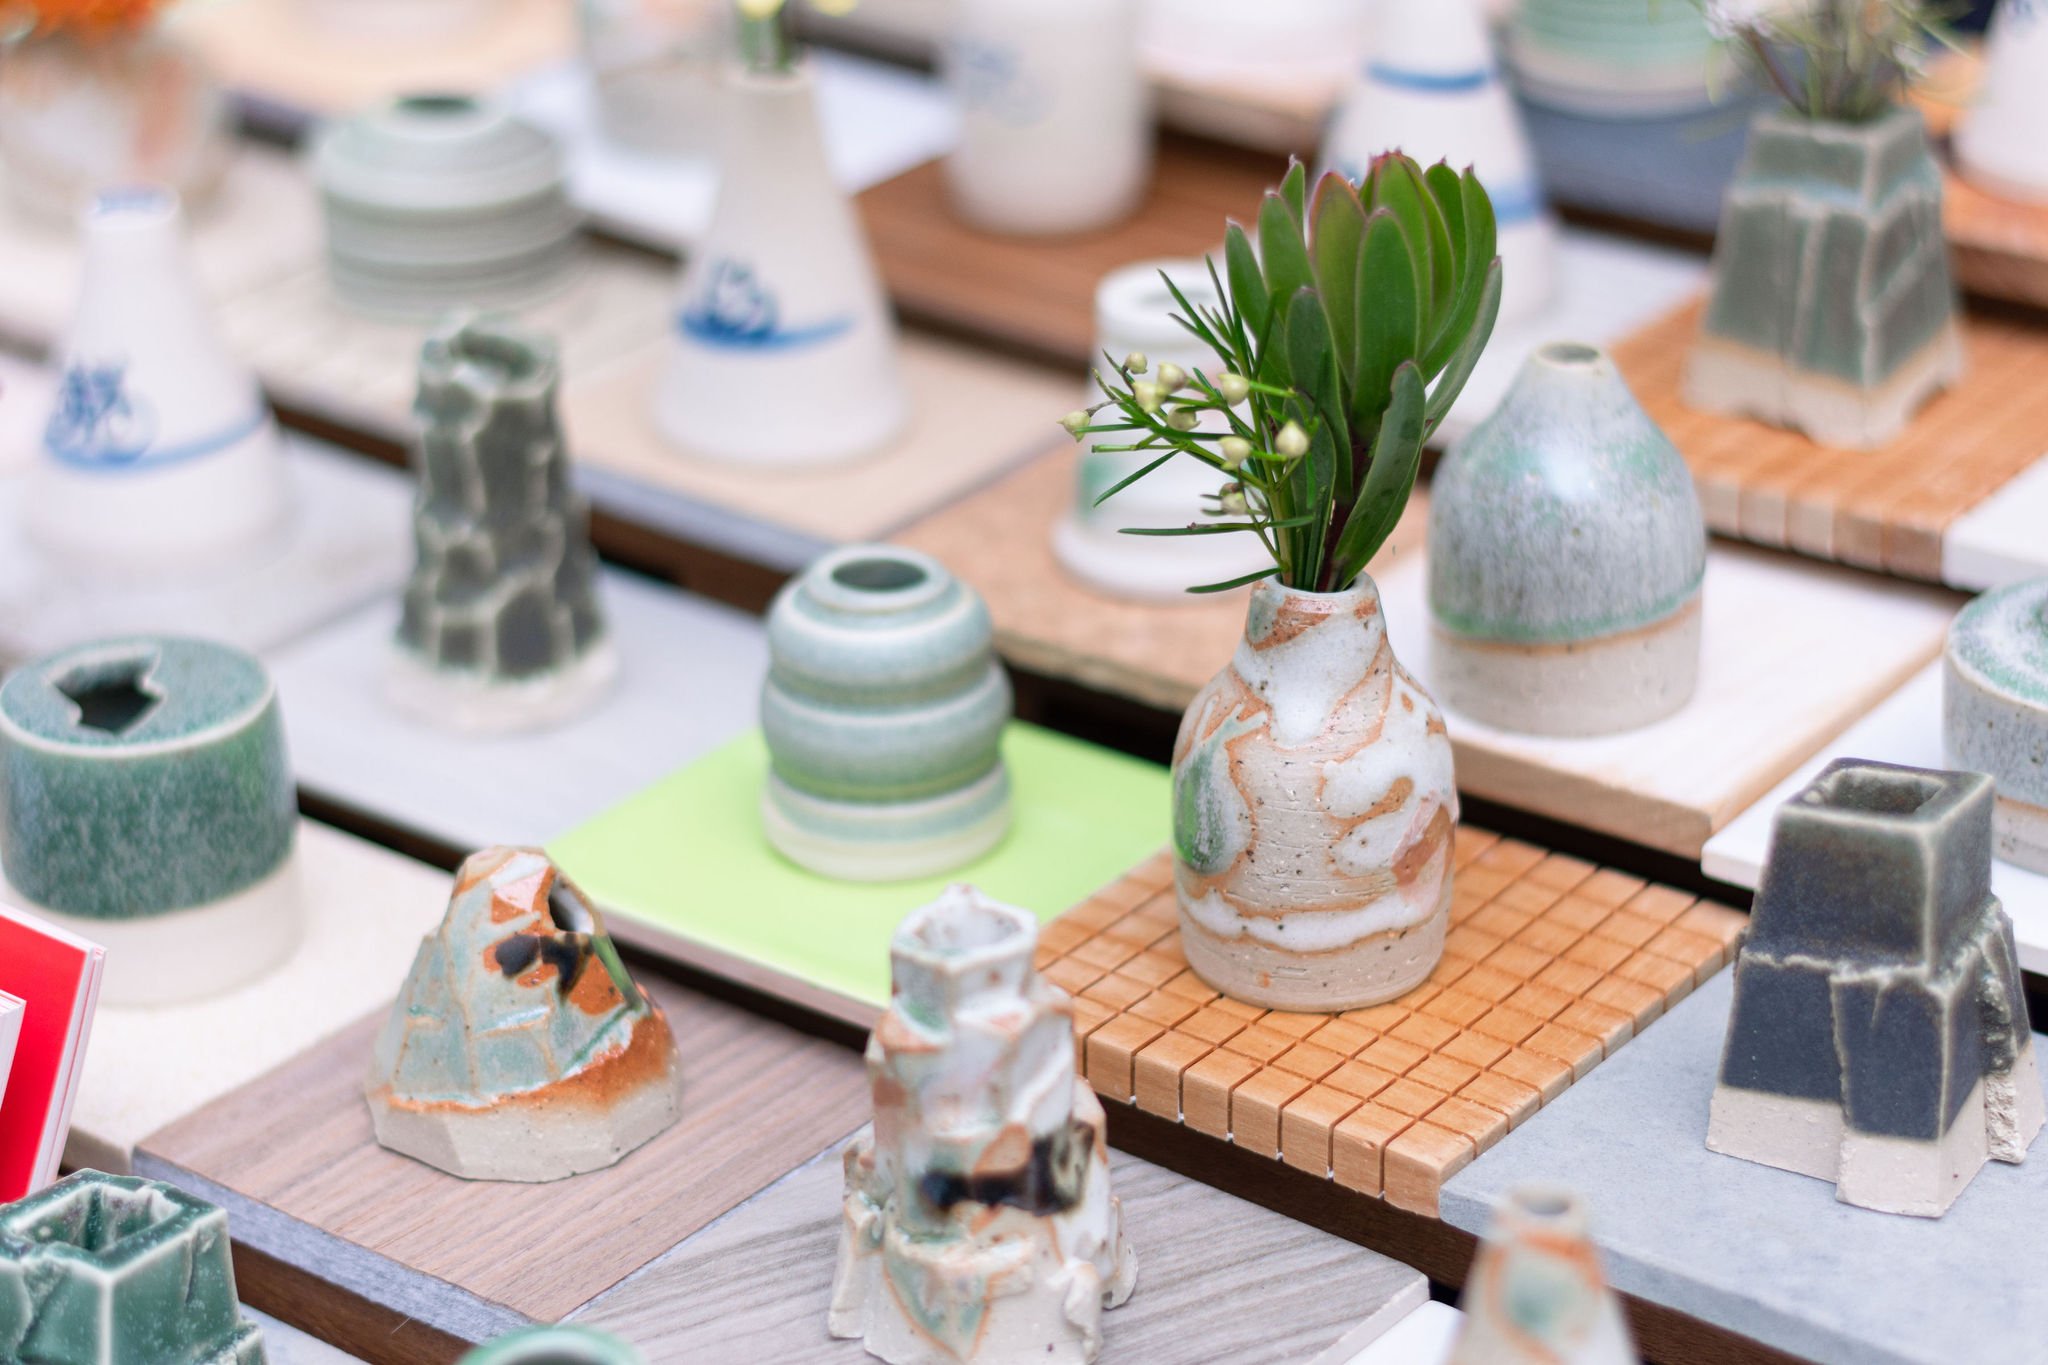
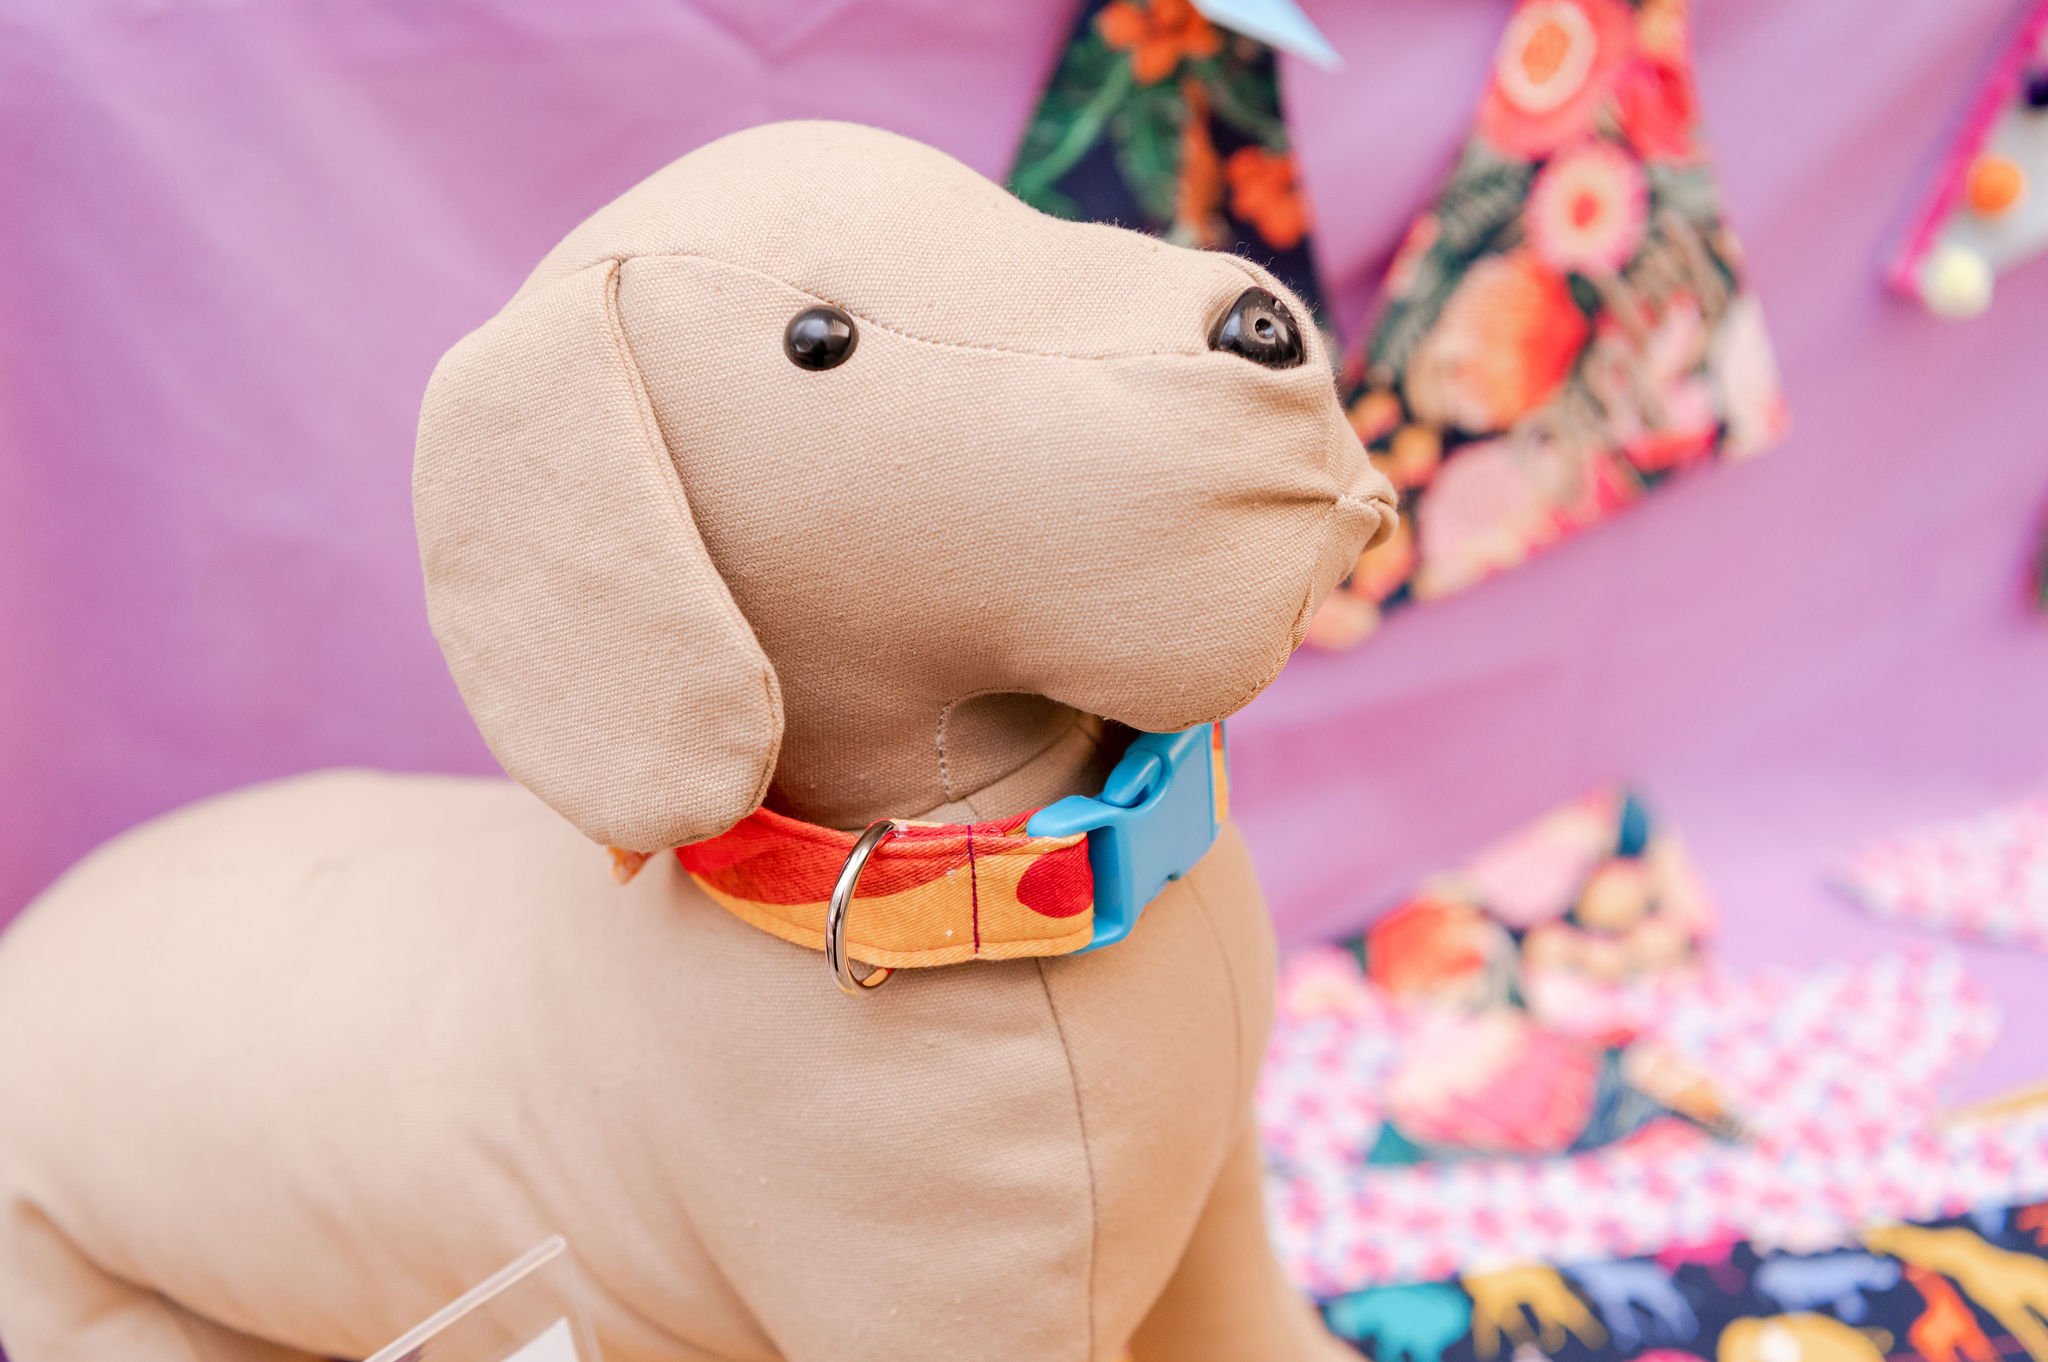
Your products: Now it's time for some close-up shots. For these shots come in nice and close and capture small sections of your stall. Focus on one product at a time and capture a little bit of the styling and stall around them. You’ll capture a few of this type of shot. For some you might like to have a hand reaching in to touch or pick up a product - interacting with your products in some way.
Market Mini Sessions
Alongside photographing events and makers, I also offer Market Minis — short and sweet photography sessions designed especially for stallholders. I work regularly with BrisStyle and Distillery Road Market, capturing makers in their element while keeping things fun and approachable.
These sessions are a great way to get a mix of product shots, portraits, and candid customer interactions without committing to a full-day shoot. If you’re booked into an upcoming market and want to register your interest in a Market Mini, I’d love to hear from you.
One final tip
When shooting at the market always remember that there is a lot going on in the foreground and background so be sure to keep an eye out for distracting elements such as your boxes, trollies, bins, atms and price tags. Try to frame these out or change your camera angle to avoid getting them in the shot.